disklaviers Archives - Page 2 of 2 - Alex's Piano Service

Best USB Stick for Nalbantovs

While installing and using Nalbantov drives in grand Disklaviers, I’ve encountered a recurring problem. The full-size USB sticks protrude too far, and are easily damaged by pianists or passerby.

Lately, I’ve had good luck using the SanDisk Ultra Fit 32 GB USB Flash Drive. I typically couple that with some brightly colored cord. Because I have a lot of it handy, I use Atwood Micro Cord, but any brightly colored cord will do. I like to tie the end in a Lanyard (Diamond) Knot.

This hardly protrudes at all. Without the cord, it’s difficult to even tell that anything is plugged in.

Below, you can see a USB stick the was struck laterally by a pianist. The solder joint snapped right off! That is an in convenience easily avoided by a good quality, low profile USB stick.

Dampp-Chaser Installation in Yamaha HQ100

The Yamaha HQ100 is a so-called “gray-market” upright. A gray market piano is one that’s authentically manufactured by Yamaha, but is not intended for sale in a specific geographic region or country. Instead, it’s sold as “gray market” — a market that exists outside of the official distribution channels and is not authorized by the manufacturer. In this case, the HQ100 is the Japanese version of the Yamaha MX100II, with a few small modifications.

Like all Yamaha Disklavier uprights, Dampp-Chasers cannot be installed inside the cabinet. There isn’t any room. Instead, a backside system is installed between the support posts behind the piano. The back is then ensconced in a light fabric to keep the humidity-controlled air inside.

However, the HQ100 has one significant oddity: There are only two support posts. The double bucket system usually installed just doesn’t fit. So in this case, after communicating with Dampp-Chaser, I opted to install a full-size bucket on the rear of the system. A thin layer of foam or neoprene needs to be pasted to the sound-board side of the bucket, and a full-size baffle needs to be installed, but otherwise the system is installed like a typical back-side system. The dehumidifier brackets did require some bending to get them to fit properly.

For the Velcro, I used two feet of two inch wide Velcro, with the male side backed with a strip of neoprene. The picture is below:

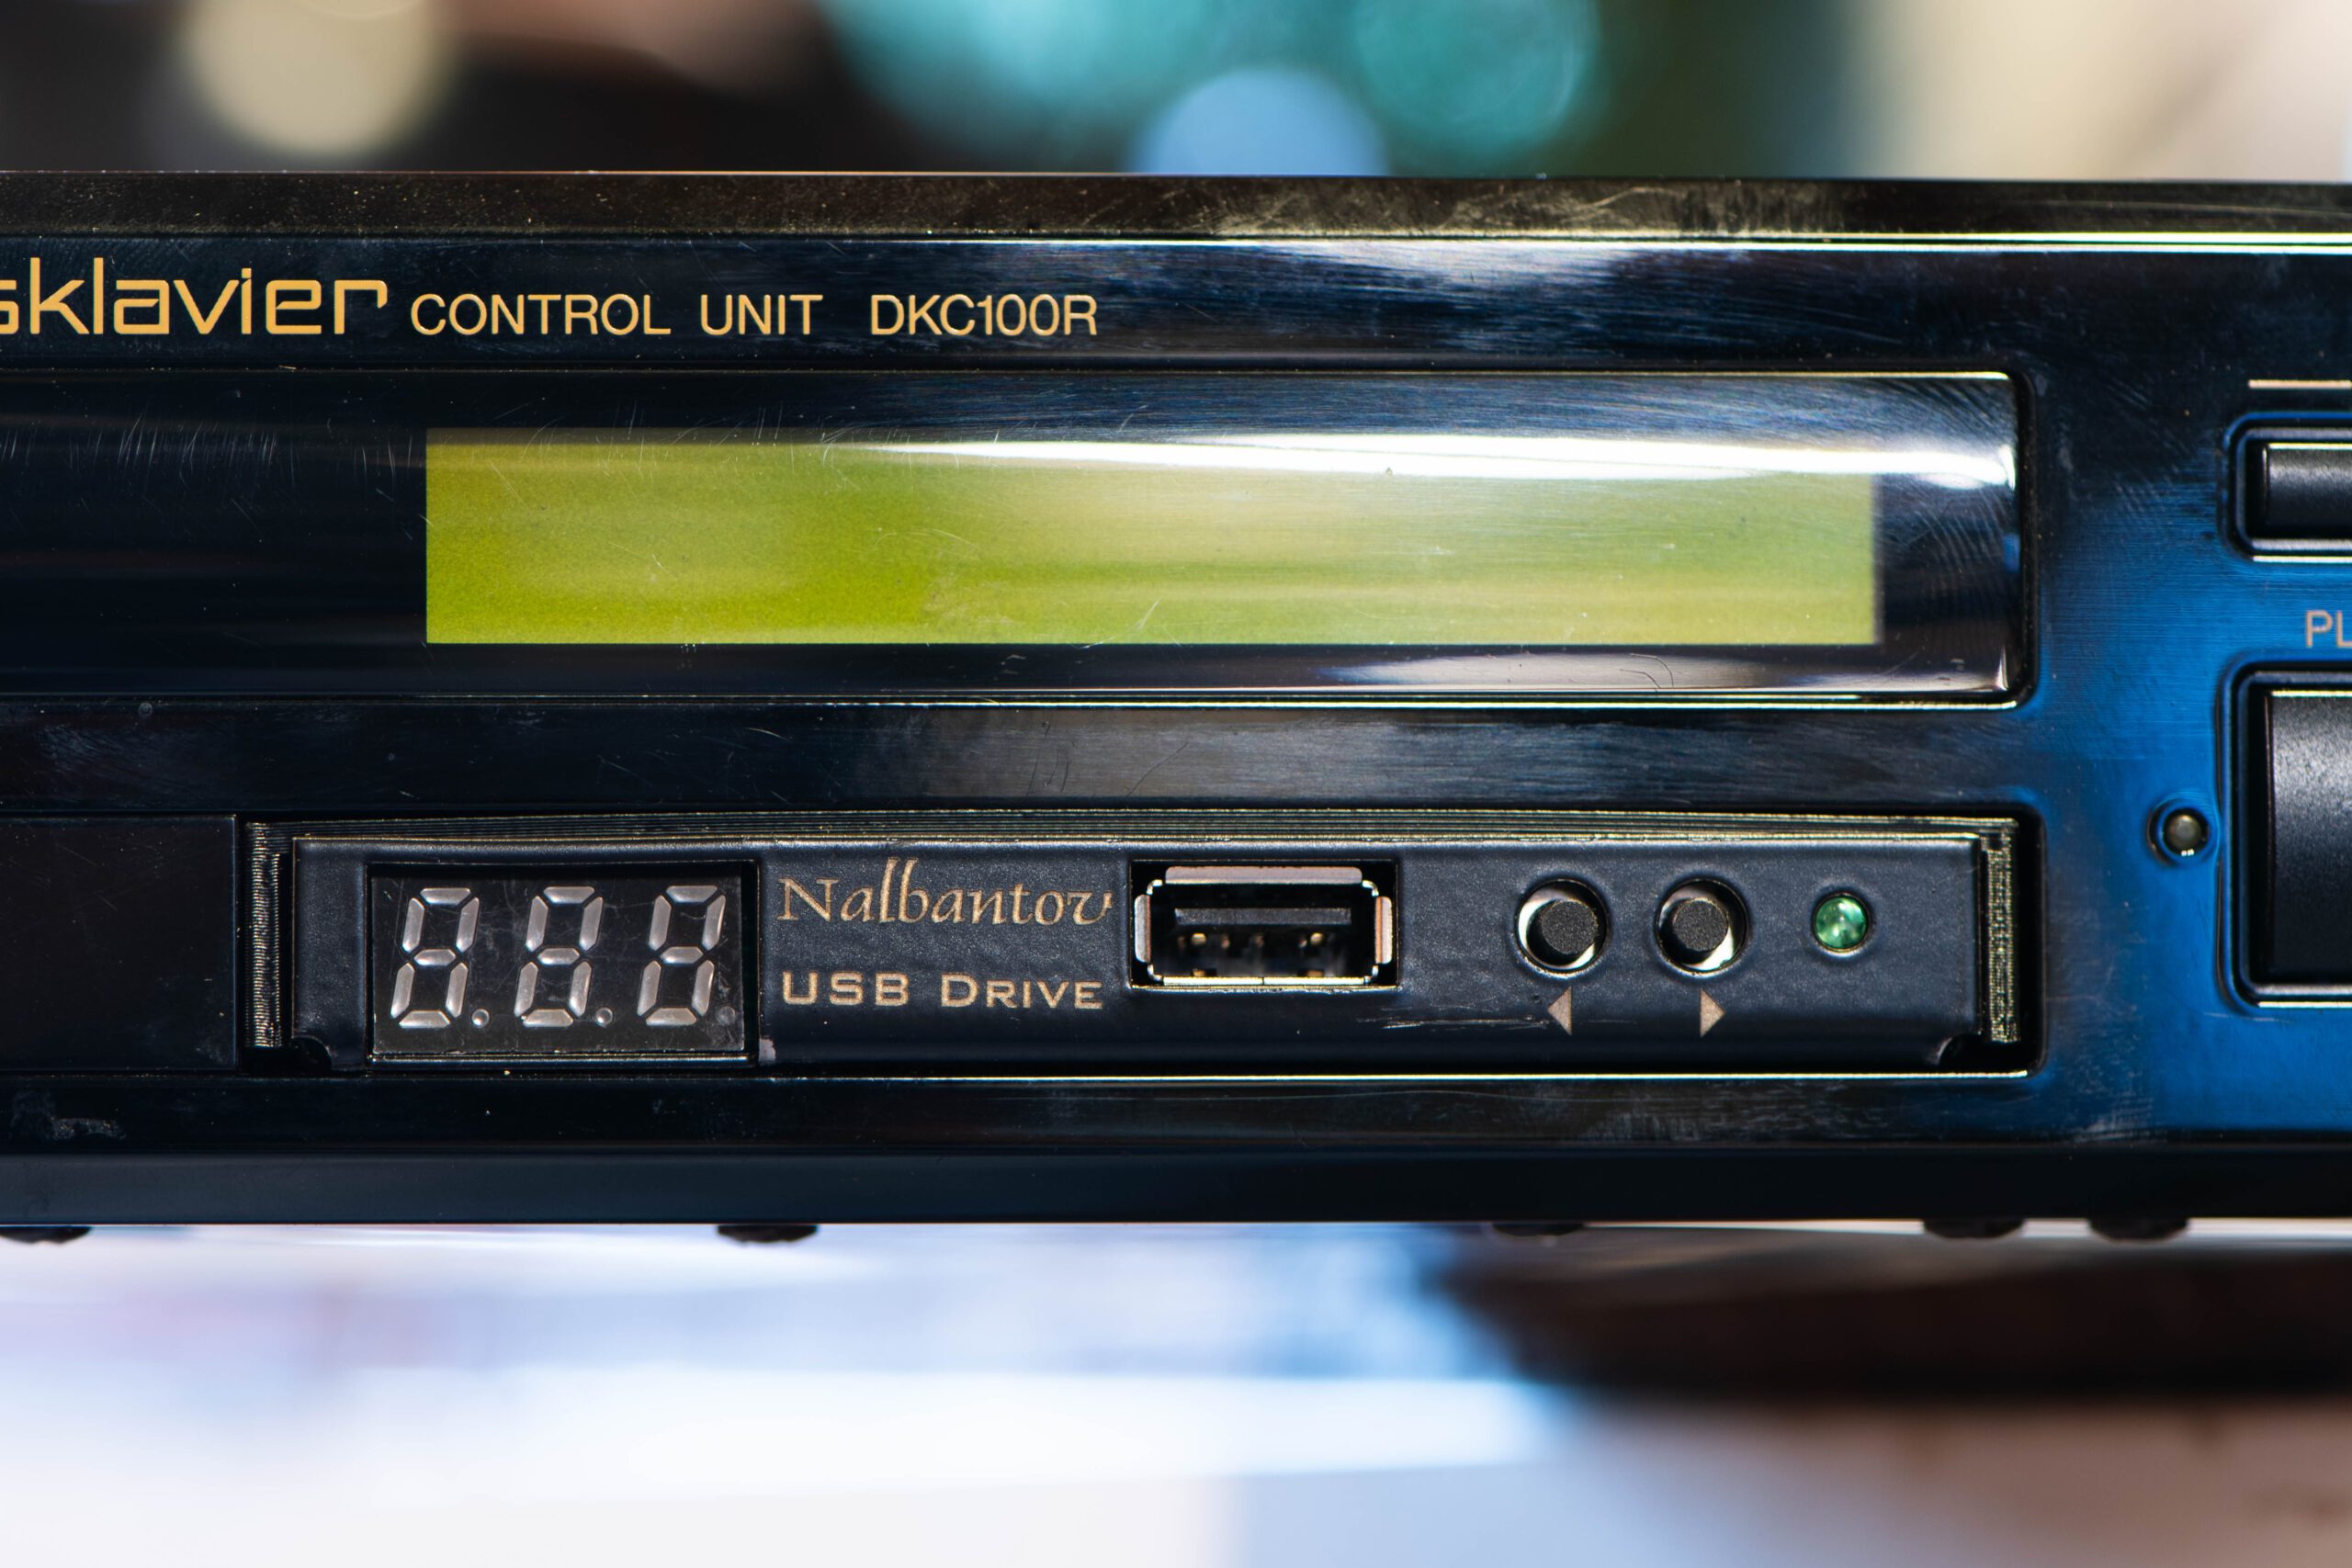
Nalbantov Floppy Disk Drive Upgrades

I’ve recently started recommending customers with worn-out floppy disk drives upgrade them to so-called “Floppy Disk Emulators.” There are a couple of these on the market, but it looks like the easiest to use and most reliable is the Nalbantov USB Floppy Disk Emulator. I use these regularly in Yamaha Disklaviers, but they can also be installed in keyboards. I install these quite regularly. If you do order from Nalbantov directly, make sure to use the AlexPiano for a 5% discount on orders from Nalbantov.

Why Upgrade?

There are several reasons why you might want to replace an old floppy disk drive with a USB floppy disk emulator, including:

  1. Increased reliability: USB floppy disk emulators are more reliable than traditional floppy disk drives, as they have no moving parts and are less susceptible to mechanical failure. Most customers reach out to me after their floppy disk drive has failed.
  2. Compatibility: USB floppy disk emulators are compatible with modern computers, which may not have floppy disk drives built-in or may no longer support floppy disks.
  3. Speed: USB floppy disk emulators transfer data faster than traditional floppy disk drives, making it easier and quicker to transfer large amounts of data.
  4. Convenience: USB floppy disk emulators can be easily connected and disconnected, making it easier to transfer data between different computers or to store data.
  5. Cost-effectiveness: USB floppy disk emulators are often more cost-effective than purchasing a new floppy disk drive or repairing an old one.

I’ve found some floppy disk drives now cost more than the replacement USB emulators, especially if they’ve had minimal use. And hardly anybody knows how to actually repair a floppy drive—that’s a nearly lost art.

Operation

After the Nalbantov is installed, you can use a single USB stick to represent up to 1000 floppy disks. Because it’s a floppy disk emulator, the Disklavier actually believes you’re inserting a different floppy disk. As you switch between virtual “disks” by pressing the arrows, you’ll see the display on the Disklavier behave as though you’ve inserted a new disk. Of course, if you have more than 1000 floppy disks, you can invest in another USB stick, although I haven’t run into this particular situation yet!

The USB stick that comes with the Nalbantov is a standard, full-size USB stick. This protrudes rather far, and I’ve now run into multiple circumstances where the drive has been damaged by an incautious pianist. See my post on the Best USB Stick for Nalbantovs. Hint: It’s the SanDisk Ultra Fit.

This is the #2 track on the #27 floppy disk stored on that USB stick!

Installation

Some customers opt to install the Nalbantov unit themselves. Depending on the design, this is quite doable, although I don’t recommend attempting it with most Yamaha MX100II Disklaviers (see below). It is a very easy installation on, for instance, the DKC5R and the DKC500RW, just to pick a couple.

With some generations of Disklavier (most notably Mark II / MX100II / MX100A / MX100B devices), the floppy disk drives are mounted behind a shaped plastic piece. In these cases, you’ll need to cut away the old plastic facing (a pair of flush-cut nippers is helpful here), install the new drive, and put some kind of buffer around it. I’ve experimented with a few different choices for something functional and attractive. Purchasing neoprene strips is a cheap solution.

New solution: I have a 3D model of a floppy bezel that’s sized to fit around a Nalbantov. You can 3D print this yourself, or I can mail you one. This mount holds the Nalbantov in place, and also fills in the gaps around the edges. It’s an all-in-one solution for mounting the Nalbantov, and allows you to reuse the same screws the original floppy disk drive was installed with.

My solution/old solution: My previous 3D model in STL format of a floppy bezel simply filled in the gap around the Nalbantov, but didn’t help with mounting. You can 3D print this yourself, or I can mail you one. I adhere it to the replacement Nalbantov with a bit of hot glue, and then slide the whole assembly in. However, you’ll need to improvise a way to actually mount the floppy drive. I use mounting assemblies from old Yamaha slim floppy drives, but these appear to now be discontinued.

For backing up your current Disklavier floppy disks to a format that can be stored on your USB stick, see my article on Backing up Disklavier Floppy Disks. They can then be moved onto a virtual “disk” with Nalbantov’s proprietary tool.

Disklavier Floppy Disk Backups, ESEQ and MIDI Formats

This post is intended to help you read from, write to, or replace Yamaha Disklavier floppy disks.

Some of my customers choose to upgrade their older Disklavier’s floppy drive to a Nalbantov USB drive, and want to know how to copy songs from their old Disklavier floppy disks onto a USB. Some of them just want to be able to back up their disks in case they need to make new ones later. Or maybe, you’re just trying to figure out how to write to disks your Disklavier can actually read!

The content on the original floppy disk is protected by copyright and is the property of its respective owners. These instructions are provided to assist owners of legitimate copies in converting the files for personal use on their own Yamaha instruments. Unauthorized copying, sharing, distribution, or commercial use of the converted files is strictly prohibited. By using these instructions, you agree to comply with all applicable copyright laws, licensing agreements, and Yamaha’s terms of use. I disclaim any responsibility for misuse of the information provided.

If you want your floppy disks files saved on a more modern media, you can also mail your floppy disks to me (please reach out to me at [email protected] or through my Contact page). Nalbantov also has a disk transfer service, and they can be very useful if you encounter particularly challenging disks. Make sure to use the AlexPiano for a 5% discount on orders from Nalbantov.

If you’re adding new music to a floppy disk or Nalbantov USB and have an older Disklavier (such as the popular MX100II), you’ll need to make sure the files are in Yamaha’s proprietary ESEQ format. Using the tools below, you can convert your MIDI files to ESEQ so that they will be in your Disklavier’s native language.

Obtaining Files from your Yamaha Disks

Yamaha floppy disks are a great source of songs that you know will be formatted correctly for your piano. However, floppy disks often don’t age well, and are very susceptible to sunlight and magnetic fields. (This is one more reason to back them up!)

Disklavier floppy disks cannot be natively read by your computer without special software. They will appear as unformatted disks.

There are several tools that will allow you to read them: I use the Player Piano Floppy Backup Utility 1.4, created by Mark Fontana. It’s freeware, but he requests donations. You can download it from him, or you can download ppfbu_v1.4_setup.exe from my MEGA drive. It can read and save directly in ESEQ format, even if the disk it’s reading from is in MIDI. It appears to run acceptably on Mac / Linux using emulators, although this can add complications.

There are other tools out there. Most notably, there was a Hack-a-Day project by Tom Nardi that uses a Python script to copy the data off the floppies. His disklav.py tool is available on GitHub.

If you copied the files in ESEQ format, there’s an extra step before your Disklavier can read them. See below!

The Player Piano Floppy Backup Utility v1.4 running on my dedicated Windows XP “floppy copy” box.

Obtaining even More ESEQ Files from the Internet

In addition to the originals you might have, you can sometimes find these on eBay or at local music stores. Older disks on eBay are seldom tested, so there’s some risk of receiving junk disks.

There are several large online repositories in both ESEQ and MIDI formats. Some of these are of dubious legality. One legitimate resource was kuhmann.com, which had quite a large repository. I have a copy of their entire database on my MEGA drive. (I worry a lot about these older resources disappearing! They disappeared. Kuhmann’s inventory does appear to be available on the Wayback Machine, but his original website is now off the internet.)

You can also source files from Yamaha’s website, although this a more expensive option. Many of their MIDI files have multiple instruments (or even limited piano), and are more designed for their keyboards and other MIDI devices. However, they do have an entire category of Piano Solos, and these are what you’ll want to search for when selecting files. When you download these, you get their associated MIDI files, which are comfortably sized for floppy disk purposes.

Converting MIDI files to ESEQ

If you want to use MIDI files with your older Disklavier, you can, but you have to convert them to ESEQ first. There’s software to do this conversion. You can either get it from http://www.carolrpt.com/MIDItools.htm or you can download the whole DKVUTILS suite from my MEGA drive.

Once you download DKVUTILS.ZIP from my site or theirs, you’ll need to extract it. The program that converts MIDI files to ESEQ files is MID2ESEQ.EXE. This program runs only on Windows, and does not seem to run with emulators. Reach out to me and I can assist with conversion.

Using MID2ESEQ, just drag and drop MIDI files into the window.

MIDI files that have only one track are called Type 0 files. MIDI files with multiple parts are Type 1. Occasionally, the piano will be spread between two tracks. In that case, you’ll find the piano is playing only half or so of the notes it should be. You can convert Type 1 to Type 0 files using the tool gn1to0.exe that’s also stored on my MEGA drive. This is a slightly cumbersome tool, but will either run on Windows or on Linux/Mac using Wine.

Using conversion software to merge all the MIDI tracks.

ESEQ Files and creating your PIANODIR.FIL

If you have a Yamaha that’s capable of playing ESEQ only, you might also need to create a PIANODIR.FIL index. I have instructions here on creating a PIANODIR.FIL index.

If you are using a Nalbantov, any USB stick you use MUST be formatted either FAT16 or FAT32.

Please also note that the ESEQ filenames should be strictly eight characters long, have no spaces, and be entirely uppercase, including the FIL extension BEFORE creating the PIANODIR.FIL file. I’ve created a script to automate this proper naming process, discussed in my creating a PIANODIR.FIL index instructions.

Formatting 2DD Floppy Disks

Some people choose to use the original floppy disk drives in their 90s-vintage Disklaviers, rather than converting to a Nalbantov. First, it’s important to make certain you’re using the correct floppy disks. The more “modern” 2HD floppy disks require stronger magnetic fields to write, and may not always be compatible with older Disklaviers. The slightly older 2DD drives, however, will work. You can tell the difference readily: 2HD disks have openings at both corners of the Disk, while 2DD disks will have only one.

2HD disks have openings at both corners, but 2DD disks do not. You’ll usually find the write-protect slider in one corner, but other will be blank.

Some have reported covering the hole with electrical tape will trick the Disklavier into believing the disk is a 2DD disk. You may or may not be able to write to it using the Disklavier, but you should be able to read from it using this trick, provided your 2HD disk is formatted as a 2DD disk.

Formatting a 2DD 720KB floppy disk in Linux.

I formatted mine on my Pop!_OS Linux machine with the instruction sudo ufiformat -f 720 -v /dev/[yourdevice]. If you’re using a Windows machine, the instruction is format a: /t:80 /n:9. Pictured below, you can see what this command looks like on my Windows XP floppy transfer box. This command does work in Windows 10 and 11, but requires you to be using an external floppy disk drive that allows this format. Not all of them do.

Formatting a 720KB 2DD floppy disk in Windows XP.

At this point, you can transfer your .FIL files and PIANODIR.FIL file to your floppy disk. Put them in the root directory, and do not use any folders.

If you have a bunch of MIDI files and you’d like to put them on a floppy disk, then first format the disk as shown above. Then follow the instructions to convert your MIDI files to ESEQ and create a PIANODIR.FIL.

Potential ESEQ Problems

If you’re using a USB stick in a Nalbantov, it must be formatted FAT16 or FAT32. Nalbantov supplies a video on how to format your USB stick.

If you’re using an actual floppy disk, it must be a 2DD disk formatted to 720 KB. See the above section on identifying the disk and formatting it correctly.

Earlier Disklaviers can be finicky about their ESEQ files. Sometimes, they’ll work without any trouble, even without a PIANODIR.FIL file. However, particularly in earlier Disklaviers (such as the DK5R), you’ll need to be more careful with the naming conventions, and you’ll definitely need that PIANODIR.FIL described above.

I’m very grateful for the research of Mike Isreal (in the comments below), who did experimentation with his own Disklavier. Before creating a PIANODIR.FIL for your disk, make certain that all filenames are precisely eight characters long, and that both the filename and extension are in all-caps. The filename must contain no spaces.

Some have commented that it appears you can also omit the .FIL extension (at least in some cases). According to Nalbantov, there might be cases where a fully lower-case filename and extension are called for, although I have not run into that particular case yet.

Some of this is caused by the choosiness of the Disklavier itself, but it seems likely to me that a lot of the free tools we’re relying on probably add their own complications. If you are experiencing any trouble, please reach out to me for assistance. You can also Categories Disklaviers Tags , , , 14 Comments

Yamaha Disklavier FAQs

My Yamaha Disklavier just makes a ‘Pop’ when I press the power button and doesn’t light up. Or it whines loudly while it’s running, and then powers off? Can you fix it?

Yes! This is a common problem with older Disklaviers, and usually indicates that the power supply has failed. I can box it up and send it to Tap Electronics, who can then rebuild it. At present (1/17/23), this is a flat-rate service provided by Tap for $750. Tap Electronics is authorized by Yamaha.

My Yamaha Disklavier runs for a few seconds (or even a few minutes), but then turns off. Can you fix it?

Yes! You might have a power supply that’s dying (in which case, see the answer to the last question). However, you might simply have a damaged power button. You can test this by wiggling the power button side-to-side with your finger. When they wear out, sometimes even just the vibrations of the piano can cause them to switch on and off. These buttons aren’t terribly difficult to replace; however, they’re discontinued.

Their (discontinued) Yamaha Part number is VN388300. The switch itself is a (discontinued) ALPS SPPH23. You can see a spec sheet for the ALPS SPPH230500 here. Unfortunately, I haven’t found an exact duplicate, and would love to know if you have. I purchase bulk generic locking switches from Amazon and use sandpaper to shape them to size.

Can you set up my wireless connection / fix my terrible connection?

Yes! I wrote a definitive guide on connecting the Disklavier wirelessly. I don’t generally recommend using the native wireless adapters that come with your device, which are clumsy and confusing. I use PowerLine adapters, which allow you to broadcast your network signal right through the power lines in your house! This technology means neither you nor your piano ever have to adjust and reconfigure anything. No keeping track of passwords, no weak signals, and no need to call a technician every time you buy a new router. Just plug in your piano and marvel at its spontaneous, excellent internet connection.

This works in most homes, although in particularly large houses or houses with old wiring the PowerLine adapters might have trouble. In that case, the best device to use is a WiFi extender mounted underneath the piano.

Can you replace or upgrade old floppy drives?

Replacement is sometimes an option, and upgrading always is. Most manufacturers have stopped producing replacement drives, but they can often still be purchased second hand. eBay is a good resource.

However, I recommend upgrading to a USB floppy disk emulator. The Bulgarian company Nalbantov Electronics manufactures USB floppy disk emulators specifically for older digital pianos and players. These systems allow you to use a single USB stick in place of dozens (if not hundreds) of floppy disks. As solid-state devices these are considerably more durable and long-lasting than old-fashioned floppy drives.

With some generations of Disklavier (most notably Mark II / MX100II / MX100A / MX100B devices), the floppy disk drives are mounted behind a shaped plastic piece. In these cases, you’ll need to cut away the old plastic facing (a pair of flush-cut nippers is helpful here), install the new drive, and put some kind of buffer around it. I’ve experimented with a few different choices for something functional and attractive. Neoprene works to fill in the around around the drive, but it doesn’t help much with keeping the Nalbantov securely in place.

I have a 3D model of a floppy bezel that’s sized to fit around a Nalbantov. You can 3D print this yourself, or I can mail you one. This mount holds the Nalbantov in place, and also fills in the gaps around the edges. It’s an all-in-one solution for mounting the Nalbantov, and allows you to reuse the same screws the original floppy disk drive was installed with.

You can read more about this on my Nalbantov Floppy Disk Drive Upgrades page.

Yamaha E3/DKC-850 Firmware Update

The Yamaha E3 (or DKC-850) firmware update is wonderfully simple, unlike its older Mark IV sibling. The entire update can be done using just a USB stick with at least 20MB of memory.

The Problem

In October of 2020, Yamaha mandated that its pianos use better encryption standards (all pianos now use TLS 1.2 instead of TLS 1.1). If you connected your piano to the internet before October of 2020, it probably automatically updated to the latest firmware. However, if you weren’t so lucky, you’ll have to perform the updates yourself.

The Solution

First, you’ll need to download a copy of the new firmware, and you’ll need a USB stick.

You can obtain this either by downloading the Yamaha E3 v3.54 file (dkv_update.bin) from my MEGA drive, or you can visit Yamaha’s website for an archived copy. Once you have the dkv_update.bin file, simply copy it on a USB stick (not in any directories or folders). Take that USB stick and insert it into your Disklavier. Now hold down the Play / Pause button and power on the system (with the Play / Pause button still held). From there, you can follow the on-screen instructions.

If you have any difficulties, I’ve attached a PDF of their instructions below. You’ll need to start with “Downloading the Update Program using a PC and USB Flash Memory” on page three.

Yamaha Mark IV Firmware Update

In order to connect your Yamaha Mark IV to the internet, you’ll need to update the firmware; otherwise, you’ll receive an error telling you it can’t connect to the internet. This is a pretty confusing error, since you might actually be properly connected. However, the Disklavier can’t tell the difference between no internet and just unable to talk to Yamaha. As far as it’s concerned, if it can’t see Yamaha, the internet may as well not exist!

The Problem

In October of 2020, Yamaha mandated that its pianos use better encryption standards (all pianos now use TLS 1.2 instead of TLS 1.1). If you connected your piano to the internet before October of 2020, it probably automatically updated to the latest firmware. However, if you weren’t so lucky, you’ll have to perform the updates yourself.

The Solution

Here’s what you’ll need to complete the update:

  1. A CD-R
  2. A CD writer
  3. A blank floppy diskette

The floppy diskette is used only by the Disklavier: You do not need to be able to write to the floppy disk from your personal computer.

You can buy blank floppy diskettes from https://www.floppydisk.com/. Amazon and eBay are also good suppliers of floppy diskettes. Personally, I like to use old Sony 2HD diskettes purchased from eBay. Although these aren’t the newest floppy diskettes available, they’re some of the most reliable I’ve been able to find.

CD-Rs are readily available on Amazon, as are CD writers.

You can also purchase both the CD-R (pre-written) and blank floppy disk from me. I sell both for $30.00 at this time. You can purchase one from me here, or contact me at [email protected].

Once you’ve got your media, you’ll need to burn the updated firmware to the CD.

You can download the Yamaha Mark IV firmware 4.26 from my MEGA drive. (The correct firmware is under the Firmware / Mark IV v4.26 directory.)

Yamaha also keeps copies on their FTP server. This is available at ftp://54.183.42.154/ using the username disklavier and the password disklavier. Update, May 31st, 2024: I can no longer log into their FTP server. At present, it appears my MEGA drive has the only copy available!

Once you’ve burned this to your CD-R, you’ll need to prepare your boot floppy. Now, if you happen to have a floppy disk drive and feel like saving a little time, you can copy the floppy disk files from my MEGA drive and put them on your floppy disk. You can then skip the below step. The below is copied from Yamaha’s firmware update instruction manual (emphasis and notations mine):

Unit must be completely booted — green standby light solid green
Floppy must have the Protect tab to the Unlock position-hole is covered

1. Insert one Blank High Density Disk--HD--into the floppy drive.

2. On the PRC-100, from the "Interface Main" tap on "Next -->" located on the bottom right corner, it will take you to the next page.

3. Tap on the "Setup" icon. Tap on the "Next -->" Bottom right corner.

4. Tap on "System". Tap on "Make Install FD". It will take approximately two minutes to make the boot Disk.

5. Tap on "OK" when the "Complete" message is displayed.

6. Press on the Back button repeatedly-the button that has the U turn arrow-until you see the "Interface Main"

Once you have the media prepared, follow their instructions for performing the update (emphasis and notations mine):

1. Hold down standby button on the Media Center until the button starts flashing. The Disklavier shuts down.

2. Wait approximately 10 seconds or more, and then press standby button on the Media Center. Update of the I/O Center starts.

3. During update, the buttons on the Media Center light in sequence. Note: The update cannot be performed if the remaining capacity of the hard disk drive is too small. The CD will eject and flash. In such case, close the CD tray, reboot the I/O Center, and then increase the storage capacity, by for example deleting song data in the PianoSoft Library or CD Library by as much as the amount of data stored on one CD. After that, try reupdating.

4. The update will continue for approximately 25 minutes before the CD tray opens. Note: The CD may eject and flash. In such a case, check that there are no scratches, stains, or dirt on the CD that can lead to readout error. If the CD is defective, clean the CD and reload it. The I/O Center reboots. If the CD is defective and a replacement is required, remove the CD and press to close the CD tray. The I/O Center reboots (though updating has stopped). 

5. Wait until the CD tray opens, and then remove the CD and the floppy disk.

(Alex's Addition: You may have to wait another 30 minutes from this point for the update to finish installing. The LED indicators sequentially flash, then illuminate solid, left to right.)

And that’s it! Your firmware is updated. You can now proceed to Connecting your Disklavier to a network! If it’s already connected, you can read more about using piano radio in their Advanced Owner’s Manual (Part 2) on Chapter 8, Page 96.

Complications

Richard Zajac reached out because his update had been interrupted during a lightning storm. He was unable to get his piano to connect to the piano, and he was unable to update it or reapply the update. The proper solution was to reimage the hard disk inside the control center. This is a technical solution, to be sure, but he took the opportunity to update the hard disk inside his control center at the same time. You can read about upgrading or replacing a corrupted Mark IV control center hard disk here.

Connecting Yamaha Disklaviers to a Network

If you have a previous generation of Disklavier and haven’t updated its firmware since October 2020, it is absolutely necessary to update it before attempting to connect to the internet. Your Disklavier will tell you it isn’t connected to the internet, regardless of what you do, until the firmware is updated. I have additional information on updating the firmware on the Disklavier E3 (DKC-800 / DKC-850). I can also help with updating the firmware on the Disklavier Mark IV, and can even provide you with the media.

Yamaha Disklaviers are an innovative fusion of digital and acoustic engineering. They allow you to experience famous, concert pianists performing right in your living room, on your piano. They’re an excellent tool for both entertainment and for learning. And of course, they’re just fun to watch. Take a look at this beautiful 2009 Yamaha GC1 Disklavier playing Billy Joel’s Piano Man that I recorded last summer.

They do have one drawback: Connecting them to Wi-Fi networks can be confusing and difficult. Yamaha provides the UD-WL01 adapter, but this is not an intuitive device: Is your Disklavier acting as an access point for other devices, or is it connecting to your Wi-Fi as a client? Is it doing both? Can you tell from the instructions what you’re expected to do, and how you’re supposed to use the Disklavier and connect to the internet at the same time?

I’m sharing an incredibly elegant, simple way to hook up Yamaha Disklaviers. You don’t have to worry about reconnecting it if you change your Wi-Fi password or buy a new router. You can set it up quickly, and it works in most houses.

Supplies

A little redundant labeling makes all the difference. And Small-Caps adds some style.

1. NexusLink Powerline Ethernet Adapters

These devices allow you to network through the electrical lines in a house. Your piano will believe it has a physical connection, and you won’t need to do any further configuration!

These devices are effortless to use once they’re paired: All you have to do to keep your piano connected is plug them in!

Make certain that the adapters are plugged directly into outlets, or into the surge protector below. Power conditioners, universal power supplies, or even higher-end surge protectors interfere with their signal. Similarly, they must be plugged into circuits that are in the same breaker box. Multiple breaker boxes or sub-panels can interfere with the signal.

It’s worthwhile to label the adapters. This will help with troubleshooting in the future. If you have specific networking needs, you can download the full manual for the NexusLink Powerline adapters here. (Or from my MEGA mirror.)

I took it apart so that you don’t have to!

2. GE Designer 3-Outlet Surge Protector

This is an 8-foot extension cord with a three port power strip on the end. It calls itself a surge protector, but doesn’t do any regulation or conditioning which might interfere with the NexusLink signal.

I did a tear-down of the device to make sure there were no surprises: Surge protection is achieved through a metal oxide varistor, and there is no voltage regulation beyond that.

3. Black CAT6 Ethernet Cables (3 feet)

With piano work, subtlety is a must. Anywhere black or concealed equipment can be used, I use it. Three foot cords have always been more than enough for me. In many installations, I’ll even use one foot cords. More cord just means more to hide.

4. 3m Dual Lock Reclosable Fastener (or equivalent)

These are strong, interlocking fasteners that aren’t vulnerable to vibration, and are strong enough to hold up the end of the extension cord. I’ve also used very large (2′) zip ties wrapped around the beams underneath the piano, and these work well.

Installation

A basic diagram of the installation.

1. Prepare and Pair NexusLink Adapters Beforehand

Remove the two NexusLink Adapters from their box and plug them both into the outlets where you intend for them to go. One will be next to the router and, and the other will be plugged into the extension cord you intend to put underneath the piano. No Ethernet connections are necessary at this time.

If the green connection lights on your NexusLinks turn on (the top light on each adapter), that means they’ve found one another, and are now communicating through your household power. Great!

Now you can secure their connection to each other. On the bottom of each unit (near the Ethernet jack) there’s a small configuration button. Hold it down for three seconds, and the bottom of the three lights—labeled with a padlock—will begin to blink. Now press the same button on the other NexusLink for three seconds. After a short period of time, the padlock lights will turn solid. Then, some seconds later, the connection lights should turn solid as well.

These two NexusLinks are now a permanently bonded pair. No matter where you put them, they’ll find one another. In fact, they’re so tightly paired that they’ll even ignore other NexusLinks.

If you have specific networking needs, you can download a full manual for the NexusLink Powerline adapters here (or from my MEGA mirror).

2. Run the extension cord up underneath the piano

A NexusLink plugged into a power strip, with a ghastly yellow Ethernet plugged into it.

With the Disklavier turned off, unplug the Disklavier.

Pick a good spot to mount the power strip underneath the piano. This is usually parallel to the floor on the side of one of the wooden beams adjacent to the Disklavier controller. (Also, make certain if there is a Dampp-Chaser installed, make sure the NexusLink isn’t near the humidistat, where the small amount of heat it produces might cause less accurate readings.)

Wipe the area down with alcohol. Take two pieces of your Scotch Interlocking Fastener and, after removing the backing, affix both to the back of the power strip. Mount the power strip to the beam.

If possible, try to route the power cord over a beam. This will keep it a more secure in the event it gets pulled on. You can even loop it around the beam once if you have enough cord.

3. Plug everything in

Plug your other NexusLink Powerline Ethernet Adapter into the bottom port of the three of your power strip. Run a short length of Ethernet cord to your Disklavier controller. If possible, loop the Ethernet cord up over the beam to apply a bit of tension. Pianos produce plenty of shaking and vibration, so keep things as secure as possible. Use no more cable than you need.

Now plug the Disklavier power into the power strip (and the Dampp-Chaser as well if one is installed). This extension cord is comfortably rated for the power consumption of all three devices.

At this time, both the green connection lights should be on, and both the padlock lights, meaning the NexusLink Adapters have discovered one another. If this isn’t the case, skip to the troubleshooting below.

Use zip-ties, twist ties, and other appropriate cable management to bundle everything up and out of sight. Stick-on conduit can be used to run cords along the beams if precise positioning is needed, such as if the piano is positioned next to a low couch or somewhere else people might easily see underneath. I’ll actually sit in various chairs in the room and look at the piano.

You’re all done! If it doesn’t work immediately, read on.

No connection! What went wrong?

First: It’s probably a power strip or Universal Power Supply (UPS)

Do not plug either Powerline adapter into a power strip or surge protector if you can avoid it. These often filter out the signal. Only simple power strips (like the GE one I recommend) will not block the signal. When in doubt, plug directly into the wall. And don’t forget to check the adapter that’s near your router. This also needs to be plugged directly into the wall.

Second: It might be the outlet

If the outlet isn’t receiving power, it won’t work. Make sure that the outlet can power other devices, and that it isn’t controlled by a switch.

Third: It might be the breaker boxes

If the house has multiple breaker boxes, then the devices might not be able to see each other. In this case, try different outlets. You can try changing outlets both near the piano and near the router.

If none of the available outlets work, you’ll need to try a different approach. This article is specifically on the Powerline adapter technique, but you’ll need to consider using a Wi-Fi bridge, since the Powerline adapters won’t work for you.

Has it been working for a while, but suddenly stopped?

As with many other pieces of sensitive electronics, if it’s been behaving and suddenly stops, you should power cycle the devices. Unplug each Powerline adapter in turn and plug it back in. If that doesn’t work, pair the adapters again in the manner described in step one.