Yamaha sold Smart PianoSoft floppy disks for Yamaha Marks III and IV. This was a revolutionary technology: You could insert a floppy disk designed to play the actual acoustic piano alongside an audio CD. In other words, the piano would accompany your CD! Yamaha released many such albums, and because the piano is accompanying the actual album, the performances are excellent and include all the original vocals.
However, the Mark IV is now in the distant past. If you have one of these floppy disks that’s designed to play with CD, and you either have a newer system (or have upgraded to the DKC-900), you’ll find yourself unable to play these disks!
However, it can be done. You can take these Smart PianoSoft floppy disks and their corresponding CD albums and adapt them to play as PianoSoft Audio tracks. How do you accomplish this alchemy?
Here’s a basic outline of the steps involved:
1. Copy MIDI tracks from Floppy Disks using Player Piano Floppy Backup Utility.
2. Rip Audio tracks from CD as MP3 files.
3. Put the resulting files in the same directory, making sure the MP3 files and MID files for a given song have the same names. Only the extensions can differ.
4. Put the collection of files in a folder with the album name.
5. Put the folder onto a USB stick.
6. Insert the USB stick into your Enspire and enjoy!
Copy MIDI tracks from Floppy Disks
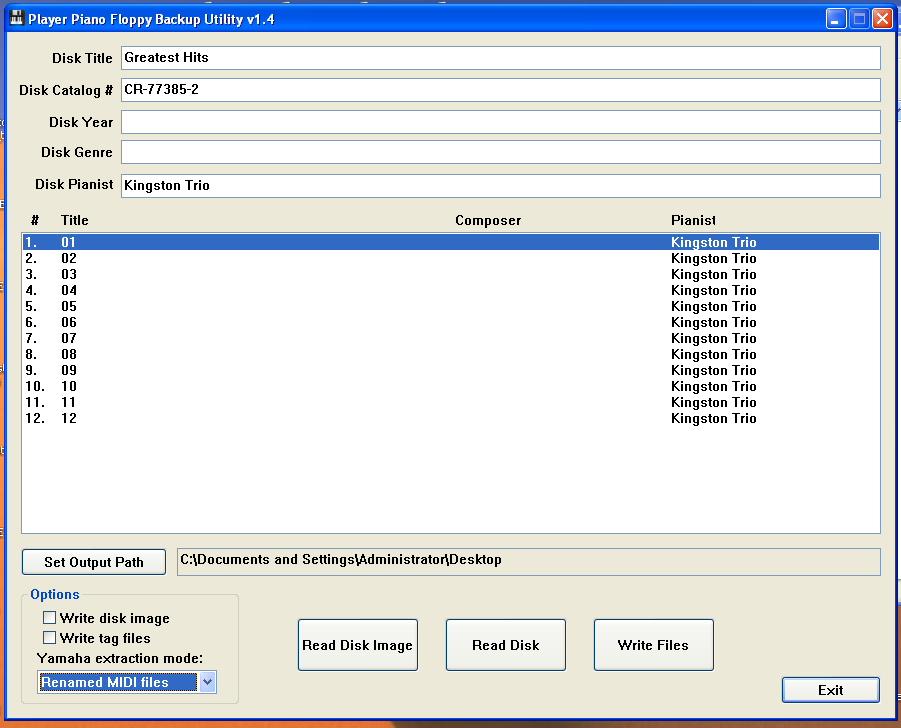
First, you’ll need copies of the MIDI files from the floppy disks. The best tool for this is Player Piano Floppy Backup Utility, created by Mark Fontana. It’s freeware, but he requests donations. You can download it from him, or you can download ppfbu_v1.4_setup.exe from my Disklavier file collection. You can read more about this process on the Disklavier Floppy Disk Backups, ESEQ and MIDI Formats page.
The most important part of this step is that you write the files as “Renamed MIDI files.” I typically name each one with the name of the track, and make sure each name starts with the track number (00, 01, 02…). This makes it much easier to keep track of which MIDI file goes with which MP3 later on.
Rip the Audio tracks from CD
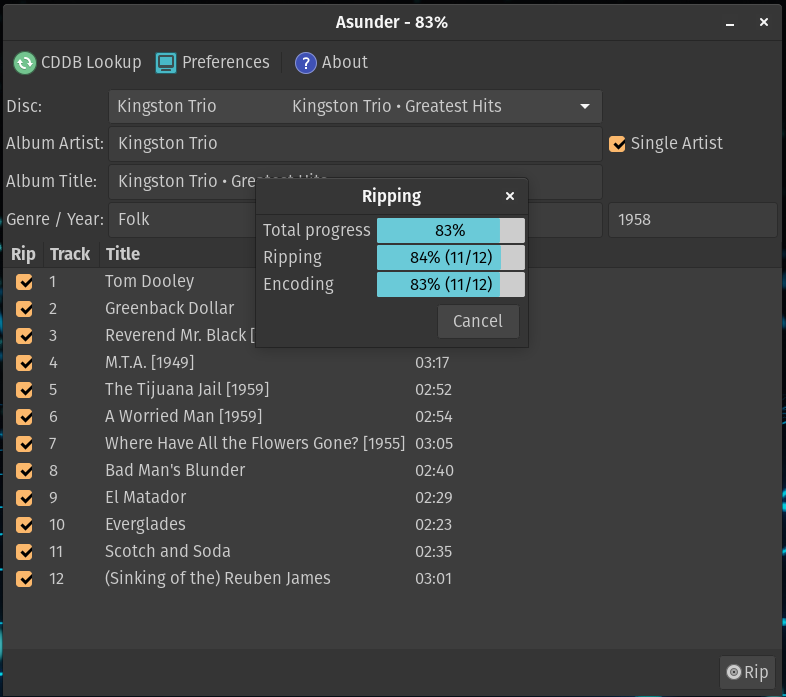
You’ll need to rip the audio off of the corresponding audio CD. You can rip CD audio natively on Windows using Windows Media Player. In the Linux environment, I used Asunder. In the Mac environment, you can actually use the Music App. The main point is just to extract mp3 files for each track on the CD.
Name and Organize the Files
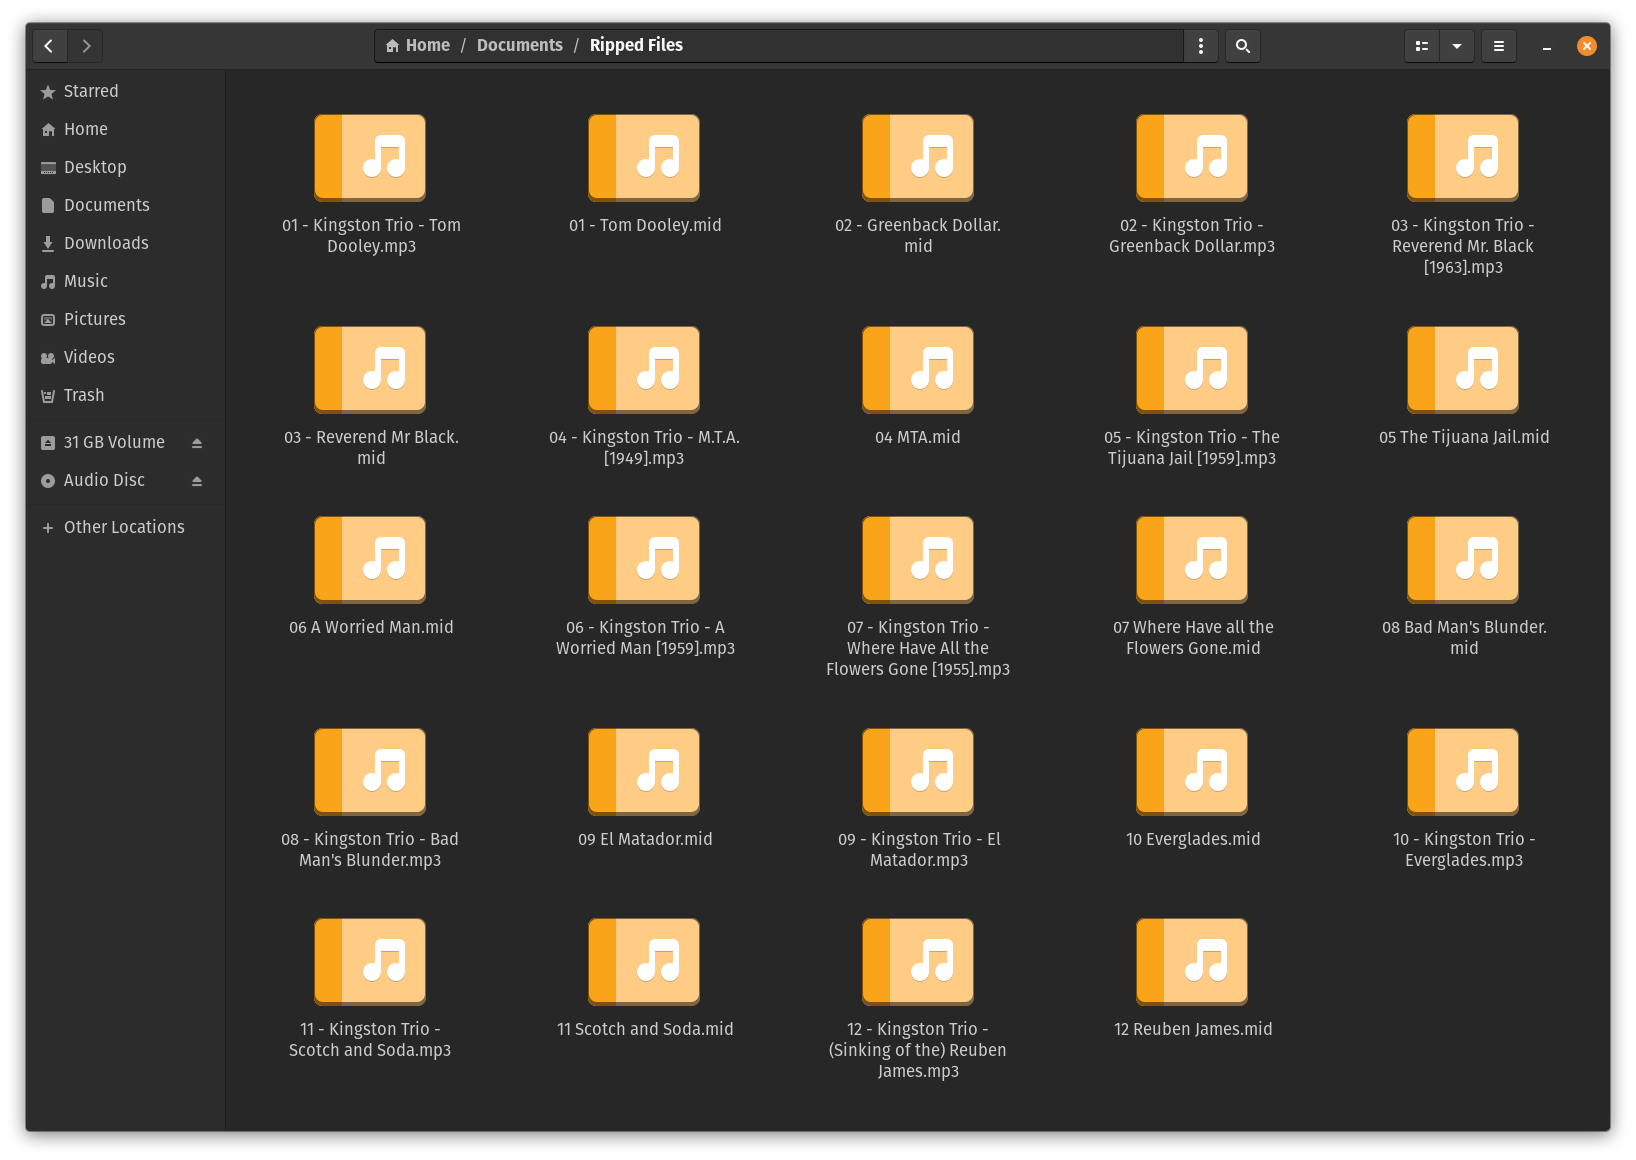
Below, you can see the files listed after ripping the audio CD, and after backing up the floppy disk drive using Player Piano Floppy Backup Utility. The floppy disk tracks are MIDI files and have a .mid extension. These contain the instructions to operate the piano. The CD tracks have been ripped as MP3 files and therefore have a .mp3 extension—these contain the audio.
'01 - Kingston Trio - Tom Dooley.mp3'
'01 - Tom Dooley.mid'
'02 - Kingston Trio - Greenback Dollar.mp3'
'02 - Greenback Dollar.mid'
...
'12 - Kingston Trio - (Sinking of the) Reuben James.mp3'
'12 Reuben James.mid'
All the files are present, but they will not yet play correctly in the Disklavier, as the filenames do not match.
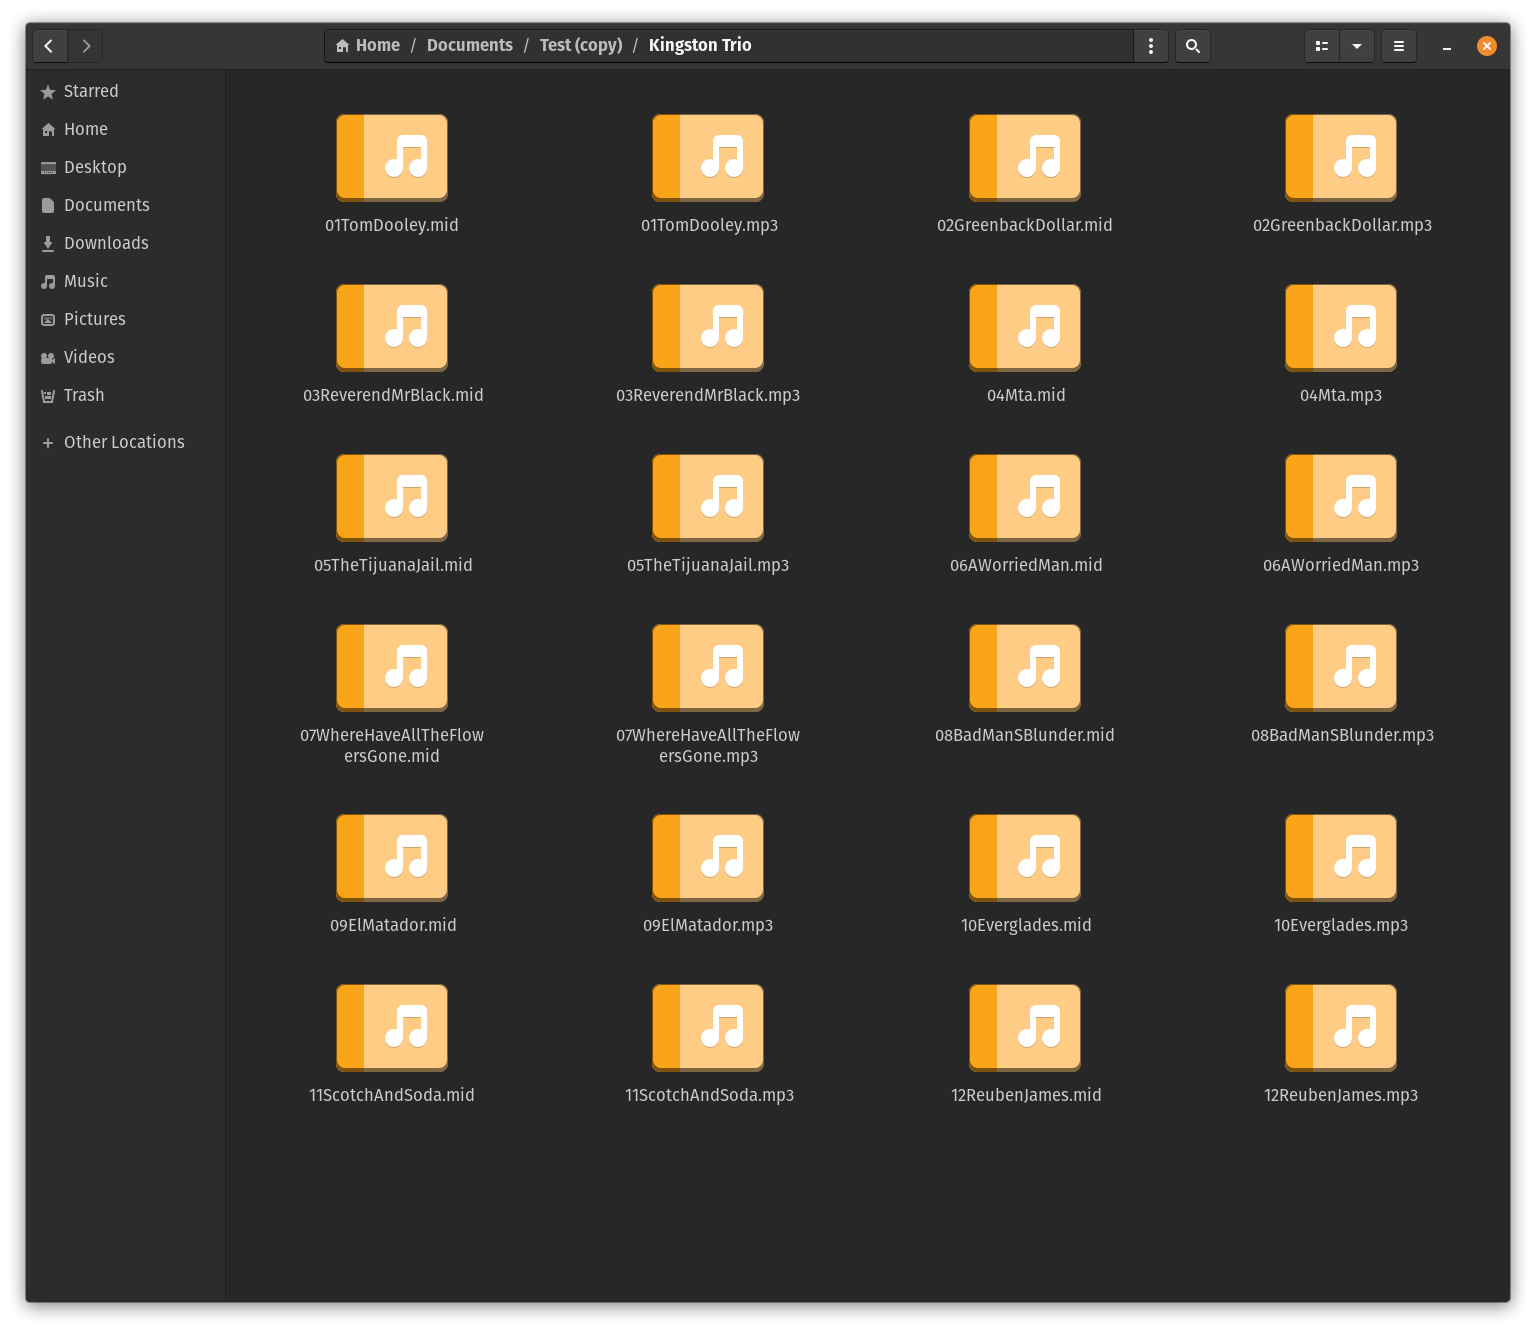
You must rename the files so that each pair of files — that is, each mid file and its corresponding mp3 — have the same filename, except for the extension. To take the above list of files, here they are corrected.
'01TomDooley.mp3'
'01TomDooley.mid'
'02GreenbackDollar.mp3'
'02GreenbackDollar.mid'
...
'12ReubenJames.mp3'
'12ReubenJames.mid'
Note that now the MP3 and MIDI files have identical names for each song. I find it easiest to remove all spaces and symbols, although this isn’t strictly necessary. It just makes for quicker visual confirmation the names are the same.
In the ENSPIRE, unlike earlier iterations of the Disklavier, filename length does not seem to matter. Here’s a graphical representation of the last folder, ready to move:
It’s Time to Play!
At this point, you can move the complete folder (in this case, Kingston Trio) onto a USB stick, and insert the USB into the front of your ENSPIRE controller. That’s it! You’ve transformed your Smart PianoSoft disks into a modern format, and they’re ready to play.
What if timing doesn’t match?
Although the Yamaha PianoSoft disks typically come out nicely, it might be necessary to match the timing of the two files. In this case, slightly shift the MIDI files, adding or removing time from the beginning. You can use Ardour (all platforms), Reaper (all platforms), GarageBand (Mac), or Rosegarden (Linux).