This Python program will recursively rename .FIL files in the specified directory, ensuring they follow the naming convention described, and convert all filenames to uppercase. If, for instance, you have twenty albums, direct this program to run in their parent directory, and all the albums in subdirectories will be corrected.
This script renames all files to be all-caps including extensions, and for the name to be exactly eight characters long with no symbols. It will add filler characters if necessary. It will make sure they’re unique by incrementing a counter. These appear to be the most important factors in making files identifiable to early Disklaviers, based on my experience and those of commenters.
Usage: python renamefordisk.py [TARGET]
Just download renamefordisk.py. The source code is also at the bottom of this page.
As mentioned above, this will either correct all the files in the target directory, or will recursively change the names of all .FIL files in subdirectories if pointed at a parent directory. This is very useful if you’re, for instance, transferring many albums using backing up numerous floppy disks.
At this point, you’re ready to use EEXPLORE.EXE to move through each directory and prepare your PIANODIR.FIL. At a future date, I’d like to automate this.
Make certain to back up all files before running this! I can’t guarantee perfect results for all combinations of names and strings of characters.
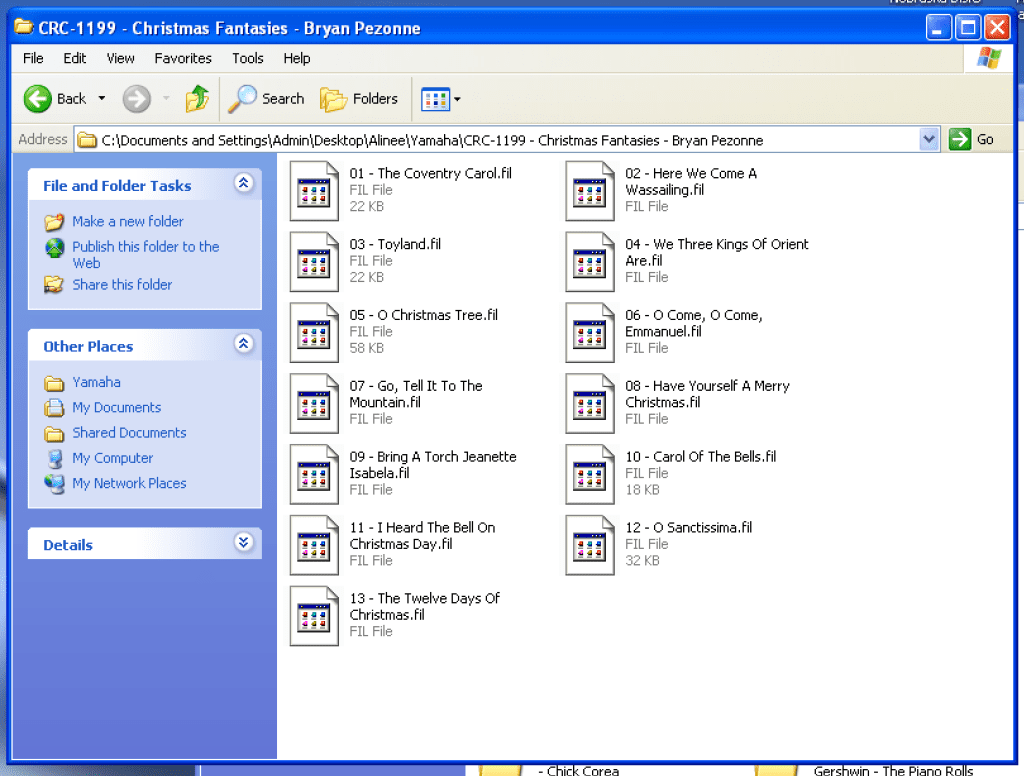
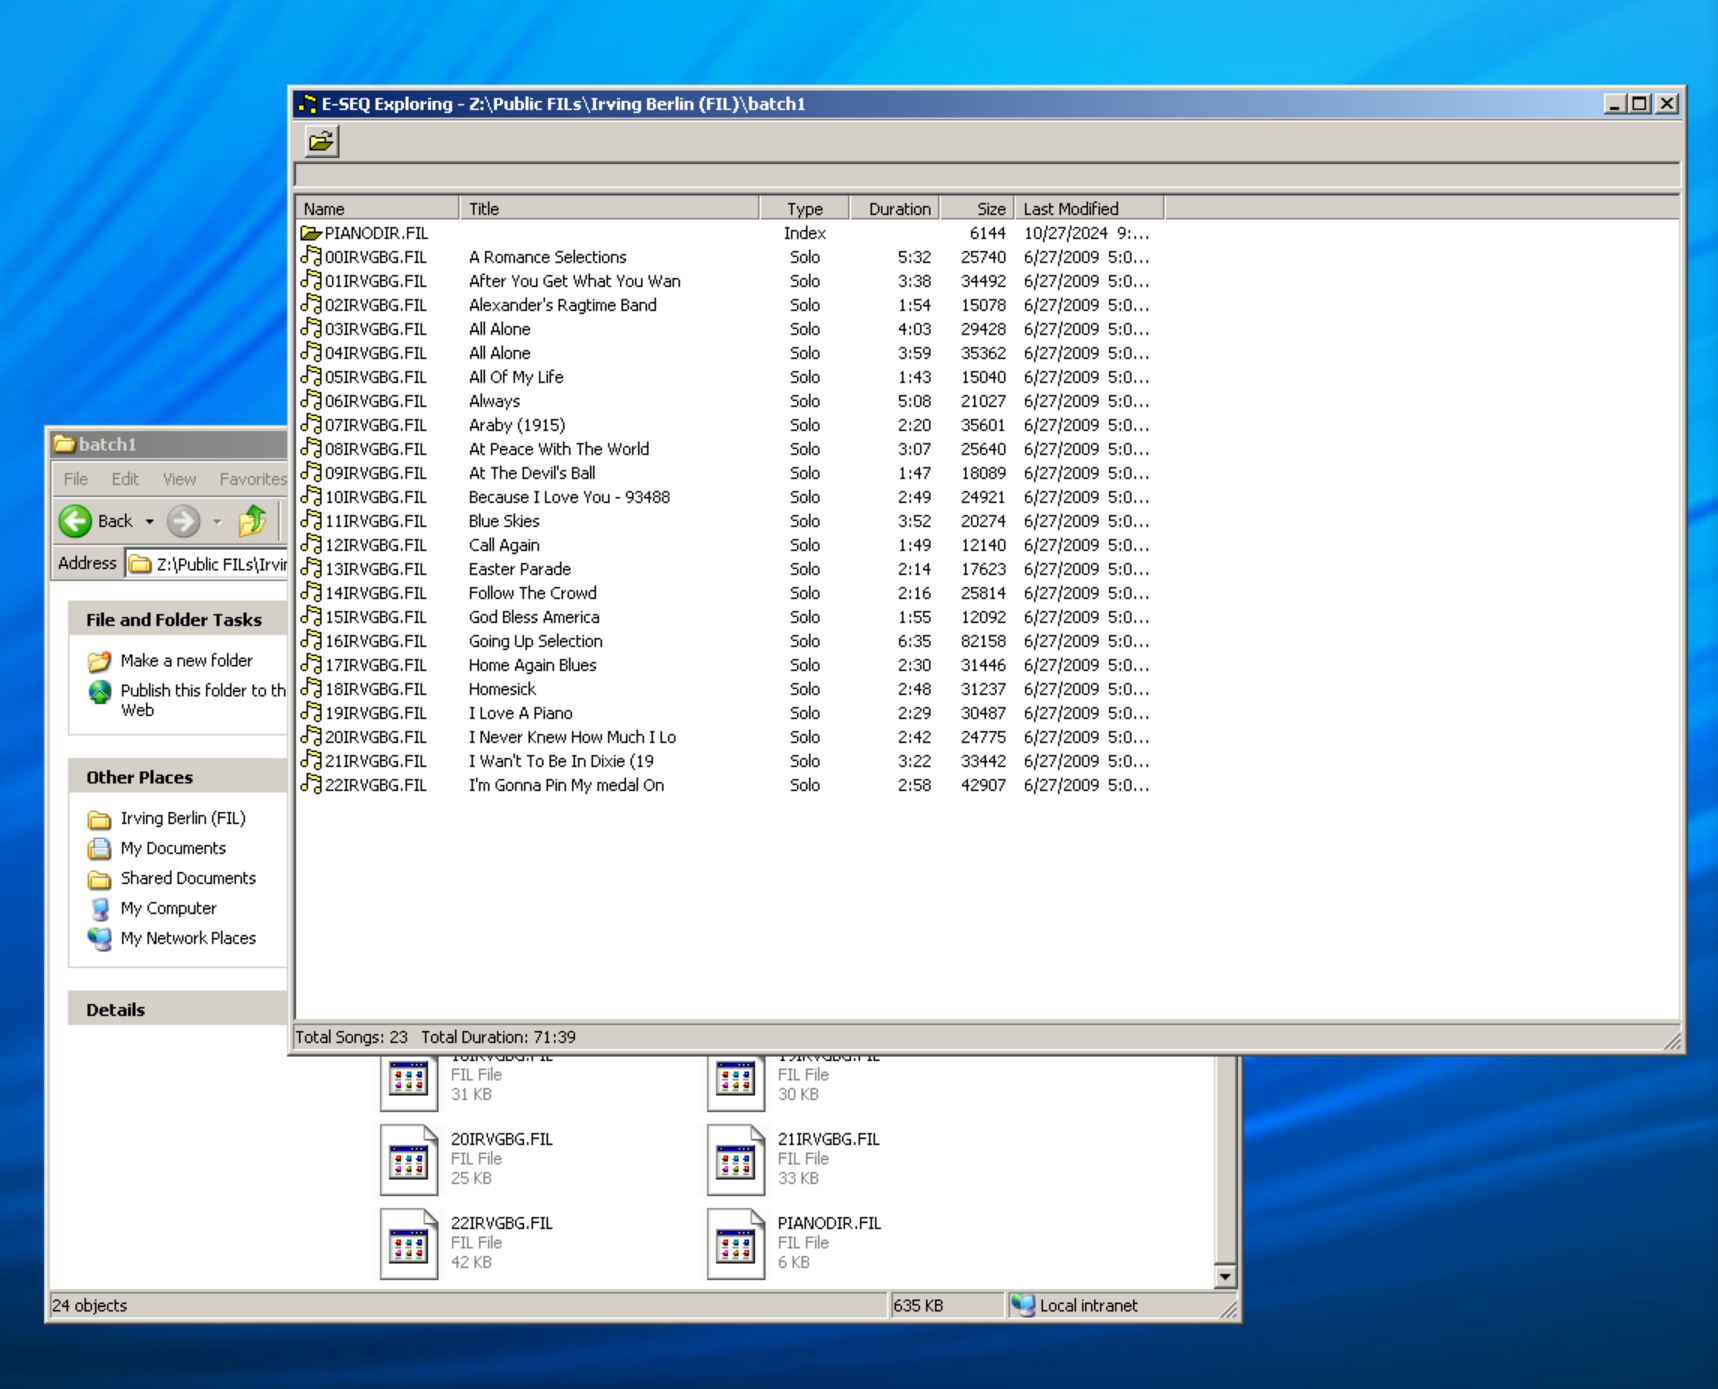
Filenames before conversion.
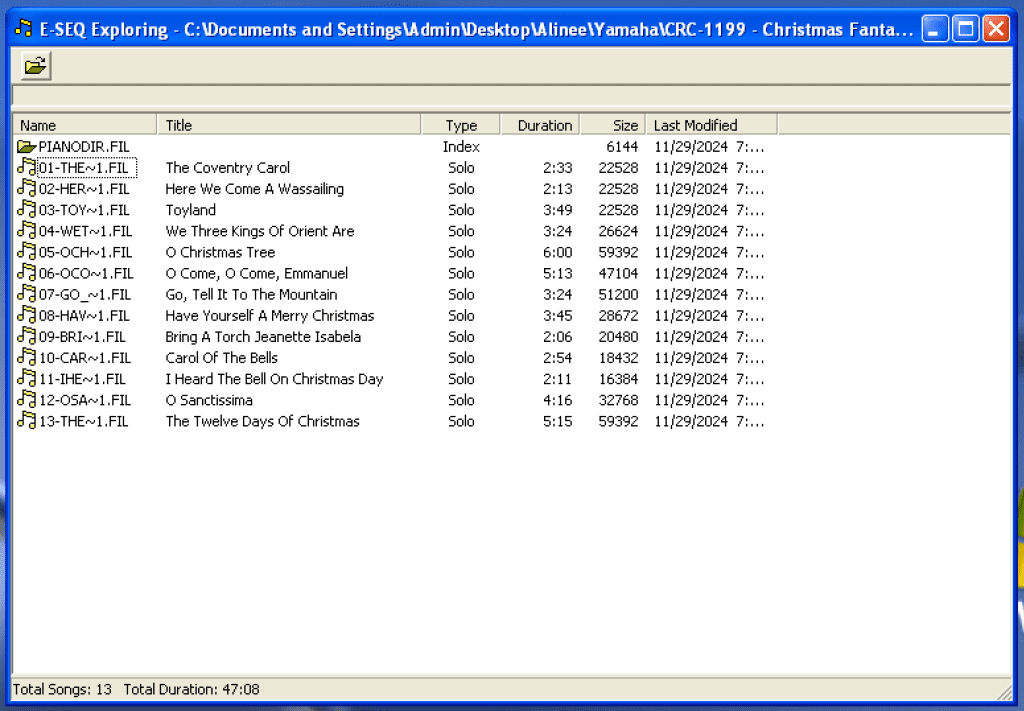
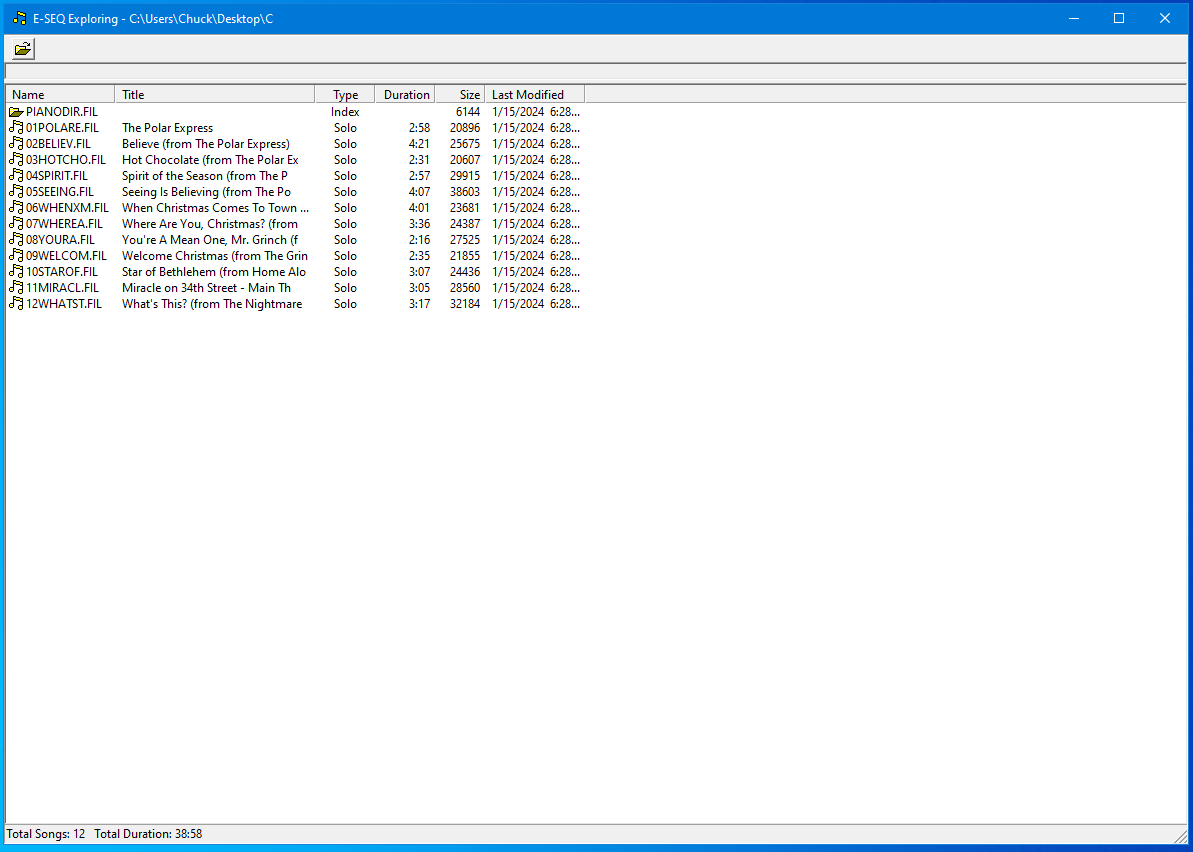
Running ESEQ Explorer on the above directory. The names are deformed using MS-DOS shorthand.
The above is not guaranteed to read in a Disklavier. It is not apparent whether this is because of misbehavior by ESEQ Explorer, or is an issue with older Disklaviers. However, this does make it less likely the tracks will read correctly in older systems.
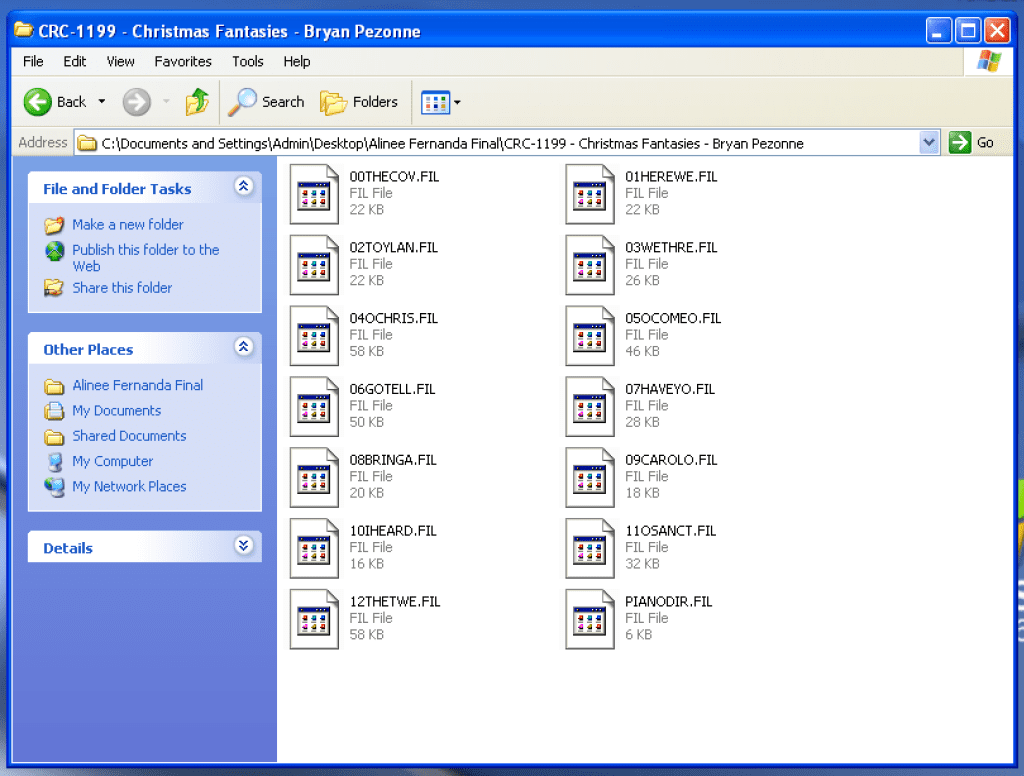
Filenames after conversion.
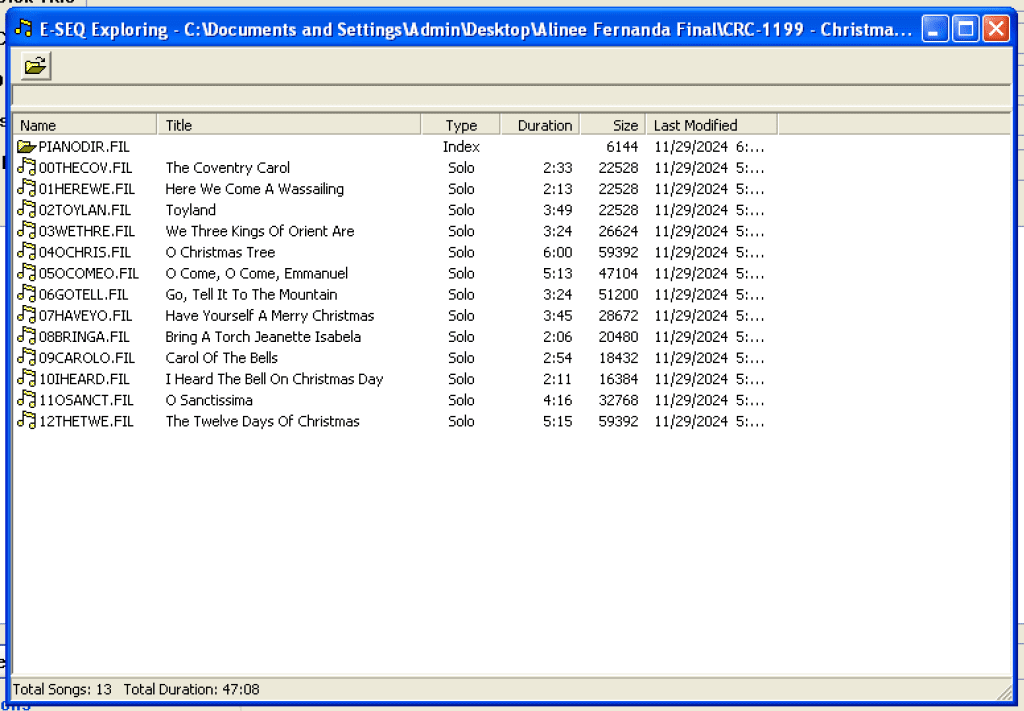
ESEQ Explorer with proper disk names. Note that the names are consistent with the names in the directories.
If you see the above, it’s quite likely it’ll read in your older Disklavier.
I recently encountered a Yamaha PSR-S750 with a couple of issues that appear to be quite common in this series. I wanted to share my experience in the hope that it might help someone in the future.
Sudden Shutdowns
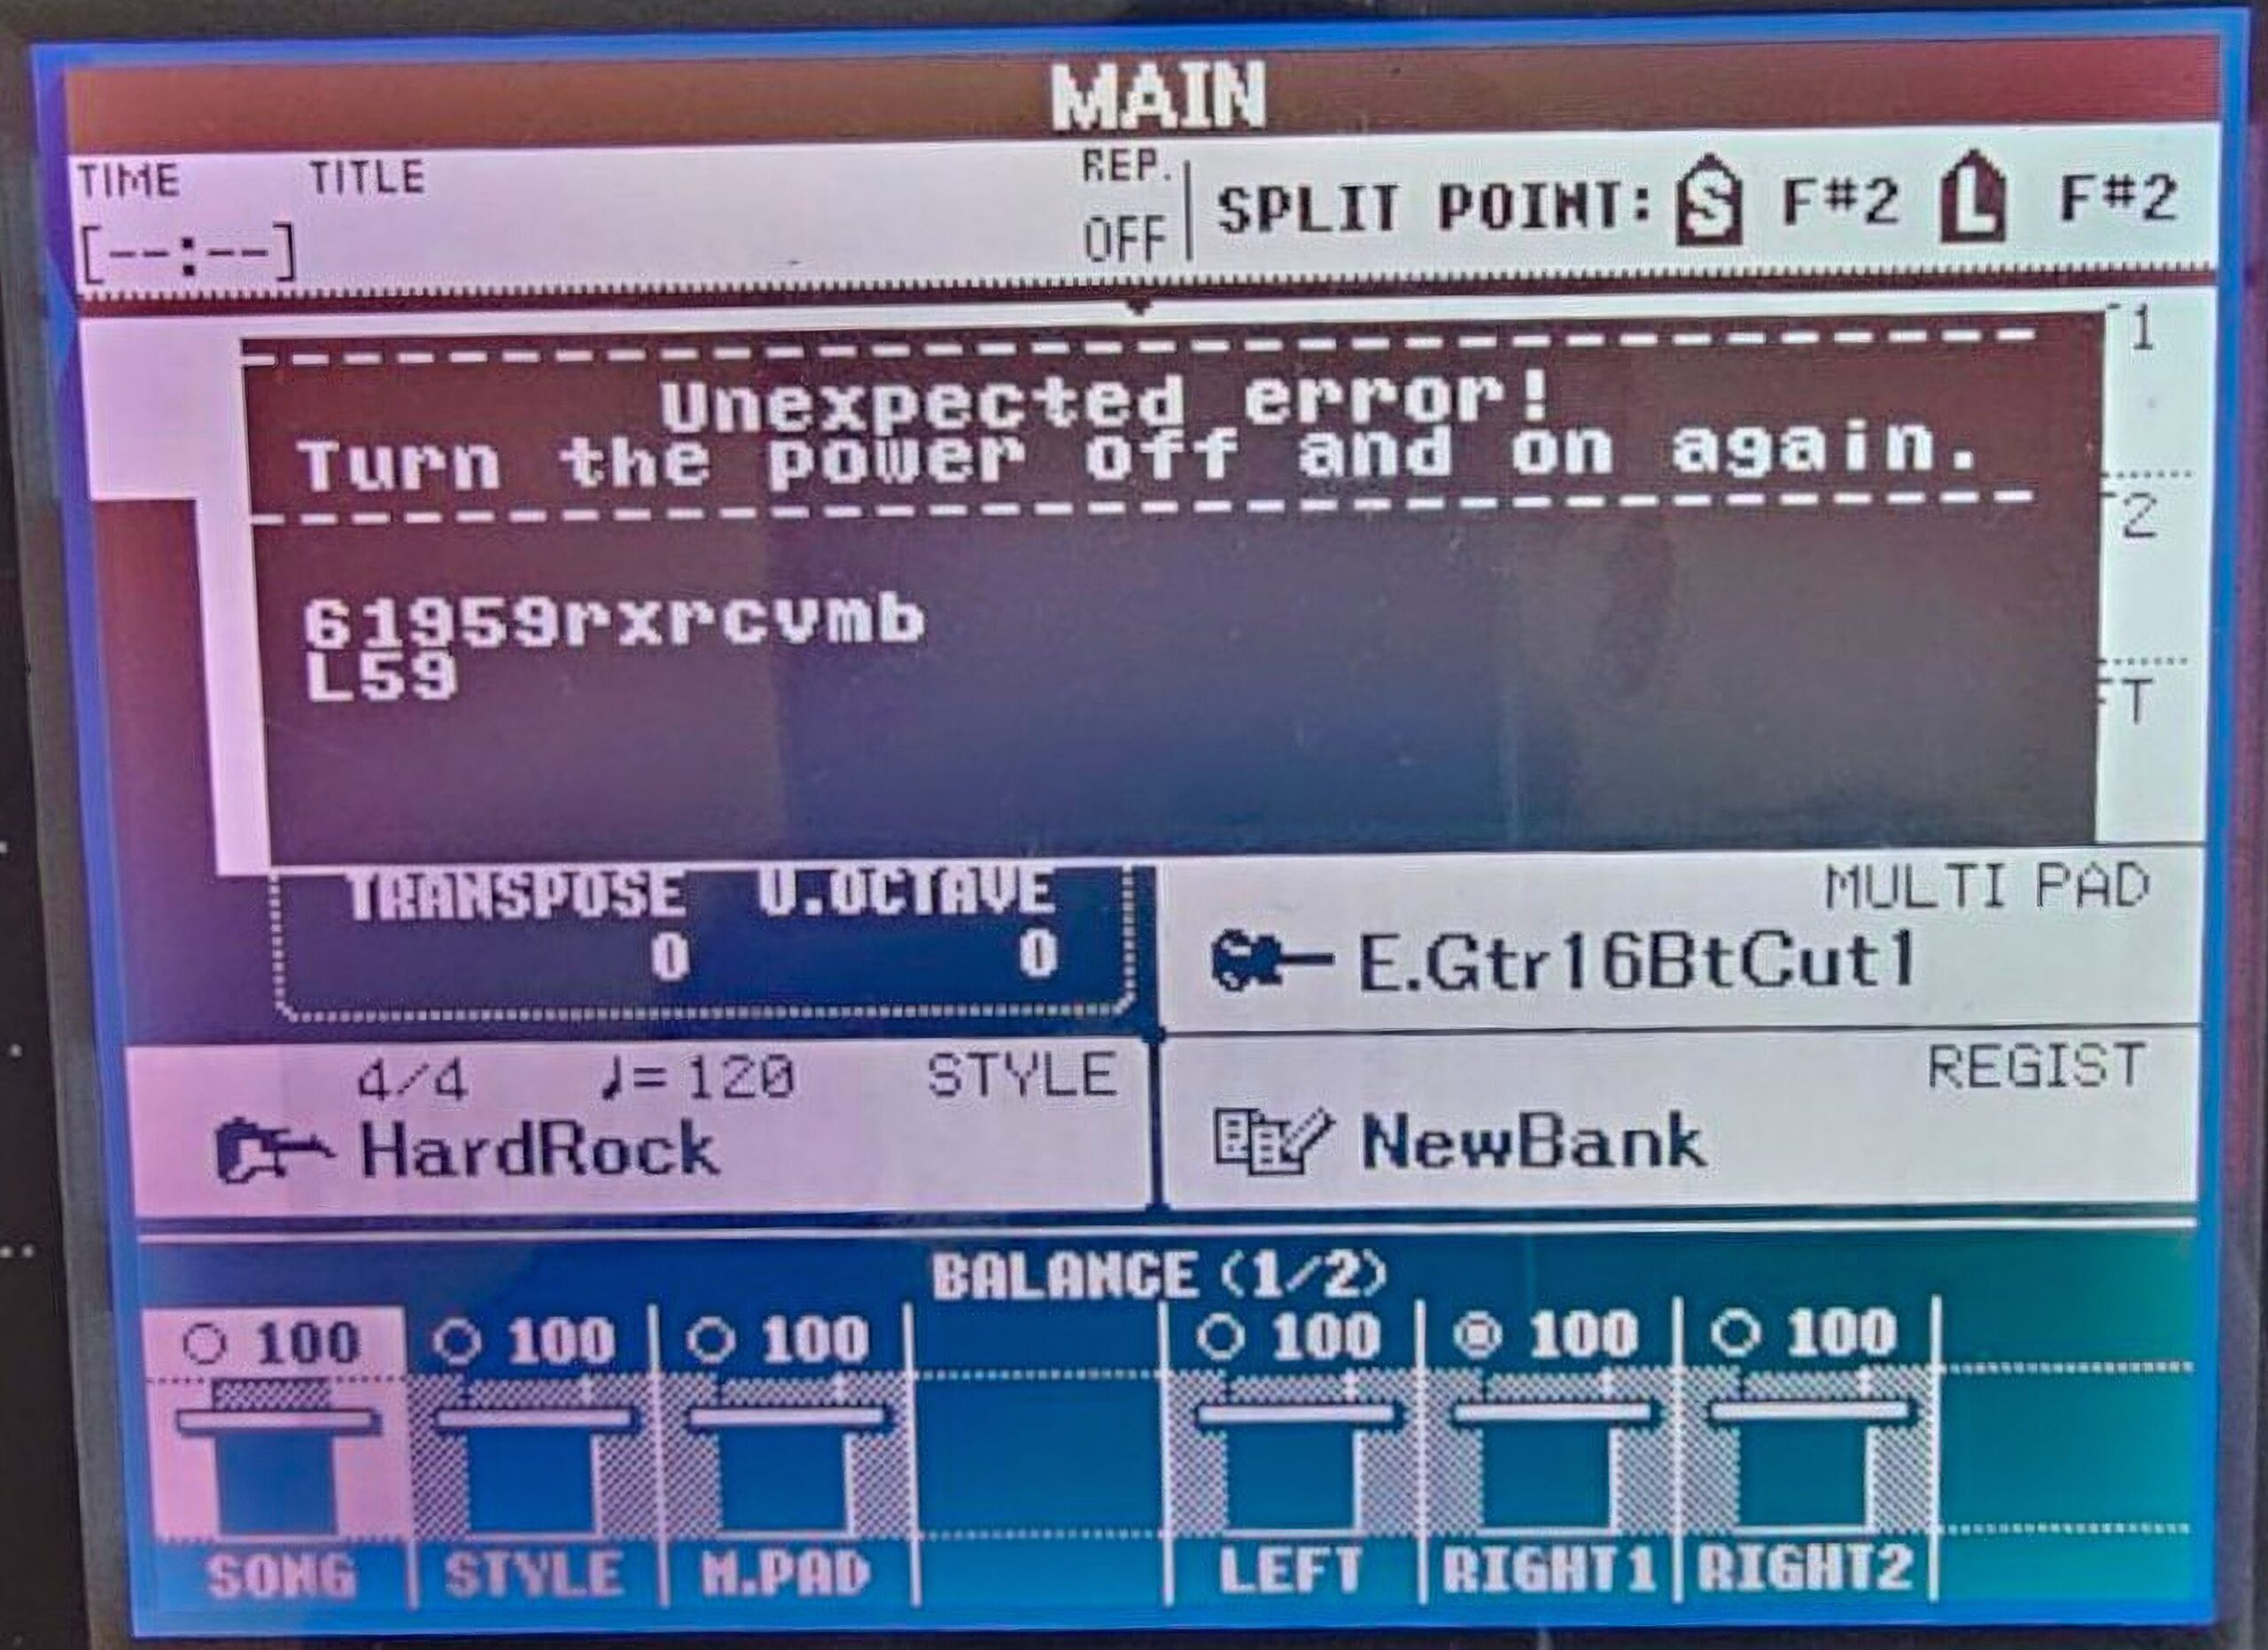
The customer initially reported that the keyboard would display an error message at irregular intervals and then require a restart. This issue turned out to be related to a known problem with the main DM board. Apparently, early versions of this board have a tendency to delaminate, leading to errors such as the following:
“Unexpected error! Turn the power off and on again.”
However, the board can fail in various ways, including issues with powering on, sudden shutdowns, and more. The recommended solution is to replace the DM board (part #WZ353701). Unfortunately, this is not a cheap fix—the part currently costs around $503 on Full Compass (as of August 2024), though a Yamaha service provider may be able to offer it at a lower price.
Keyboard Turns On but Won’t Turn Off
This is an interesting issue. The power switch on this keyboard is a rubber button that, when depressed, completes a circuit to ground. Over time, as the button ages and the graphite on its underside degrades, it does continue to complete the circuit, but the resistance increases. Eventually, this high-resistance path is enough to signal the keyboard to turn on, but not enough to signal it to turn off. Diagnosing this issue can be tricky because the button consistently powers the keyboard on, even though it is the source of the problem.
The replacement button is part #WZ960401. Replacing it involves removing the entire front panel, making it a somewhat involved process. It would be wise to have a copy of the service manual on hand before attempting this repair.
Notably, the same issue can occur in the PSR-S770, PSR-S950, and PSR-S970.
Finally, make sure to update your Yamaha PSR-S750 to the latest firmware!Download the latest firmware file, put it on a USB stick, and insert the USB stick into your PSR-S750. Then Power On the keyboard while holding the Start/Stop button (below the LCD screen). You’ll be guided through the update.
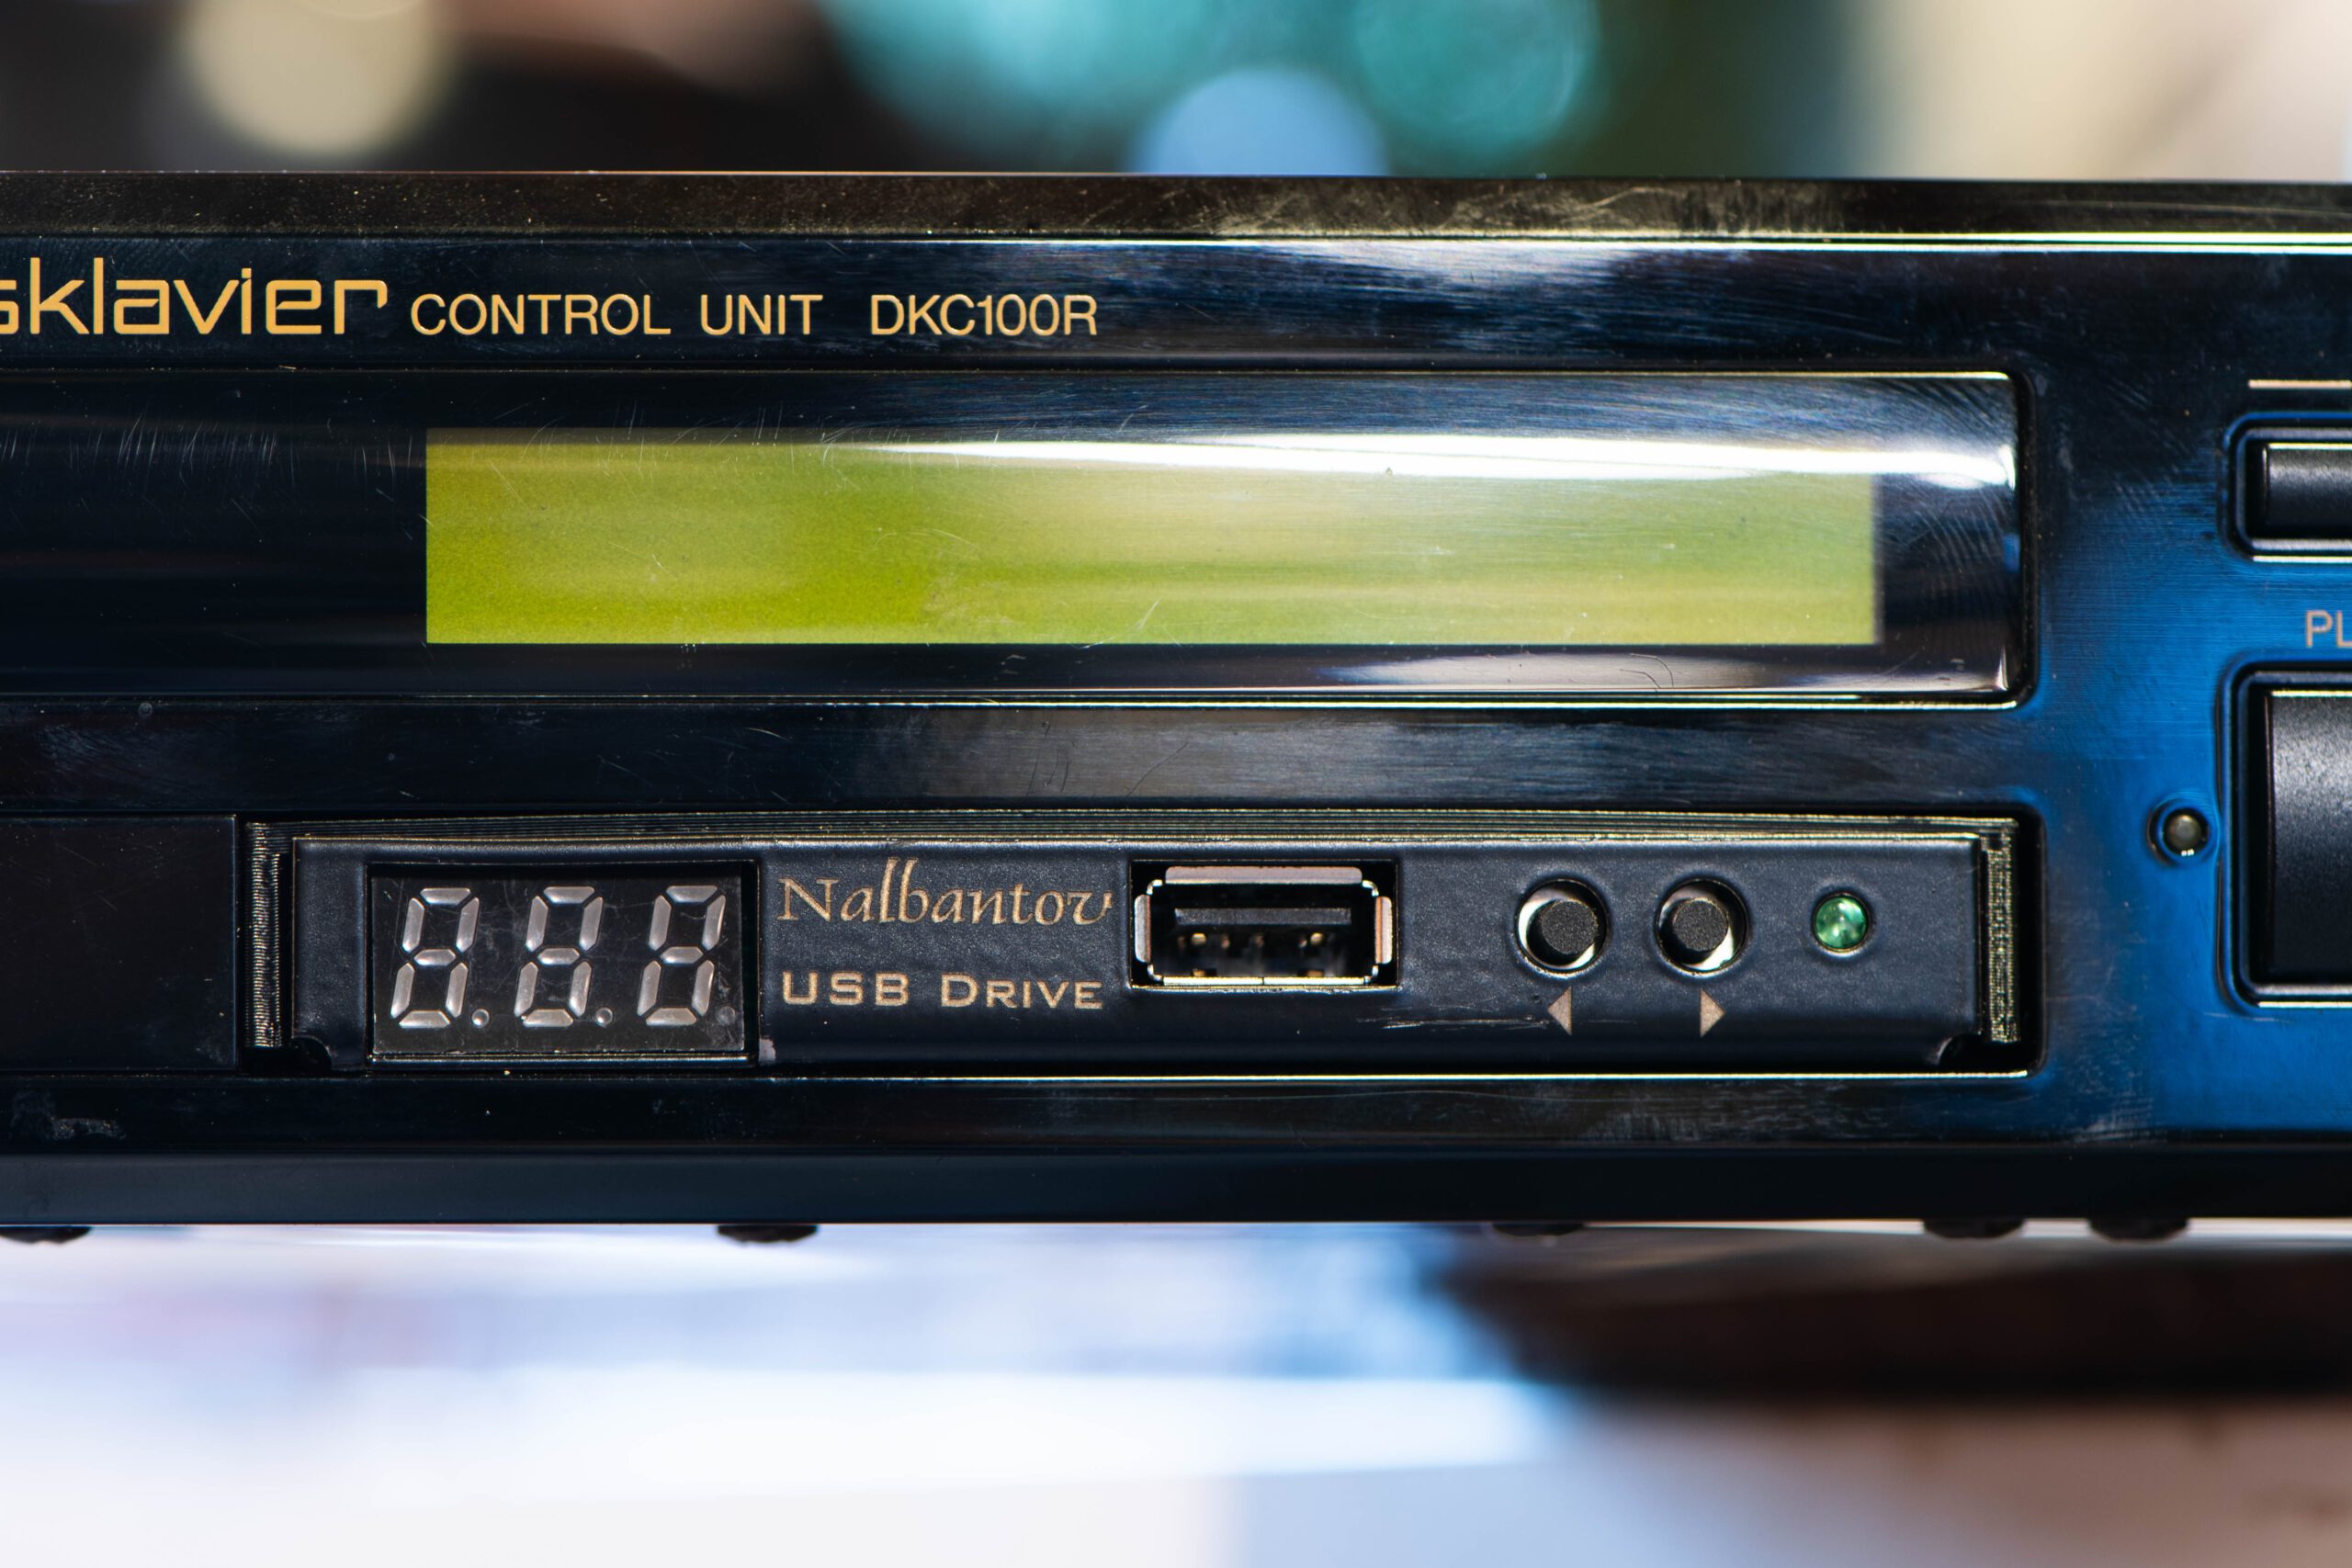
I recently installed a Nalbantov USB drive using an updated version of the insert and mount that I designed.
You can see based on the pictures below that the Nalbantov slim is slightly too small to fill the entire cavity left by the original floppy disk drive. Additionally, there are no mounts of any kind to hold the Nalbantov in place. This insert solves both problems: The drive screws into the insert at just the right distance and depth, and the insert also buffers the area around the outside of the drive.
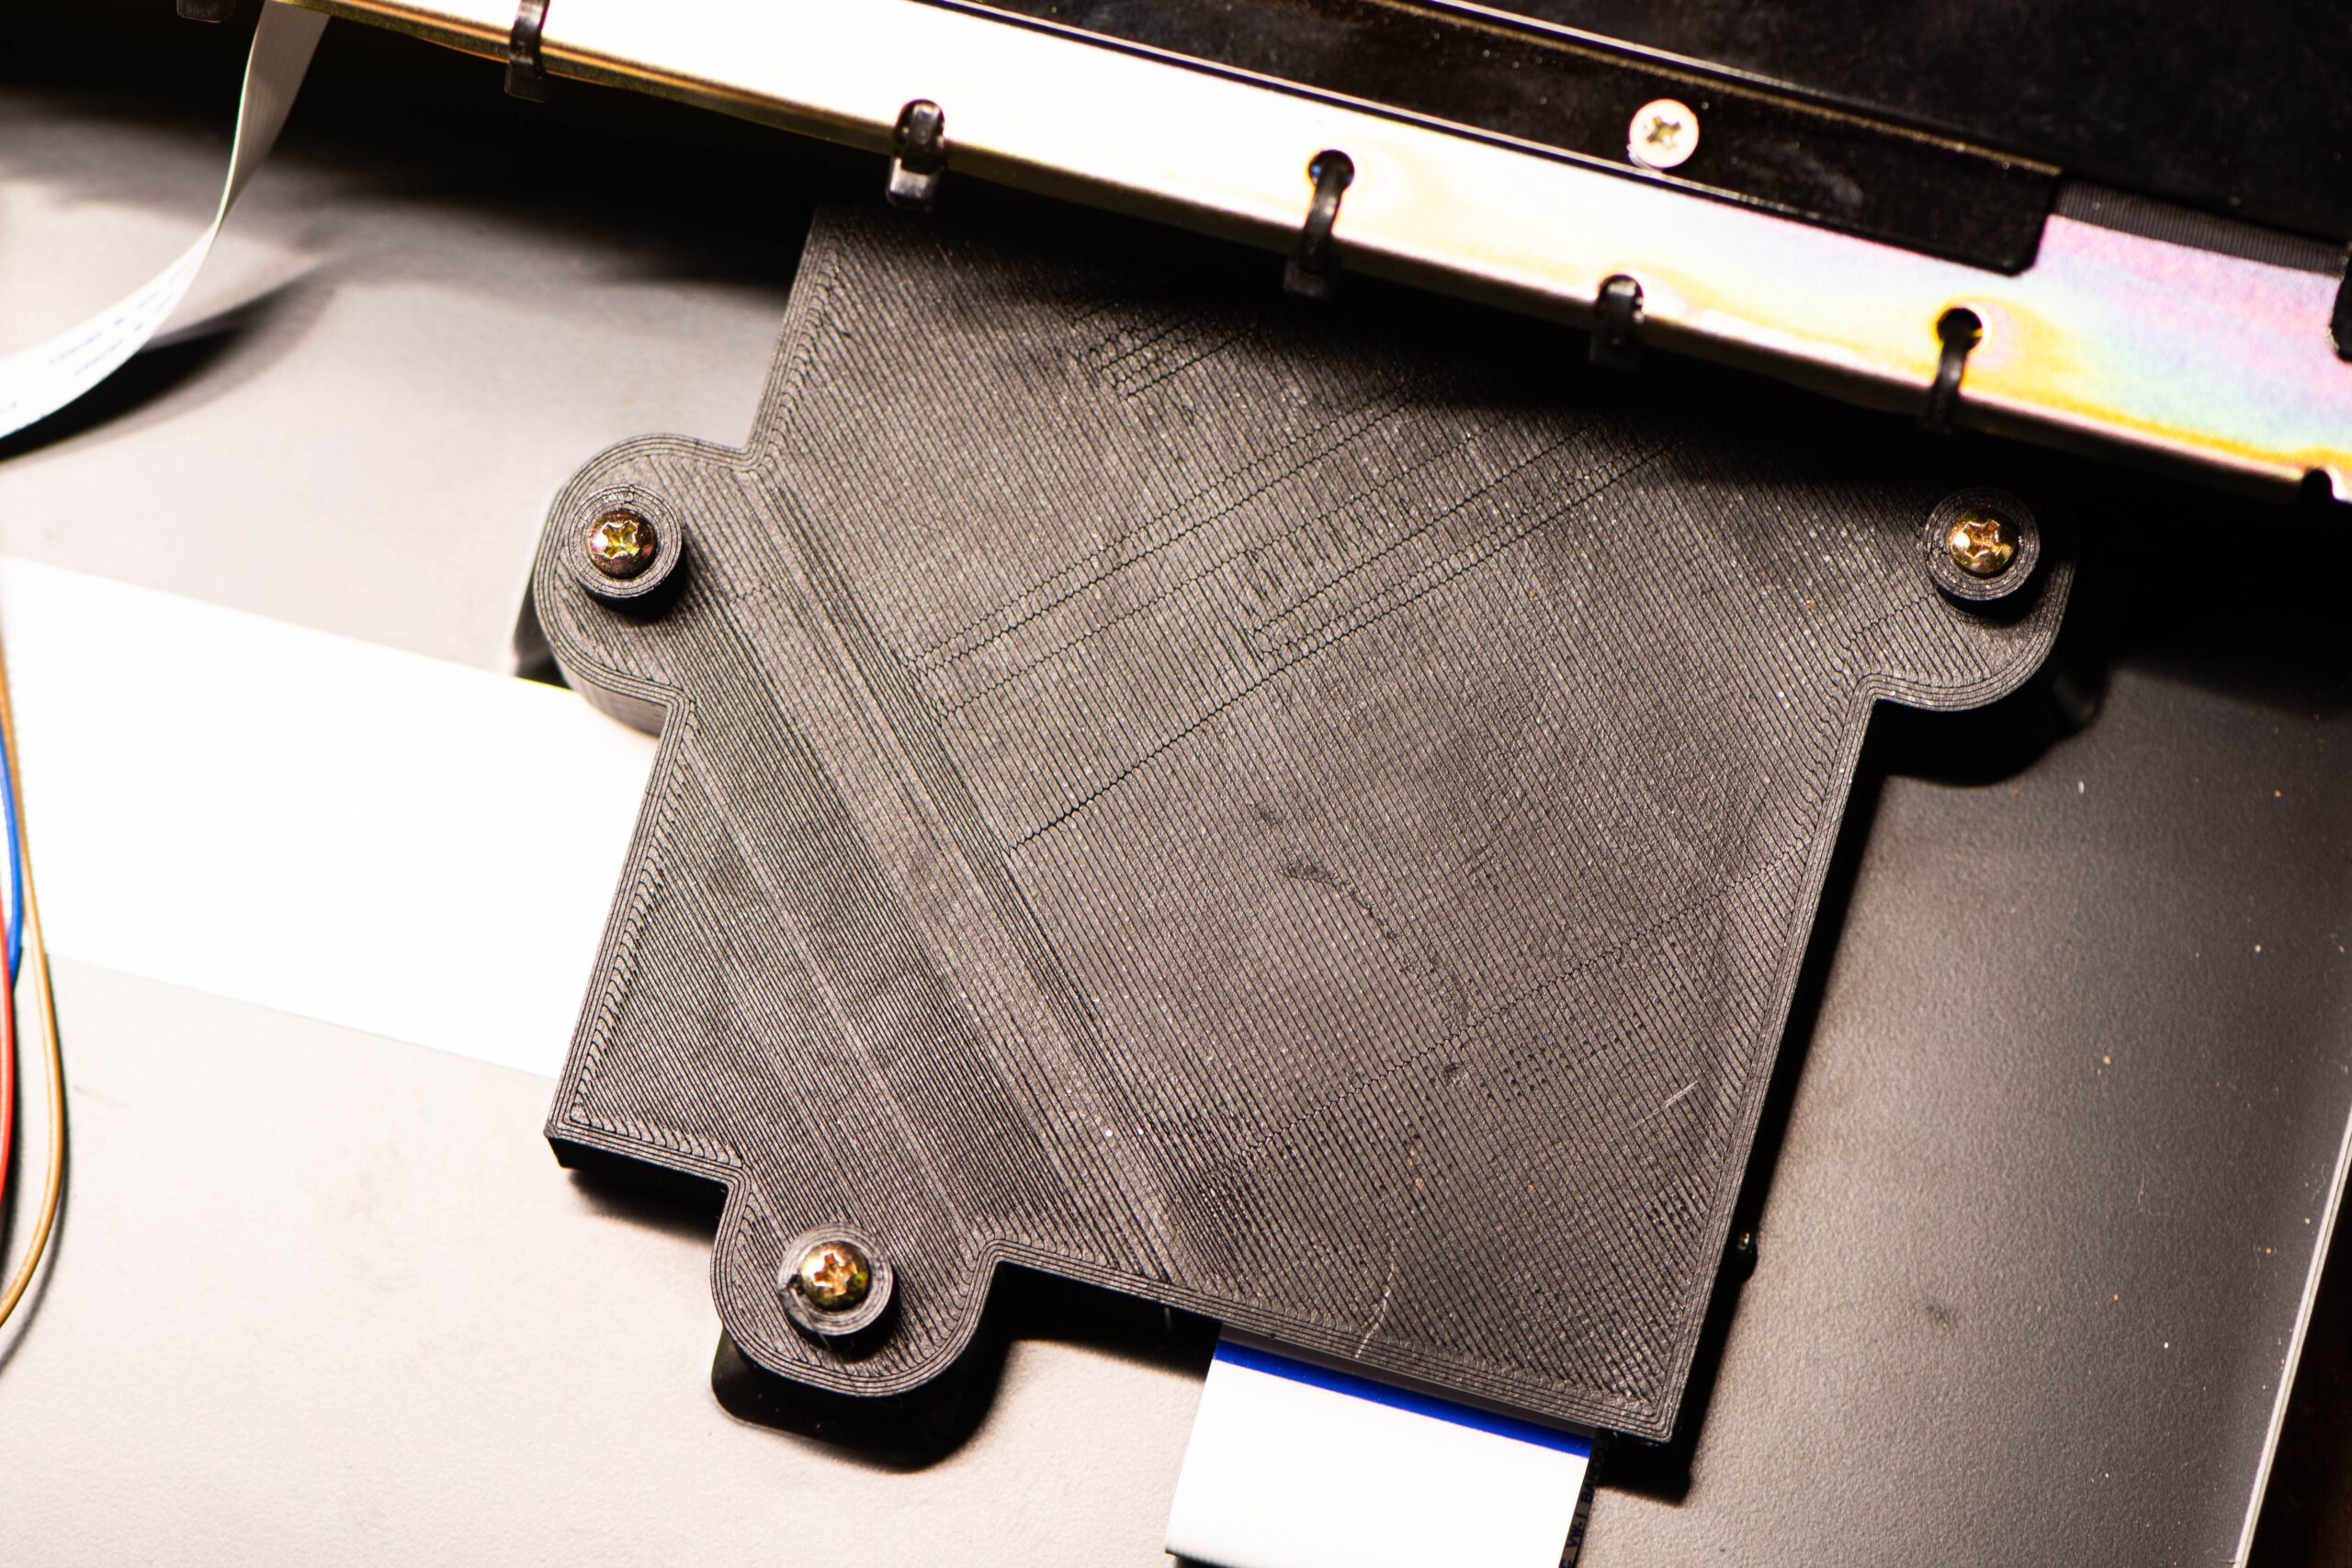
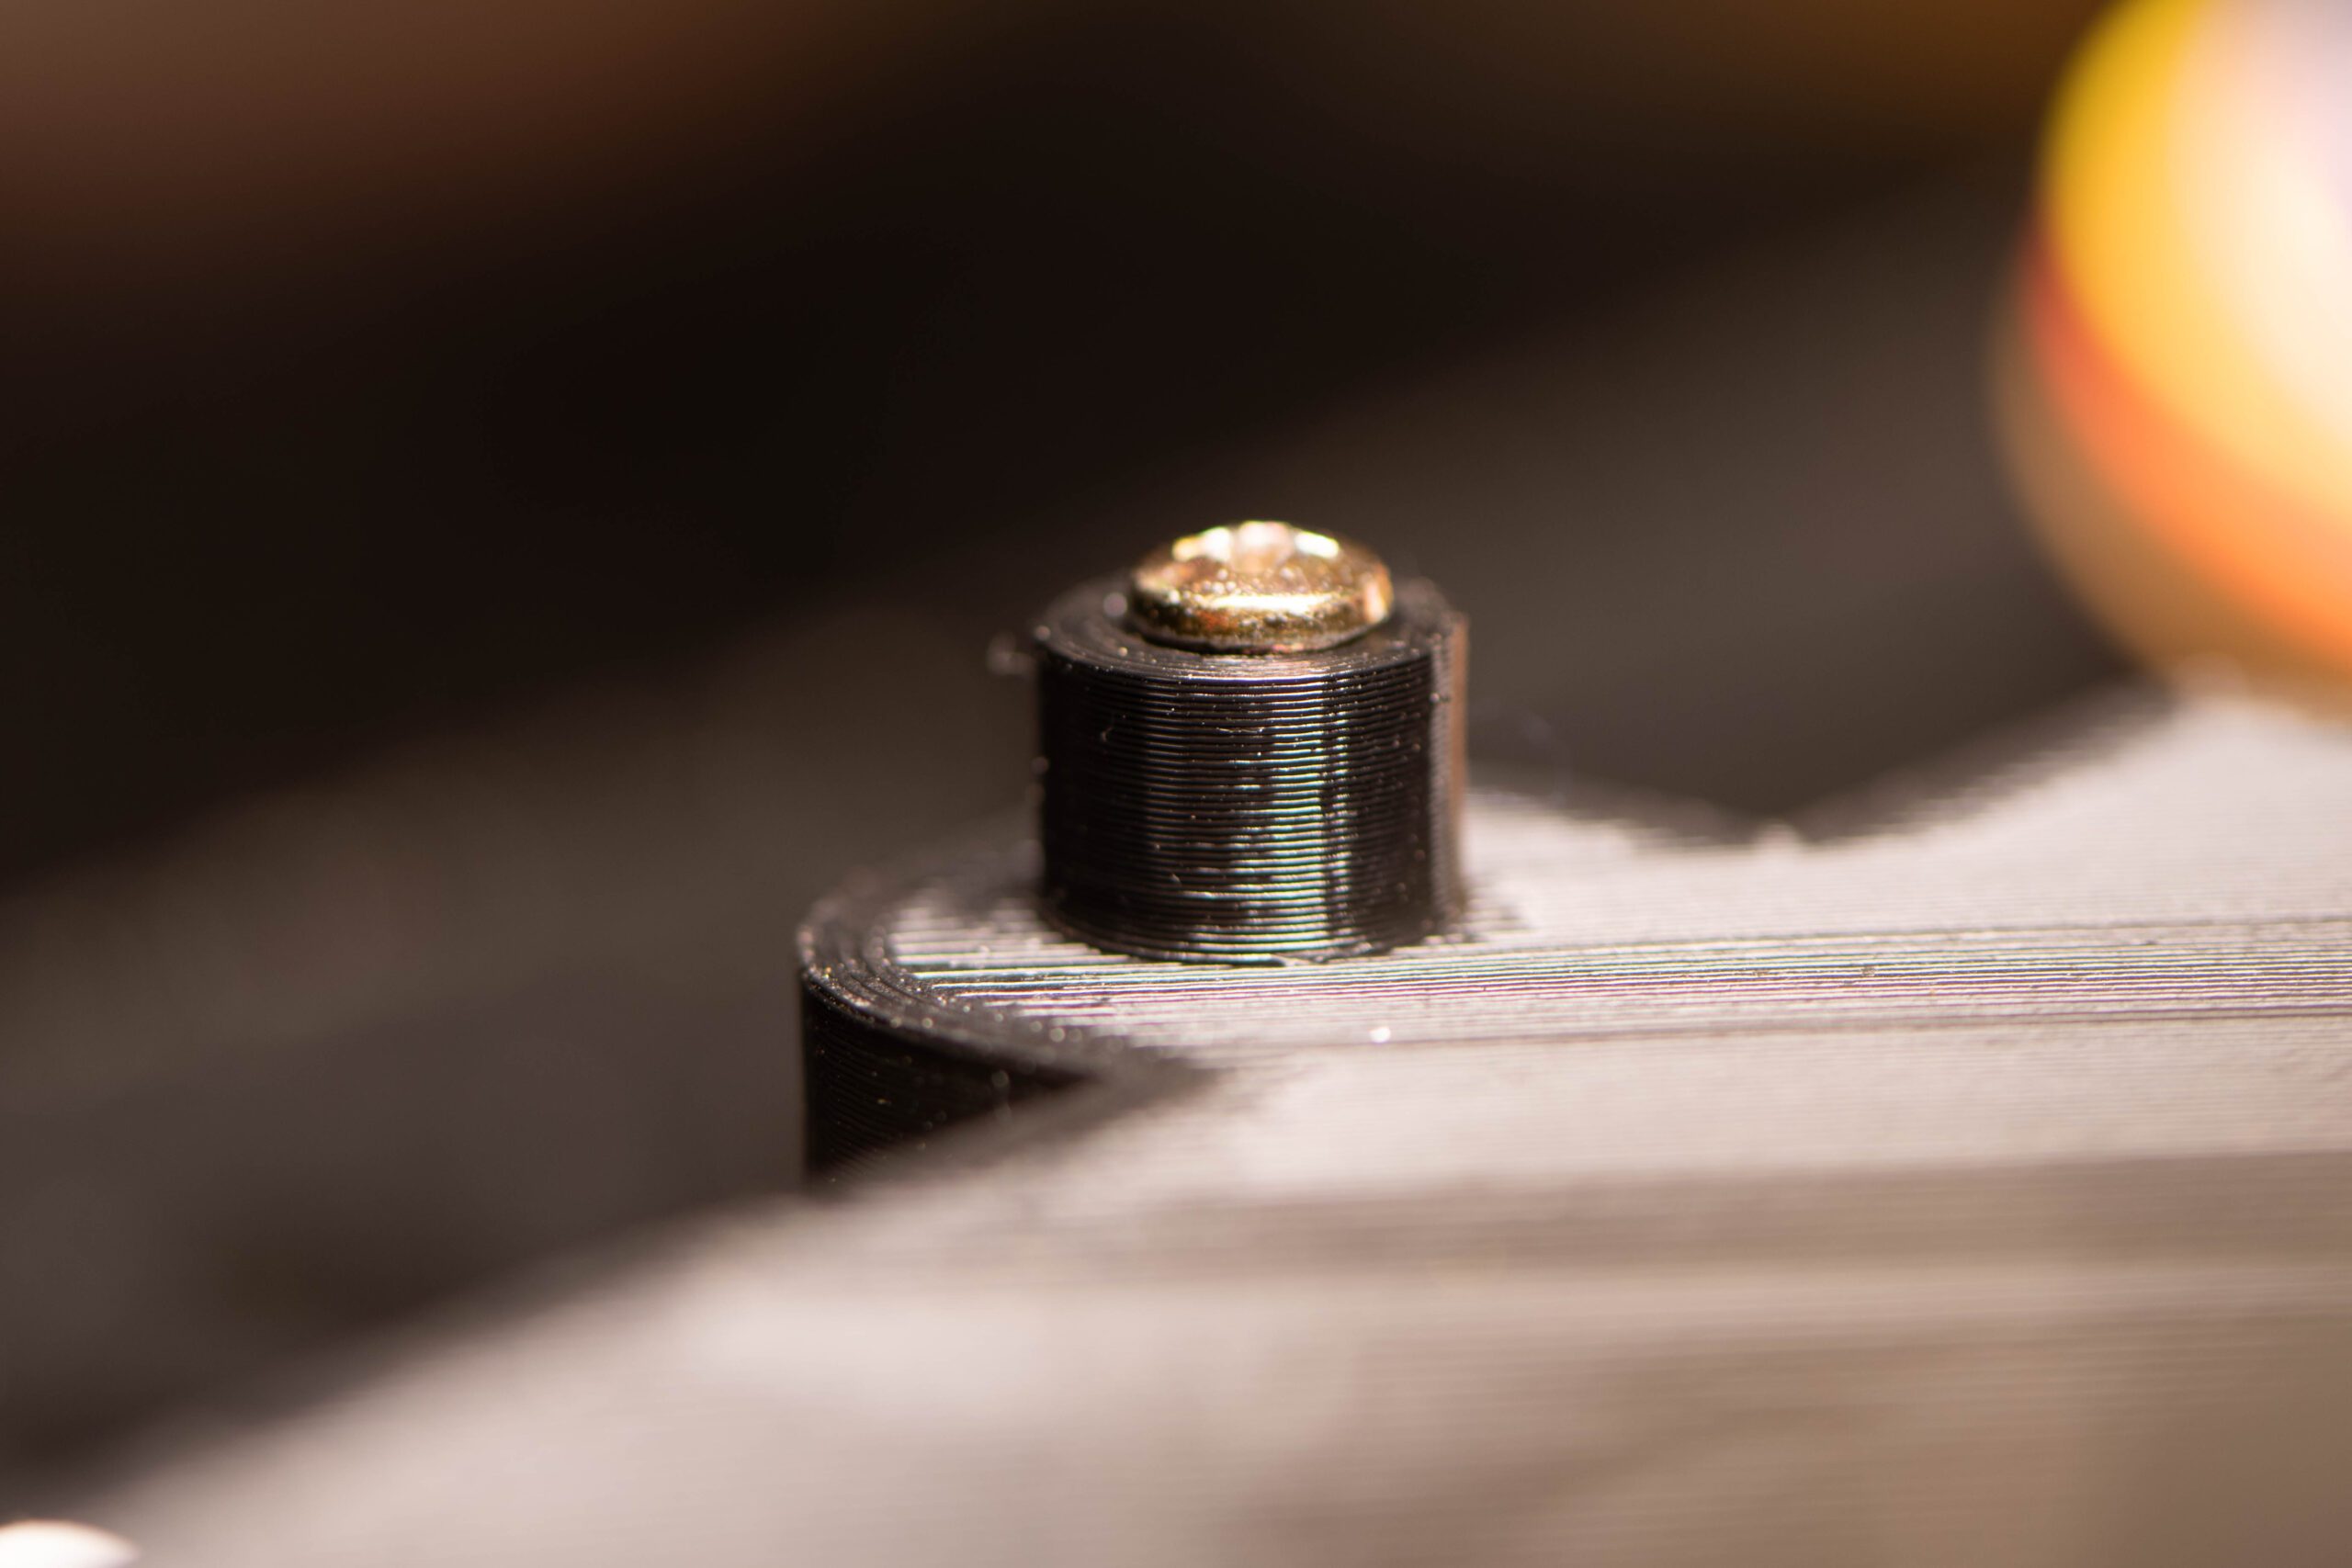
The insert installed over the screw positions of the original floppy disk drive.I 3D printed the spacers at 50% infill so they’d be fairly solid. These spacers allow you to use the original machine screws that hold down the OEM floppy disk drive, which is a huge advantage. No visits to the hardware store!
I have a customer who recently experienced an issue with his Yamaha Disklavier HQ100. The HQ100 is the Japanese version of the MX100II. He primarily uses this instrument over MIDI, and finds the Disklavier quite useful.
This discussion should apply to other models of Yamaha Disklavier. The Yamaha MX100A and MX100B use different solenoids, but the designs are similar.
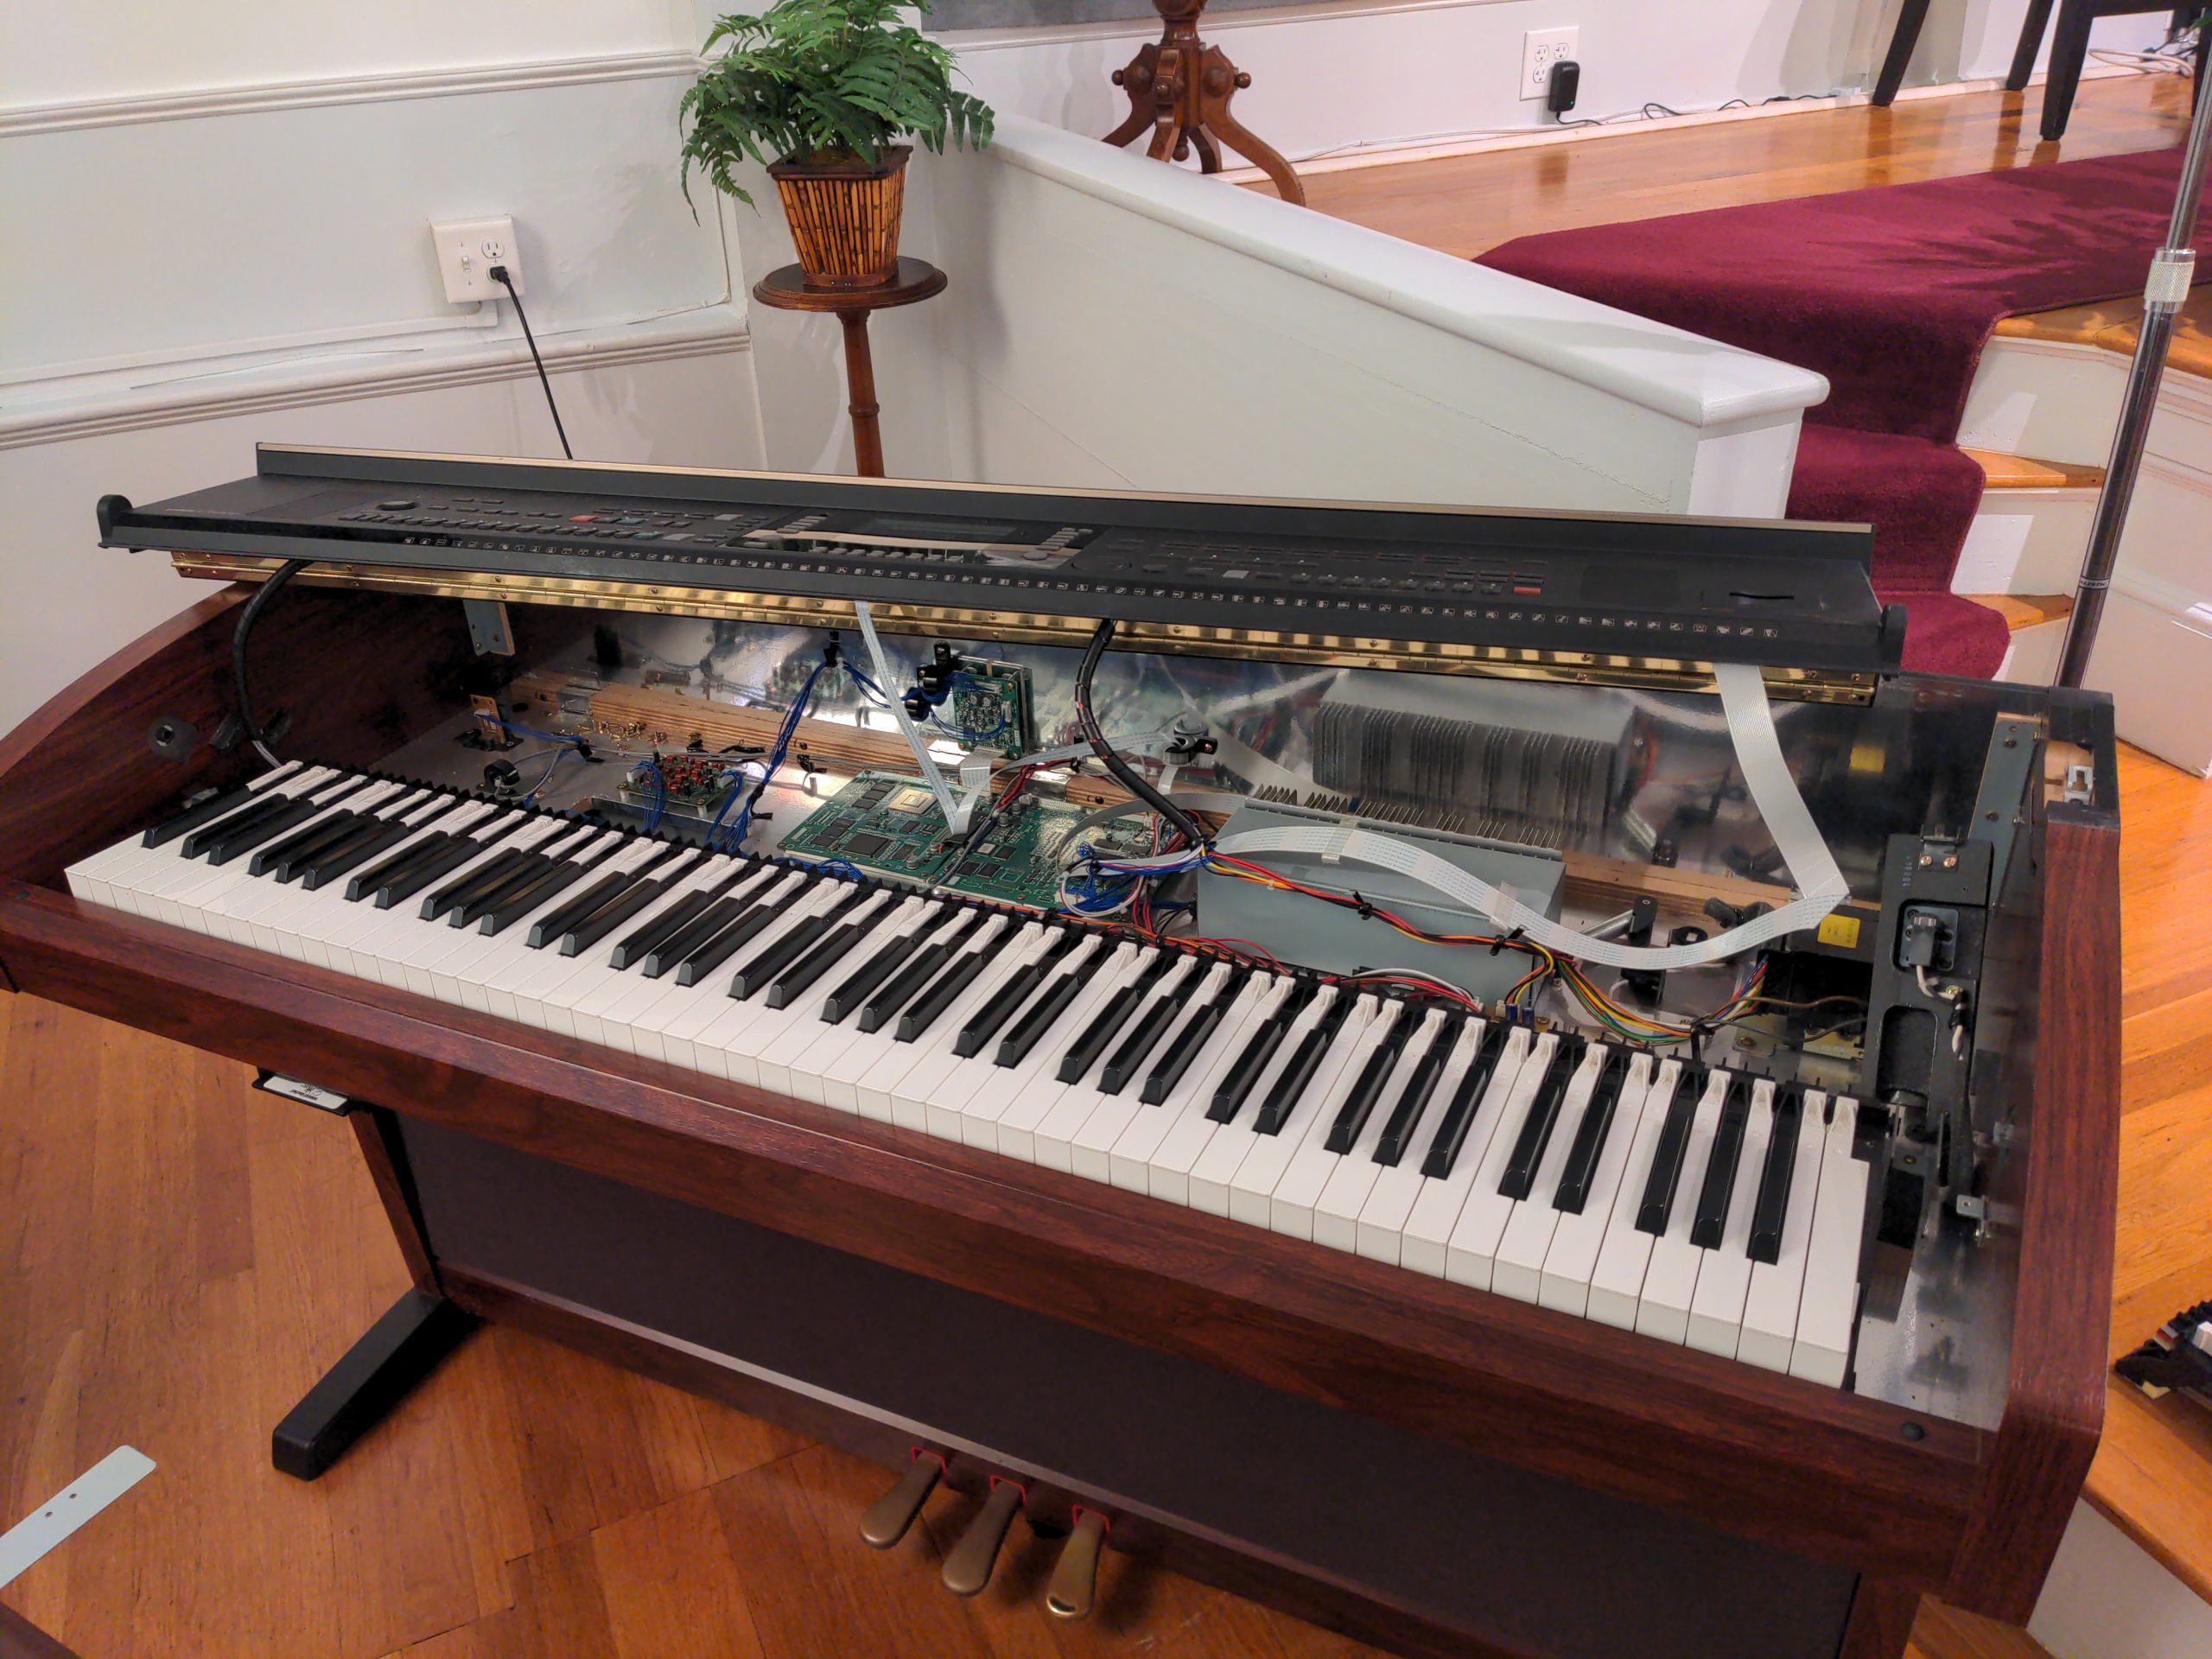
The symptom was that, when started, the Disklavier would play a single key at maximum velocity. It would sustain it for several seconds before releasing. Additionally, the system emitted a noisy whine while powered on. This noise turned out to be a failed power supply, and a replacement resolved that particular symptom. However, despite this, the system would still play one single key after powering on and then fail to respond to any subsequent commands.
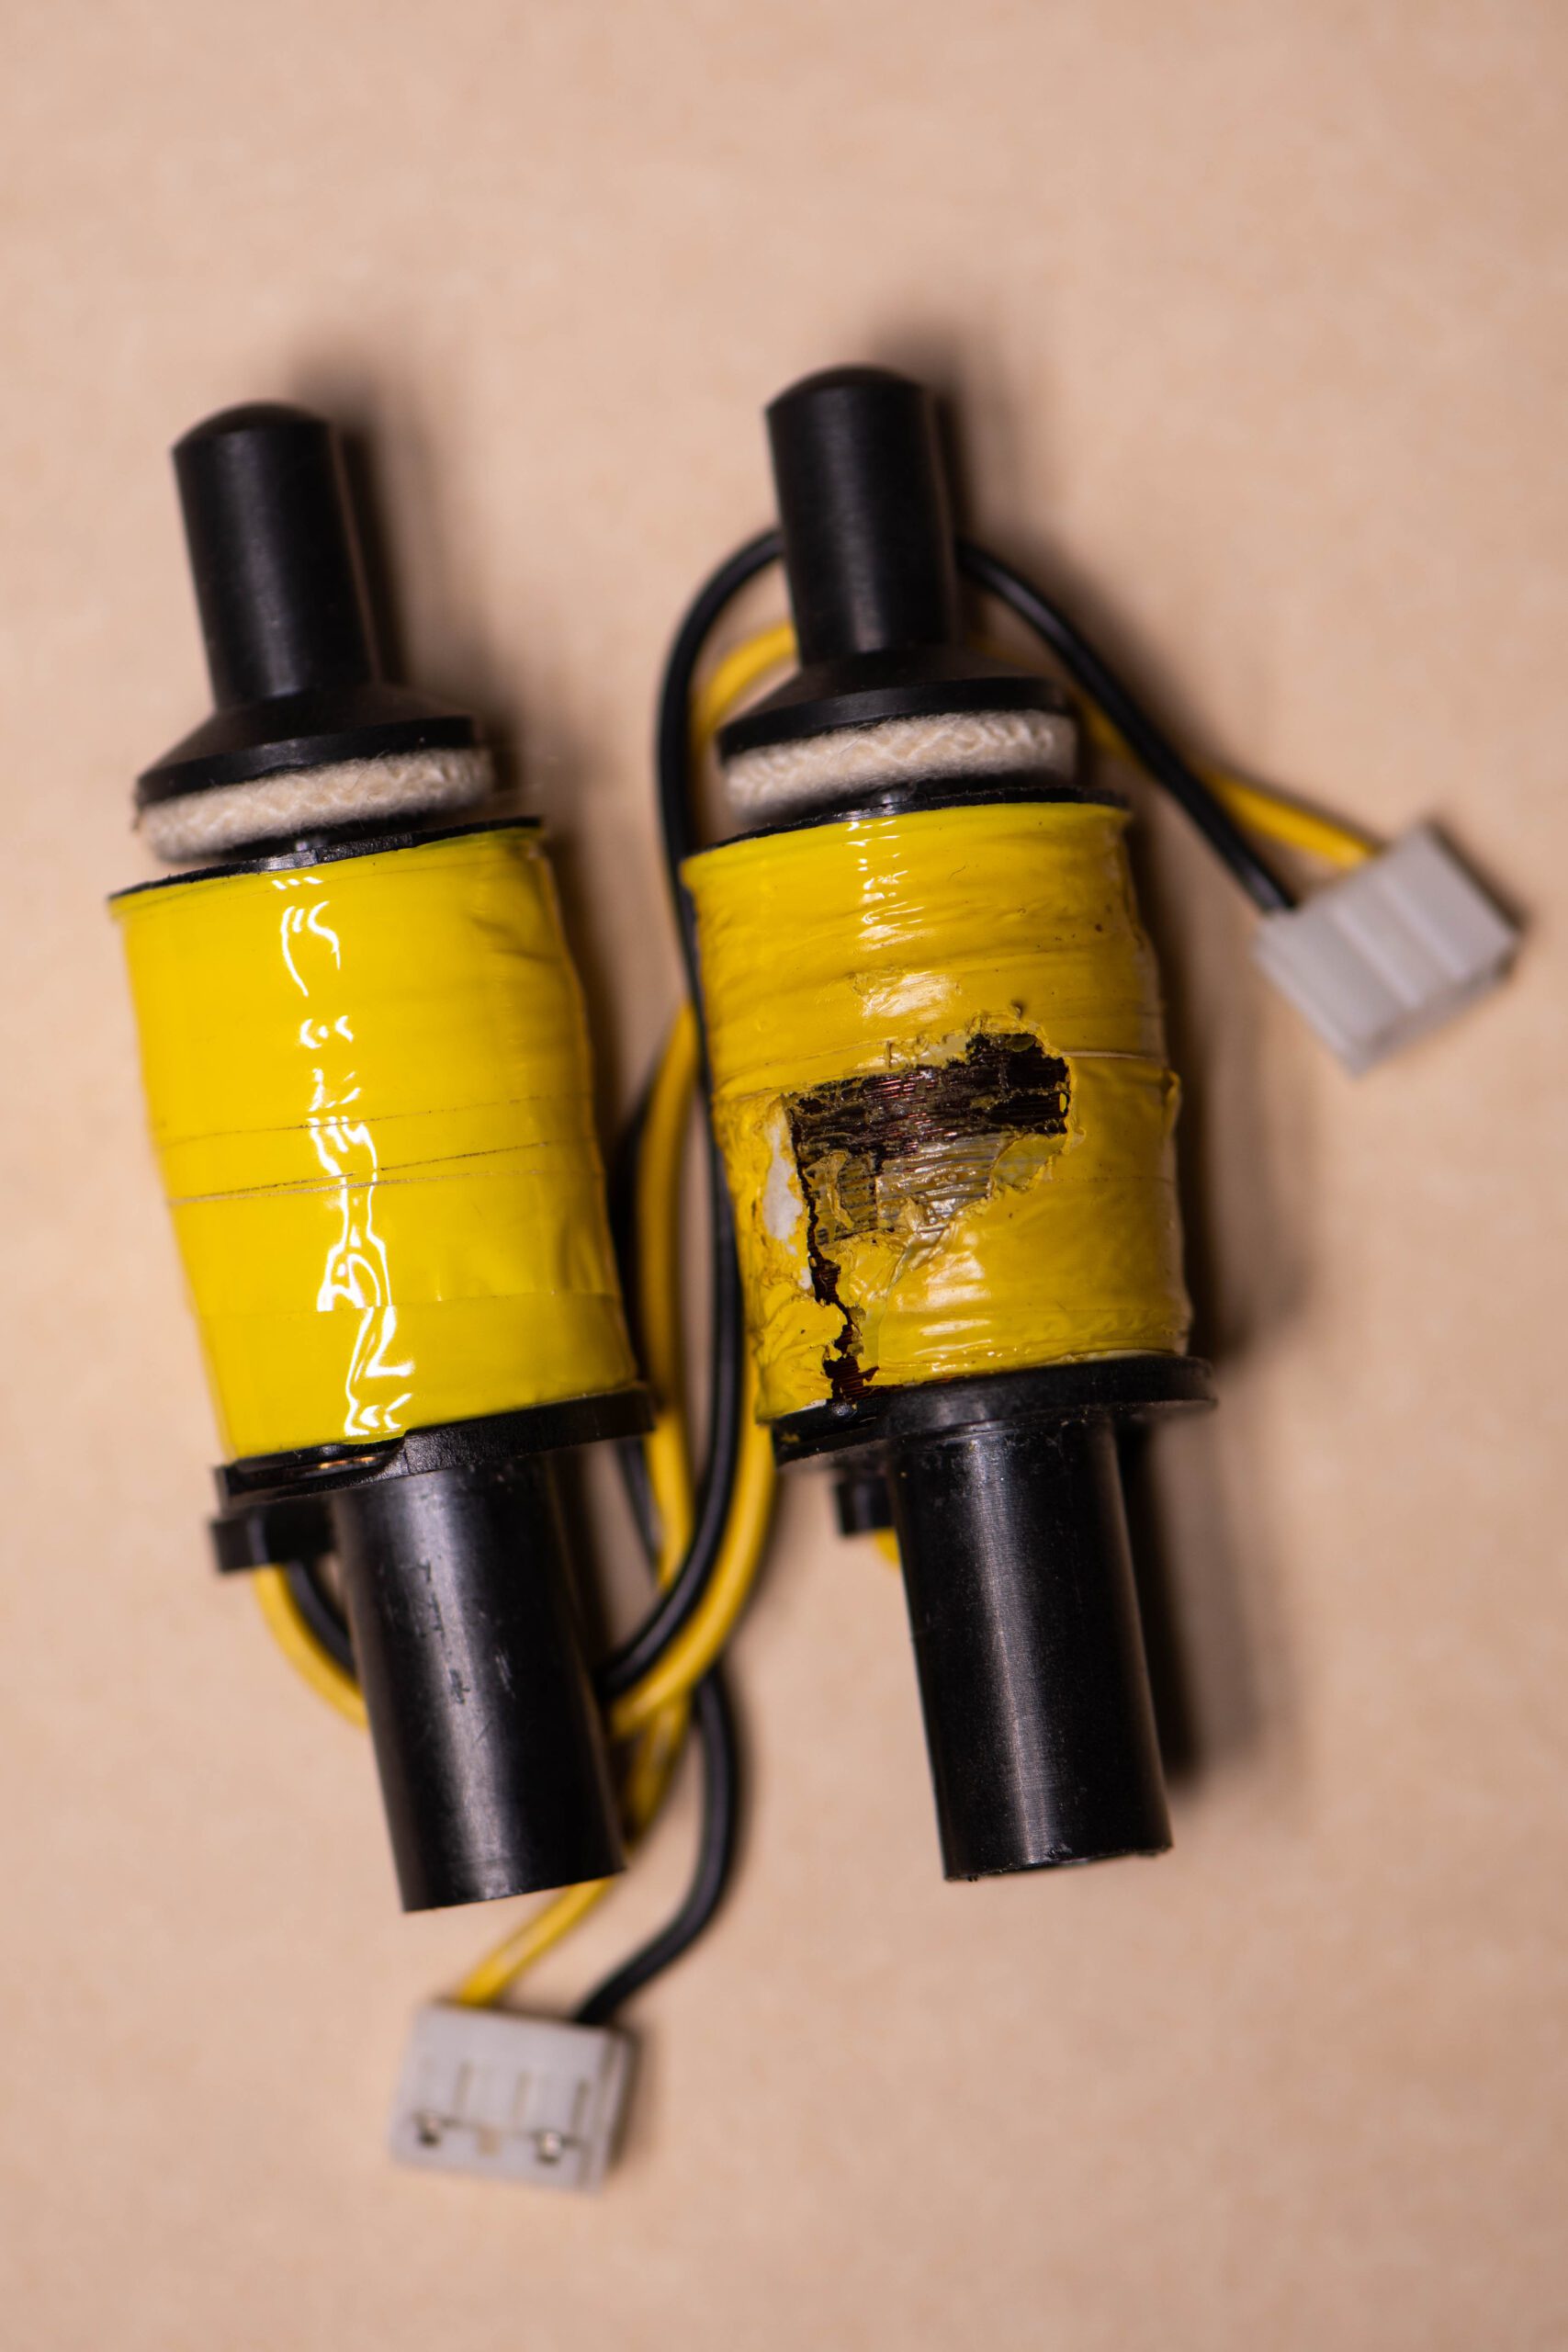
The key that was playing was a low D (specifically, D1). I disassembled the instrument and inspected the solenoid for that key. The solenoid assembly was exuding an enormous amount of heat. The burned coil can be seen below.
There was also considerable damage to the inside of the coil assembly. The solenoid was unable to move fully back down into the rest position, as the assembly was badly melted.
I replaced the solenoid; however, this did not solve the problem. The new solenoid would activate and rapidly heat up. At one point, F1 activated instead of D1, adding an interesting twist.
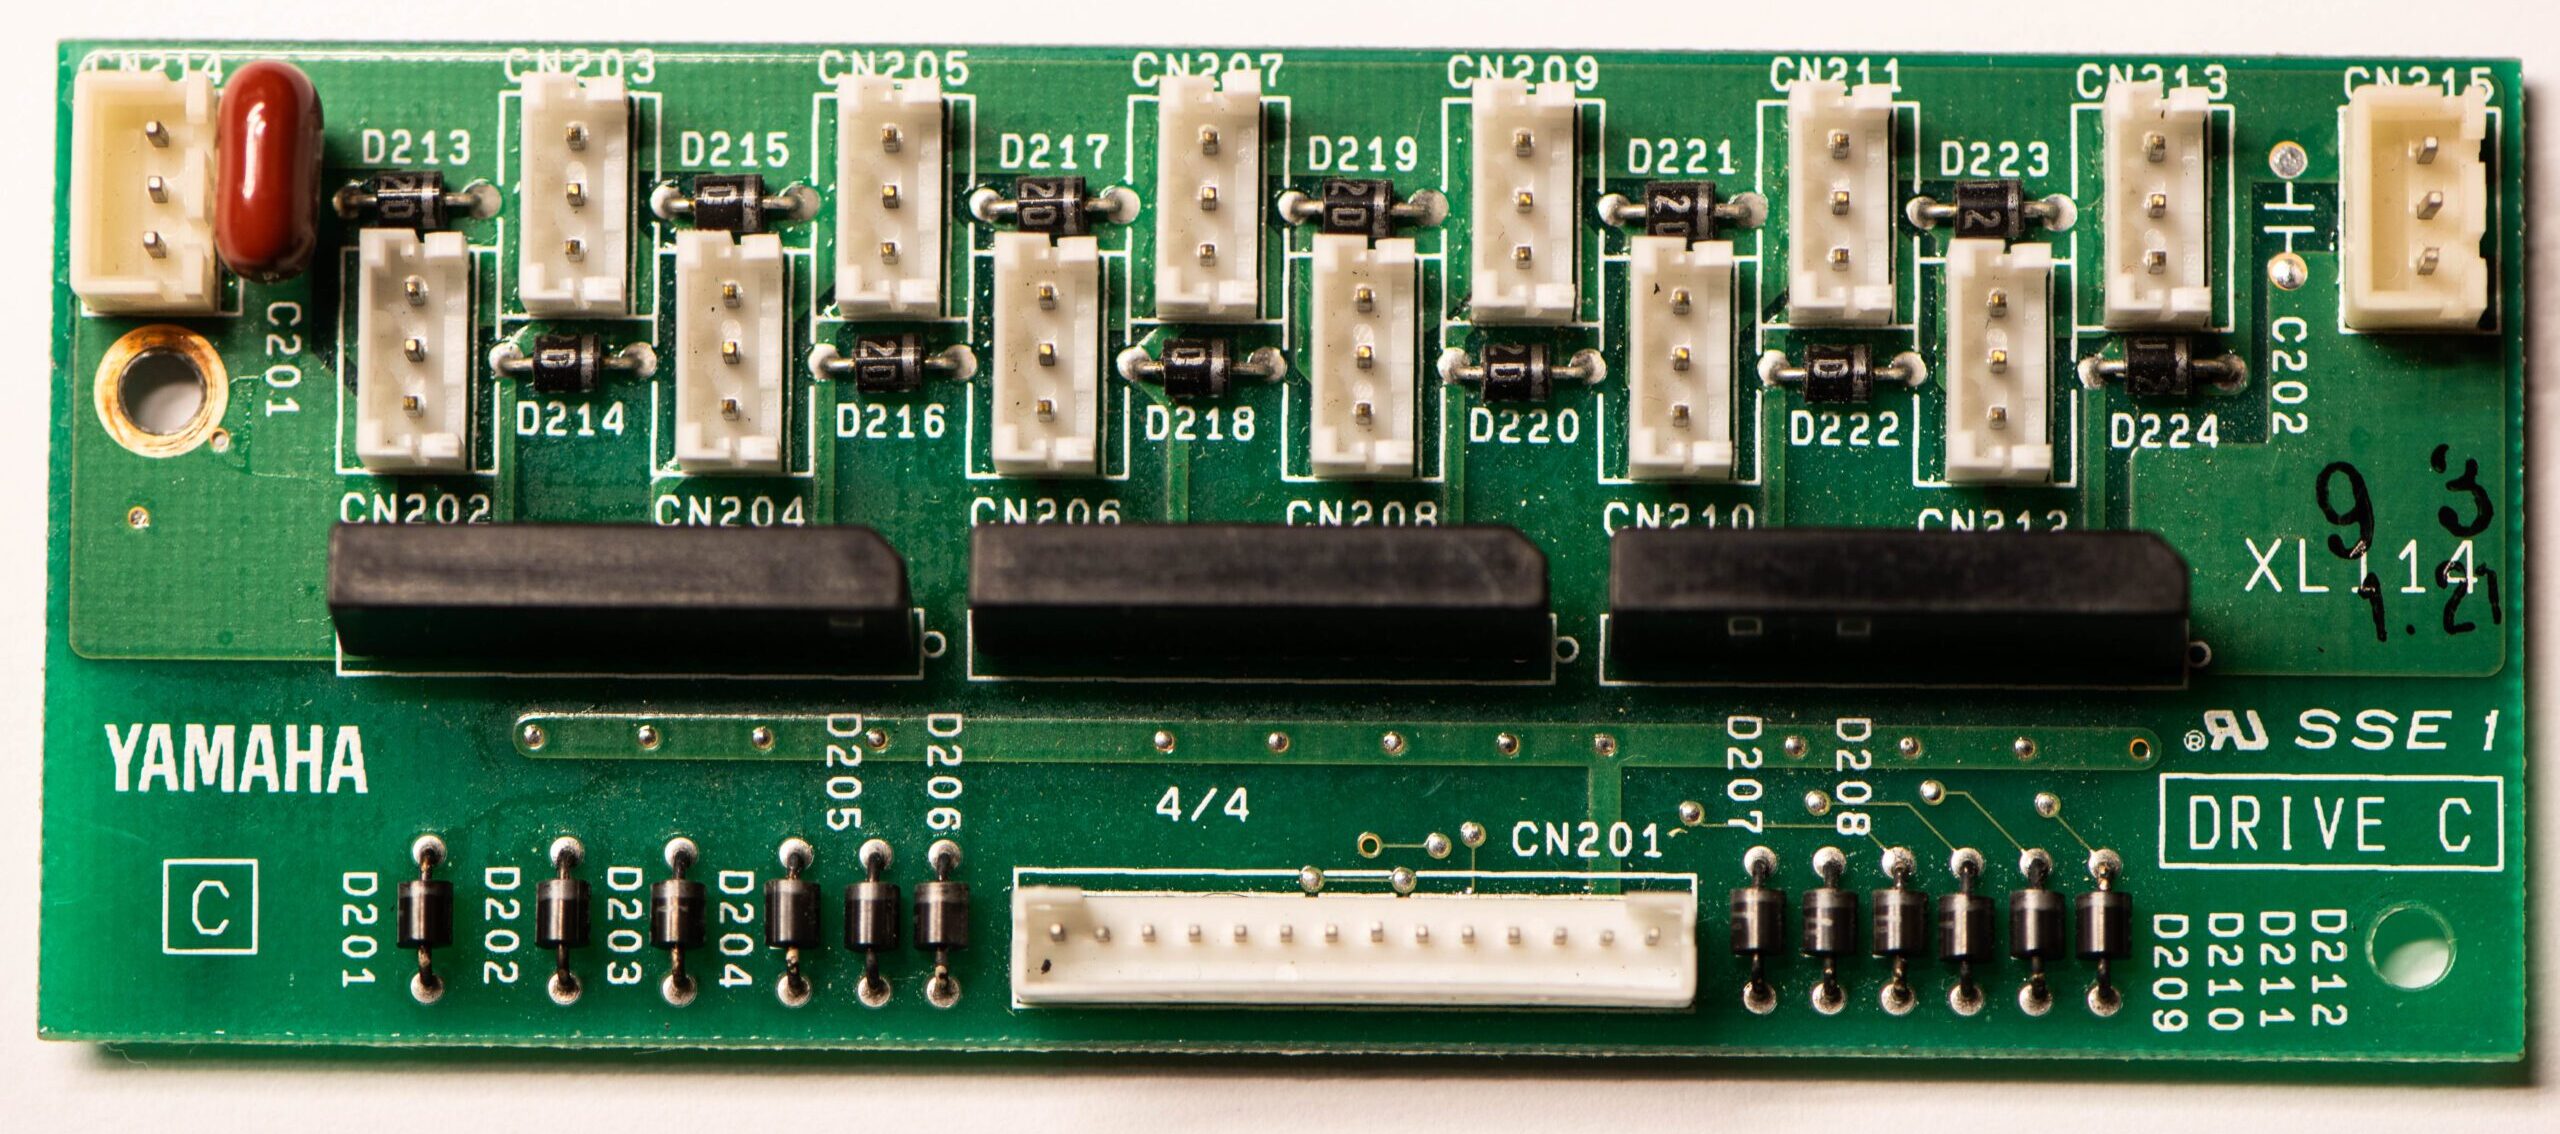
I disconnected CN201, meaning that the Drive C solenoid drive board was still receiving power from the Disklavier but wasn’t receiving a signal. This isolated the problem to the Drive C board. Replacing the solenoids made it clear that they weren’t the issue. Therefore, the problem had to be somewhere on the PCB below:
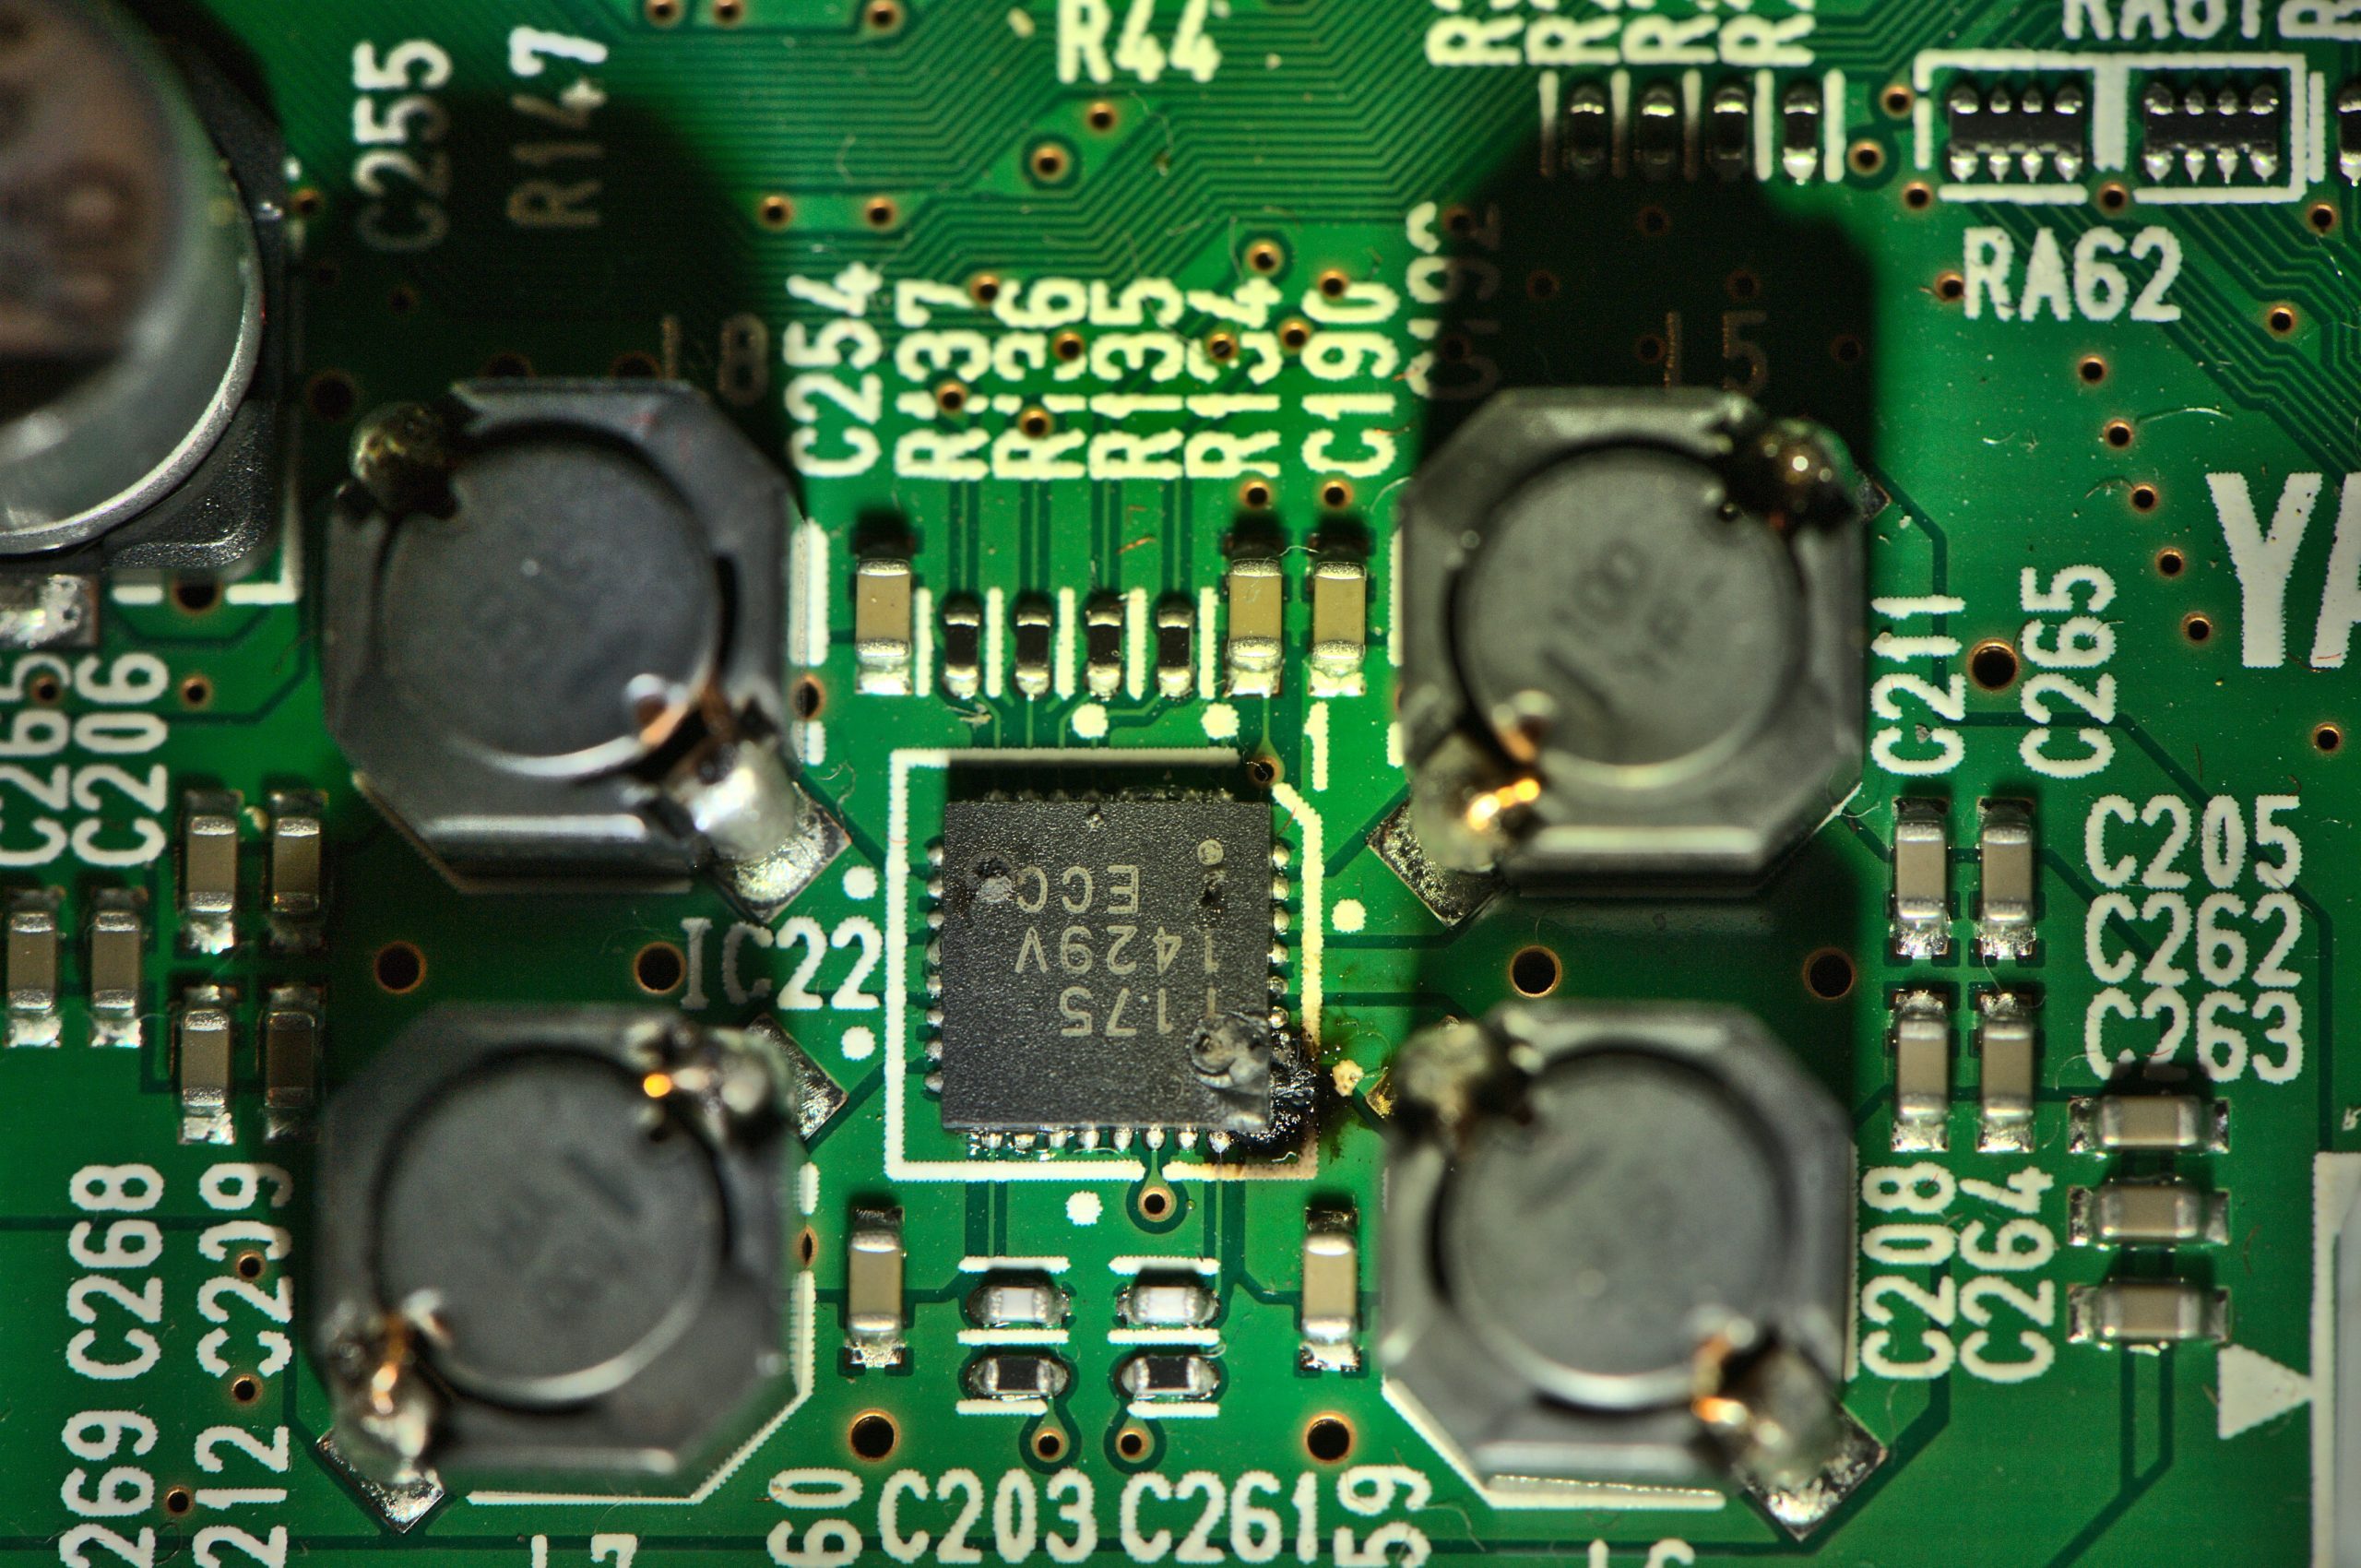
I traced the circuitry back from the solenoid. In the image above, the D1 key solenoid is plugged into CN207. I verified that diodes D213-D224 were all behaving correctly (between 400-600 mV forward, and 0 back). Eventually, I was able to trace the behavior to the transistor array. My current theory is that the transistor array failed, causing current to run to the solenoid continuously. The solenoid eventually melted the plastic sleeve. This would also explain why the F1 solenoid activated in place of the D1 during later tests—both key solenoids are attached to the same failing transistor array.
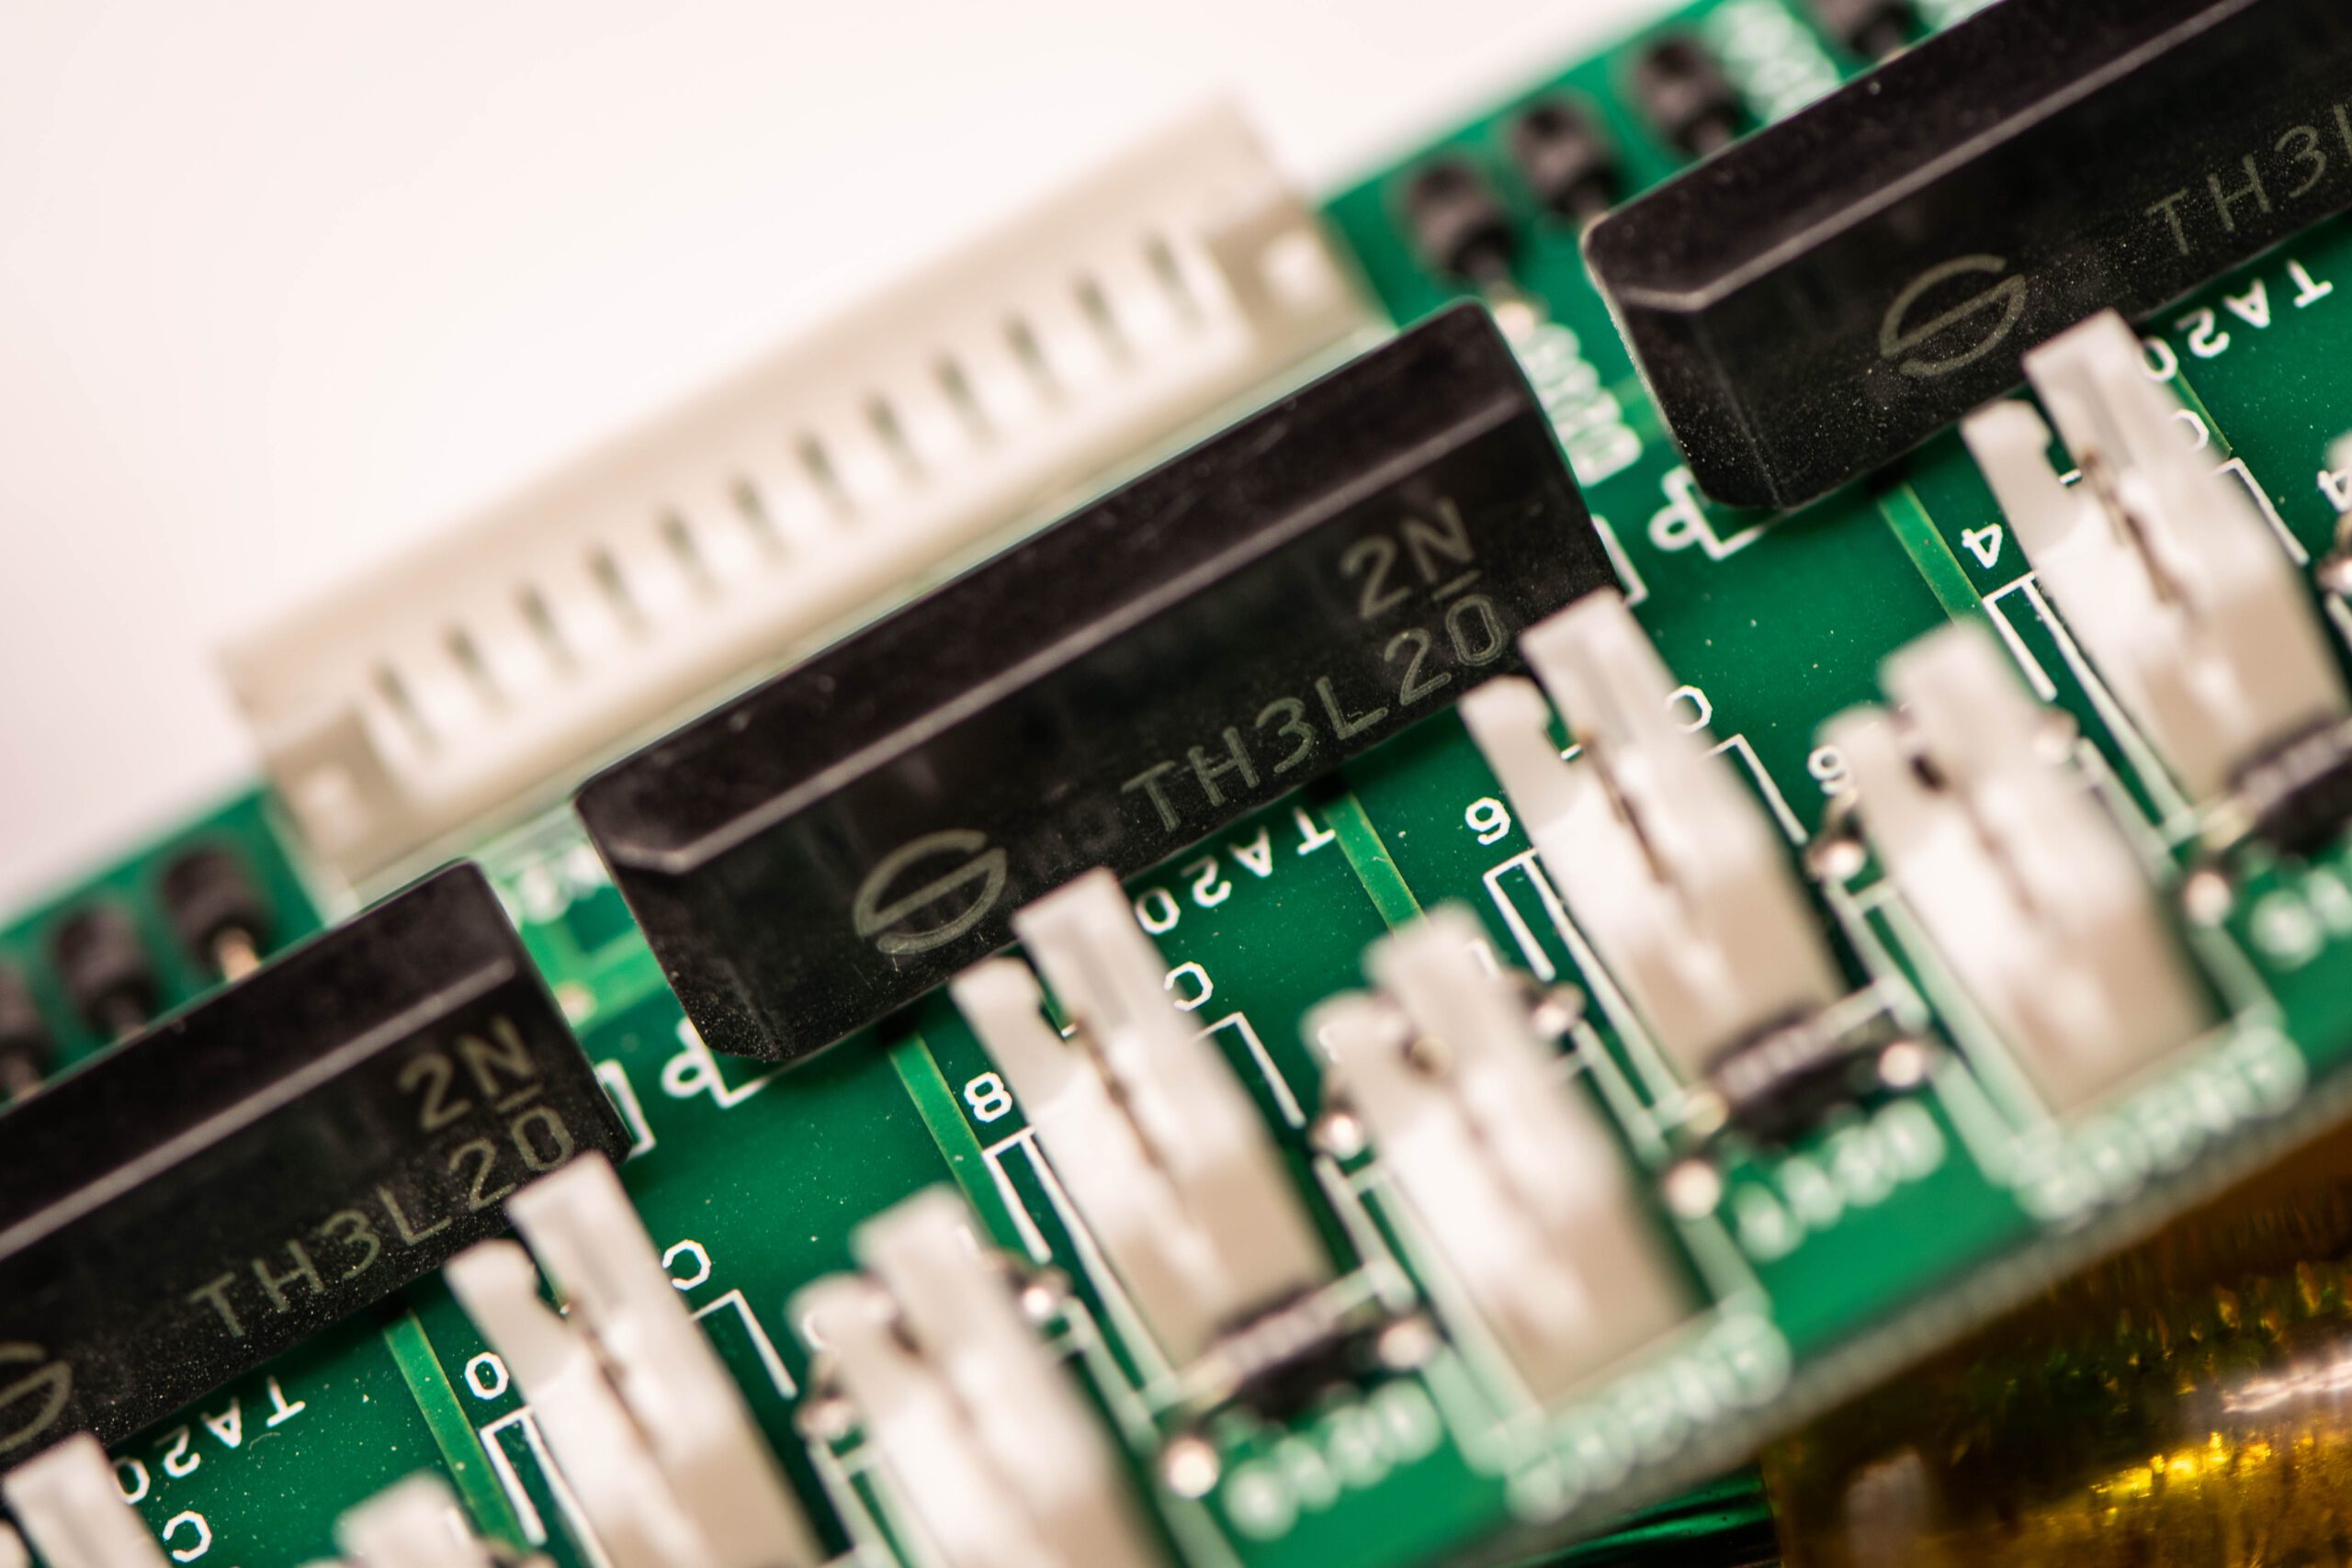
This is the failed component. In the MX100II, this transistor array (2NTH3L20 / Yamaha #VB293700) has been discontinued. However, the equivalent array is NX551020 available through Digikey.
I’ve had a couple of people reach out over the years looking for the bracket that supports the Yamaha DKC-850, otherwise known as the “hanger assembly.” The part number for this is, according to Yamaha, WT79210. Unfortunately, it’s been discontinued. However, you can use the hanger assembly for the Yamaha DKC-800, which is a perfect fit for the DKC-850.
The part number for this hanger assembly is ZE383601, and it’s readily available.
I was working on a Roland KR-370 that had been through a lightning strike, and I was looking for the BIN file to program onto a replacement EPROM (IC2). I did eventually find one, posted by a very helpful individual in the Badcaps forum.
Yamaha’s earlier floppy disks use the propriety ESEQ format. They also use a primitive form of copy protection, where the first sectors of the disks are missing. This means computers identify the disks as corrupt, requiring you to use specialized software to back up your Disklavier disks. In place of these sectors, Yamaha uses the PIANODIR.FIL file, which serves both as a file table and a song index.
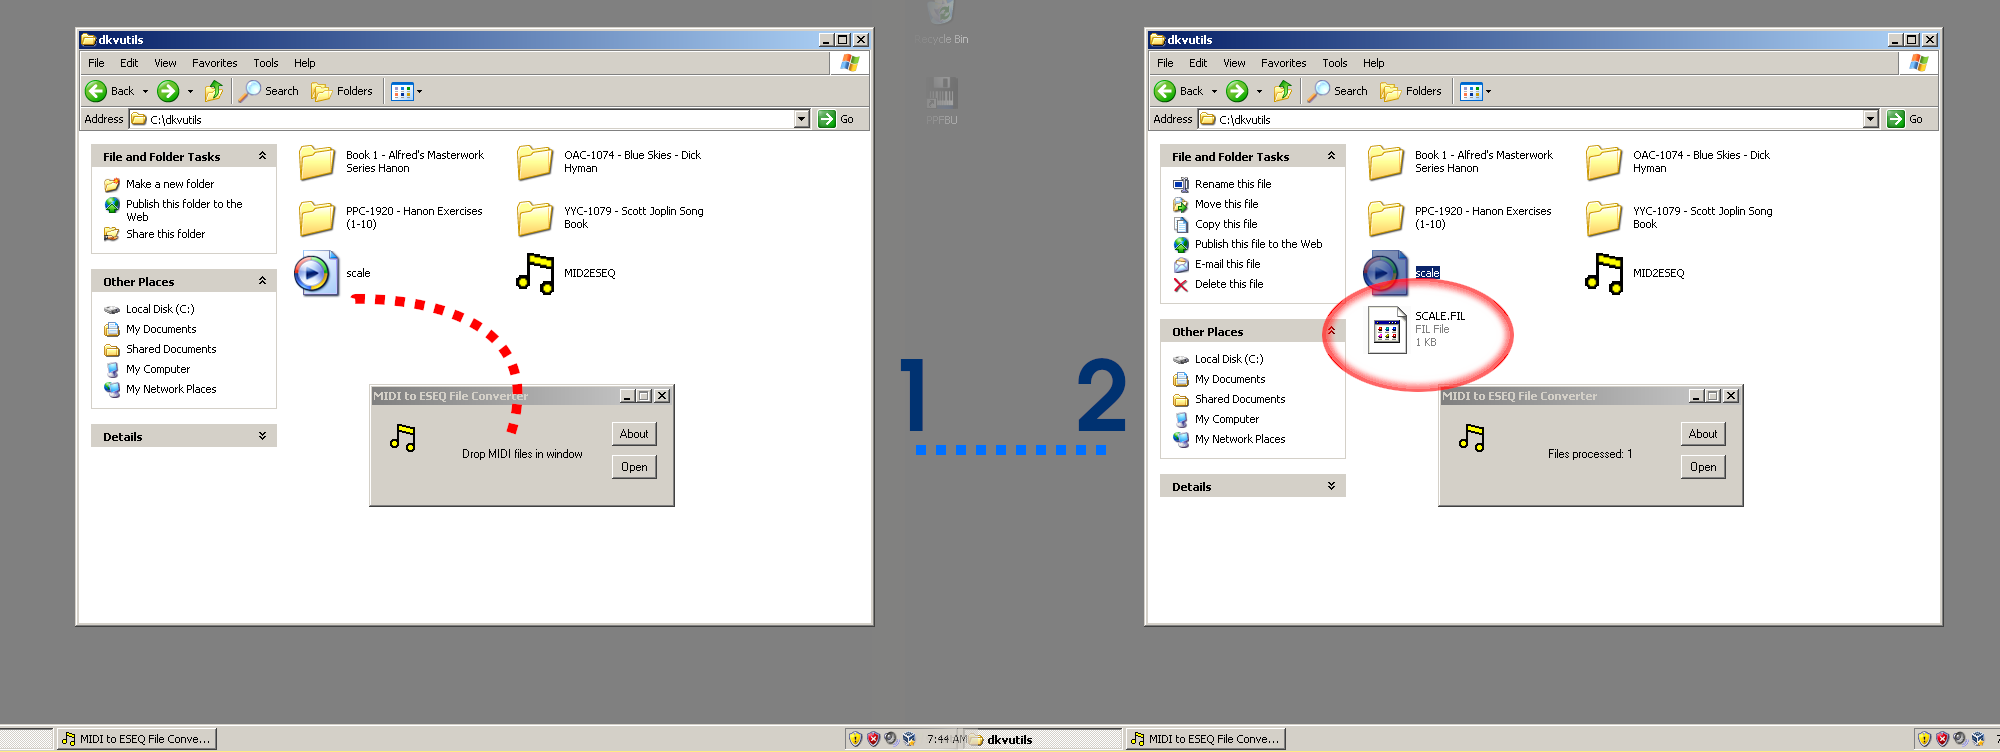
Once you download DKVUTILS.ZIP from my site or theirs, you’ll need to extract it. The program that converts MIDI files to ESEQ files is MID2ESEQ.EXE. This program runs only on Windows, and does not seem to run with emulators. Reach out to me and I can assist with conversion.
Using MID2ESEQ, just drag and drop MIDI files into the window.
If you have a Yamaha that’s capable of playing ESEQ only, you might also need to create a PIANODIR.FIL index. Continue scrolling down for instructions!
Creating a PIANODIR.FIL using ESEQ Explorer
If you are creating a floppy disk for use with an earlier ESEQ only Disklavier, or if you’re preparing ESEQ files for transfer to a Nalbantov USB stick, you might have to create your own PIANODIR.FIL.
Note: Please note that the filenames should be strictly eight characters long, have no spaces, and be entirely uppercase, including the FIL extension BEFORE following the process below. If you don’t do this, some pianos will be unable to read the files. I’ve created a program to conveniently rename all your .fil files at once, which is especially helpful if you have numerous albums.
First, put all the ESEQ files you’ve created in a folder together. The DKVUTILS suite includes a program called ESEQ Explorer. Once you open the program, select the directory you’ve stored your ESEQ files in (make sure they’re properly renamed according to the above instructions, or use my program to rename them for you). You’ll see a screen like the one below:
Note that, if you don’t currently have a PIANODIR.FIL, there will be a red X in front of it. That means it’s not present. Right-click on it and select Create Index. The contents of that folder are now ready to be added to a disk using the Nalbantov tools. If your file names are too long, you’ll see them renamed with ~ symbols. In my experience, this is a program, and indicates they likely won’t read in the piano. Make sure to rename them appropriately first.
I’ve also quoted the text file from the DKVUTILS.ZIP tool below, since they’re informative:
Yamaha Disklavier discs are always on Double Density (2DD) media, High Density (HD)discs, which are more common nowadays, will not work. Furthermore, they are formatted to 720 Kbytes not the default of 1.2 Mbytes. The original discs are copy protected. This has been achieved by placing invalid data on the first sector. As DOS and Windows always refer to this sector to check out a floppy, they will report that the discs are bad. The Yamaha machinery ignores the first sector, so it reads them normally.
The music files on a Disklavier disc have the extension .FIL. They are frequently identified with titles like PIANO001.FIL, but sometimes they have names similar to DOS like MUSIC1.FIL. In addition to the music files, there is an index file on the disc. This contains a list of the active music files on the disc, their titles, and pointers to their position on the disc. The index file is always called PIANODIR.FIL and always has a size of 6 Kbytes. In order to set up a Disklavier disc to function on a Disklavier, you must first copy the music files onto it in Disklavier format (ESEQ) and then run the ESEQ EXPLORER program to build the index file.
I recently had a client request I replace the stock GH3 action in her Yamaha CVP-305 with a Yamaha Natural Wood action, and I had an opportunity to do some experimenting.
The Yamaha GH3 keyboard action can be replaced with the NW-GH3 action, the GH3X action, or the NWX action. All four of the actions below seem to be interchangeable, with the features as listed:
Plastic
Wood
No Escapement
GH3
NW-GH3
Escapement
GH3X
NWX
Her favorite action was the NW-GH3. Although there’s some subjectivity, we mutually agreed that the natural wood actions were lighter than the plastic equivalents (which is a bit counter-intuitive initially), and that the escapement added perceived weight.
In other words, we found that the NW-GH3 action was the lightest action, perceptibly, and the GH3X was the heaviest.
I recently had a customer report their P105 was producing no sound, although occasionally, it emitted a scratchy noise. Attached to this post is a picture of the burned out chip I found inside the unit. The solution was a replacement DM board (Yamaha #ZJ257000).
The Yamaha HQ100 is a so-called “gray-market” upright. A gray market piano is one that’s authentically manufactured by Yamaha, but is not intended for sale in a specific geographic region or country. Instead, it’s sold as “gray market” — a market that exists outside of the official distribution channels and is not authorized by the manufacturer. In this case, the HQ100 is the Japanese version of the Yamaha MX100II, with a few small modifications.
Like all Yamaha Disklavier uprights, Dampp-Chasers cannot be installed inside the cabinet. There isn’t any room. Instead, a backside system is installed between the support posts behind the piano. The back is then ensconced in a light fabric to keep the humidity-controlled air inside.
However, the HQ100 has one significant oddity: There are only two support posts. The double bucket system usually installed just doesn’t fit. So in this case, after communicating with Dampp-Chaser, I opted to install a full-size bucket on the rear of the system. A thin layer of foam or neoprene needs to be pasted to the sound-board side of the bucket, and a full-size baffle needs to be installed, but otherwise the system is installed like a typical back-side system. The dehumidifier brackets did require some bending to get them to fit properly.
For the Velcro, I used two feet of two inch wide Velcro, with the male side backed with a strip of neoprene. The picture is below: