Alex Peppe learned the trade of piano tuning and repair from his father, Eric Peppe, and subsequently began tuning under his father’s supervision. He also worked as the exclusive in-house piano technician at Starbird Music for six years: He tuned, regulated, and repaired a wide variety of both consignment pianos and new floor models, and was able to begin exploring the tremendous variety of pianos here in Maine. He learned the value of listening and asking questions from Starbird’s legendary salesman, John Nickerson.
Alex is now an independent tuner/technician, operating throughout the Southern Maine region. He enjoys getting to meet a wide variety of incredible people, their pianos, and their pets. His main goals are to provide a customer service experience that is exceptional, and for his customers to always feel their piano got more care and attention than they paid for.
Alex lives with his wife Kati and his step-daughter Saoirse, on their farm sanctuary with their many animals. You can also check out their recipe blog, Plant-Based and Practical. And of course, you can also see a gallery of the goats and other animals that live with them.
Aside from piano tuning, I offer the following services:
Evaluation
I strongly recommend getting all used pianos evaluated before purchasing. It is very discouraging to get a piano—especially a “free” piano which still costs hundreds of dollars to move—only to discover that it is, in fact, not able to be tuned.
If you are interested in looking up the age of your piano, many can be found online at Bluebook of Pianos. All you will need is your serial number and the piano’s make. The serial number is usually visible near the tuning pins (under the lid on an upright).
Appraisal
After evaluating a piano, I can give you a formal document with a monetary value. This is useful if you are selling a piano, or if you require documentation for insurance or tax purposes. I will also determine the value of damage to a piano.
Regulation
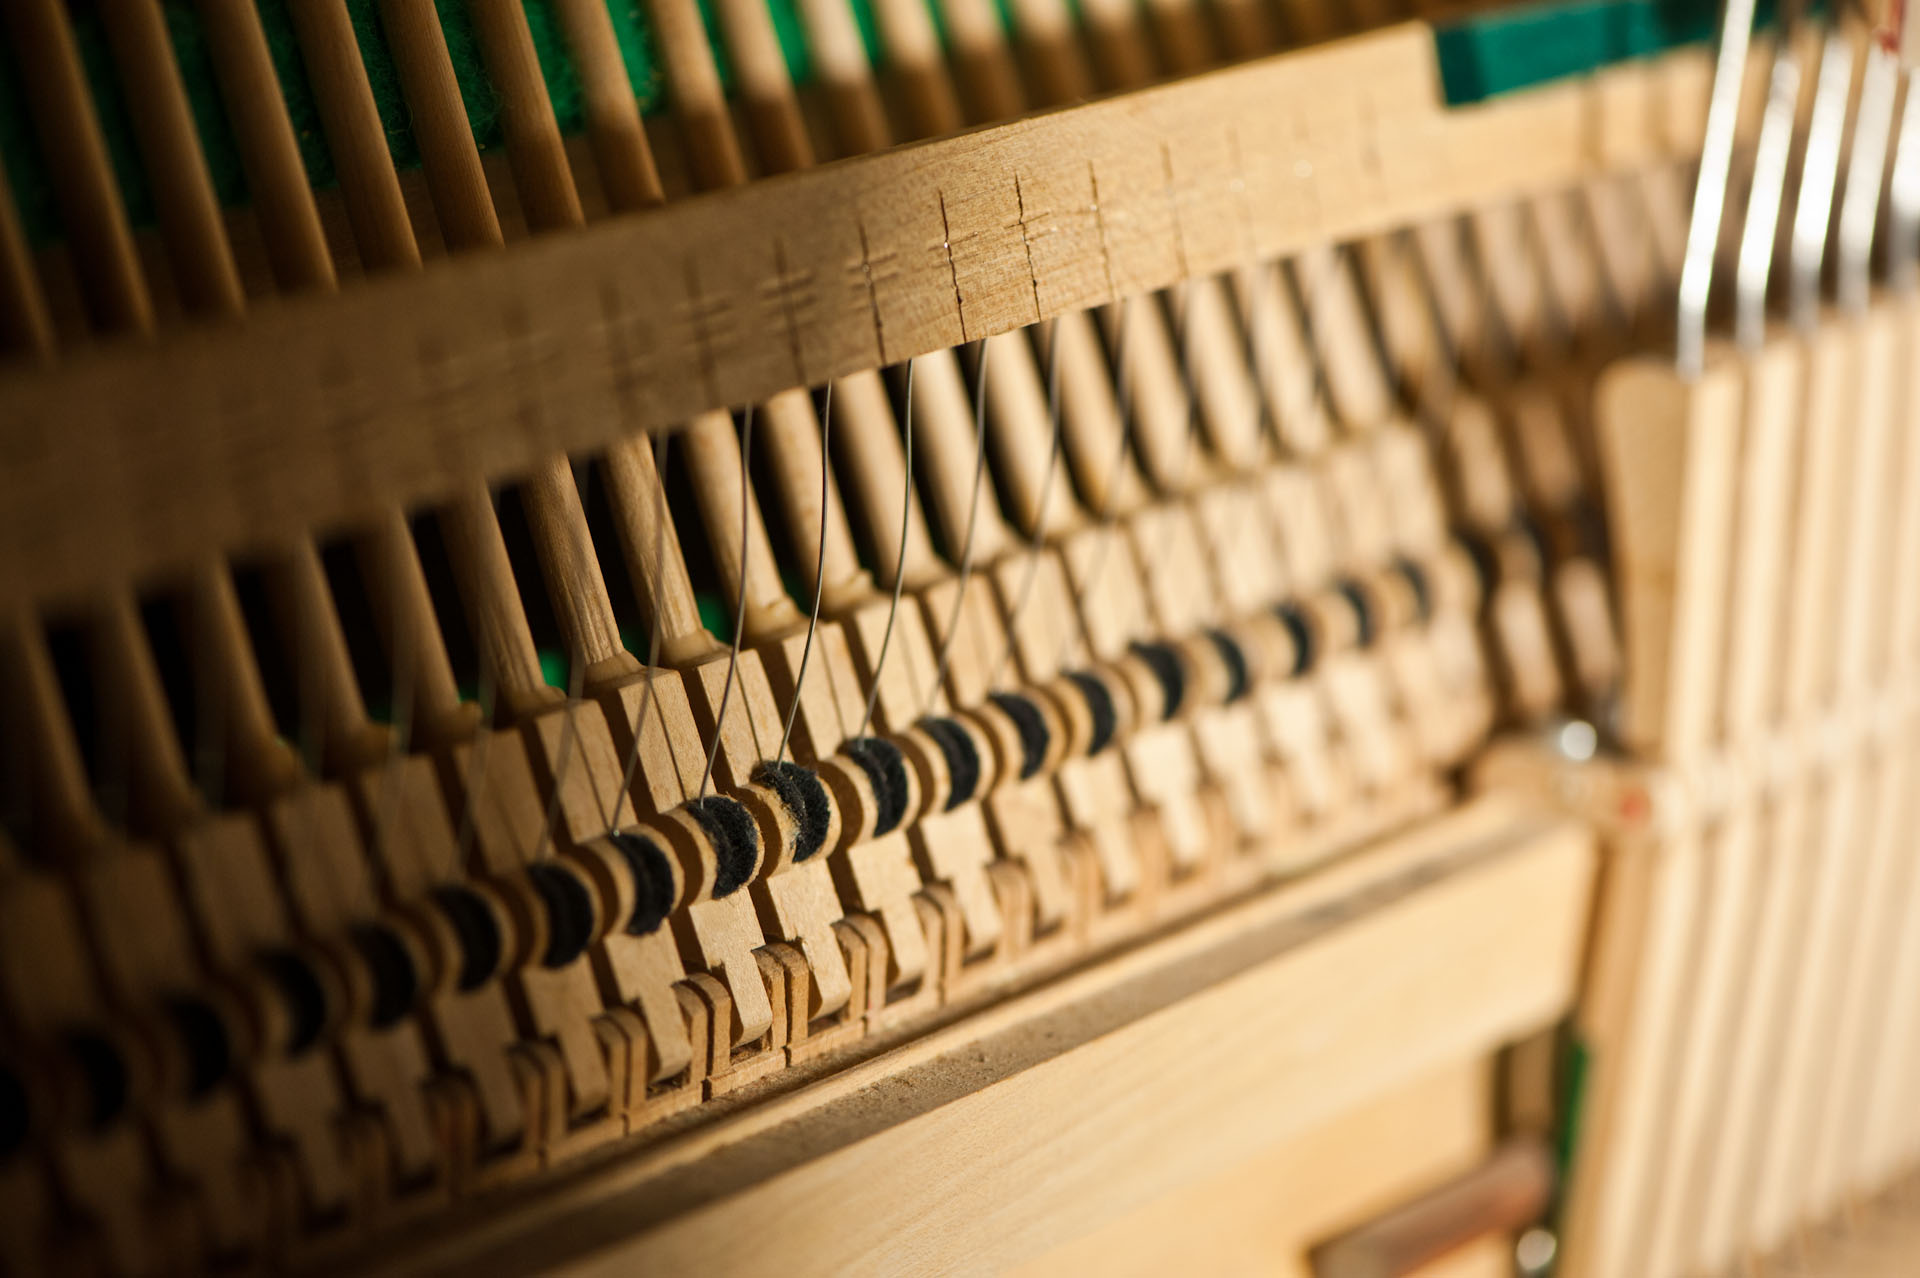
As pianos age, they undergo many changes: Felt and cloth compact, wood changes shape, and glue weakens. This can cause many different feelings and sounds:
Keys can stick or feel “slow”
Keys can have “lost motion,” which creates an unresponsive, gummy feeling
Keys can feel like they’re tight and “bounce”
Keys can wiggle and feel loose
Keys can become visually uneven
Hammers can hit multiple notes
Certain keys can make clacking sounds
A degree of regulation is included with a standard tuning; however, if a piano requires a lot of regulation in multiple areas, or if the regulation actually requires more serious repairs, there may be additional costs.
More Significant Repairs
Some piano issues require more than regulation.
Pianos can emit mysterious buzzes
Pedals can stick, clank or not work
Strings can break
Keys can fail to play at all
If the repair is quick and straight-forward, it is often included in a basic tuning. Otherwise, more complicated or extensive repairs can be made at an hourly rate.
Major repairs that require a shop—such as major rebuilding where the piano needs to be tipped or lifted—are referred to piano rebuilders in the area. I do not refinish pianos. Refinishing is a woodworker’s craft. Some rebuilders do refinish pianos, but many do not and refer that business to local woodworkers.
Dampp-Chaser Piano Life Saver System® installation
In many spaces, it’s difficult to regulate humidity to the degree necessary to protect your piano. For some people, the time and effort required might be unreasonable, and in some settings it might not be possible. A Dampp-Chaser Piano Life Saver System® will protect your piano from both humid summers and dry winters, and is capable of responding in real-time to the drastic changes that are an almost daily occurrence here in Maine. The only maintenance necessary is filling the humidifier, which needs to be done roughly every other week, and the periodic replacement of wicks (usually annually).
I’m registered with Dampp-Chaser as an installer, and maintain nearly 100 systems throughout the state. Every time I tune your piano, I’ll inspect the condition of the Dampp-Chaser wicks and replace them if necessary. I provide both the inspection and replacement as a complimentary part of my service.
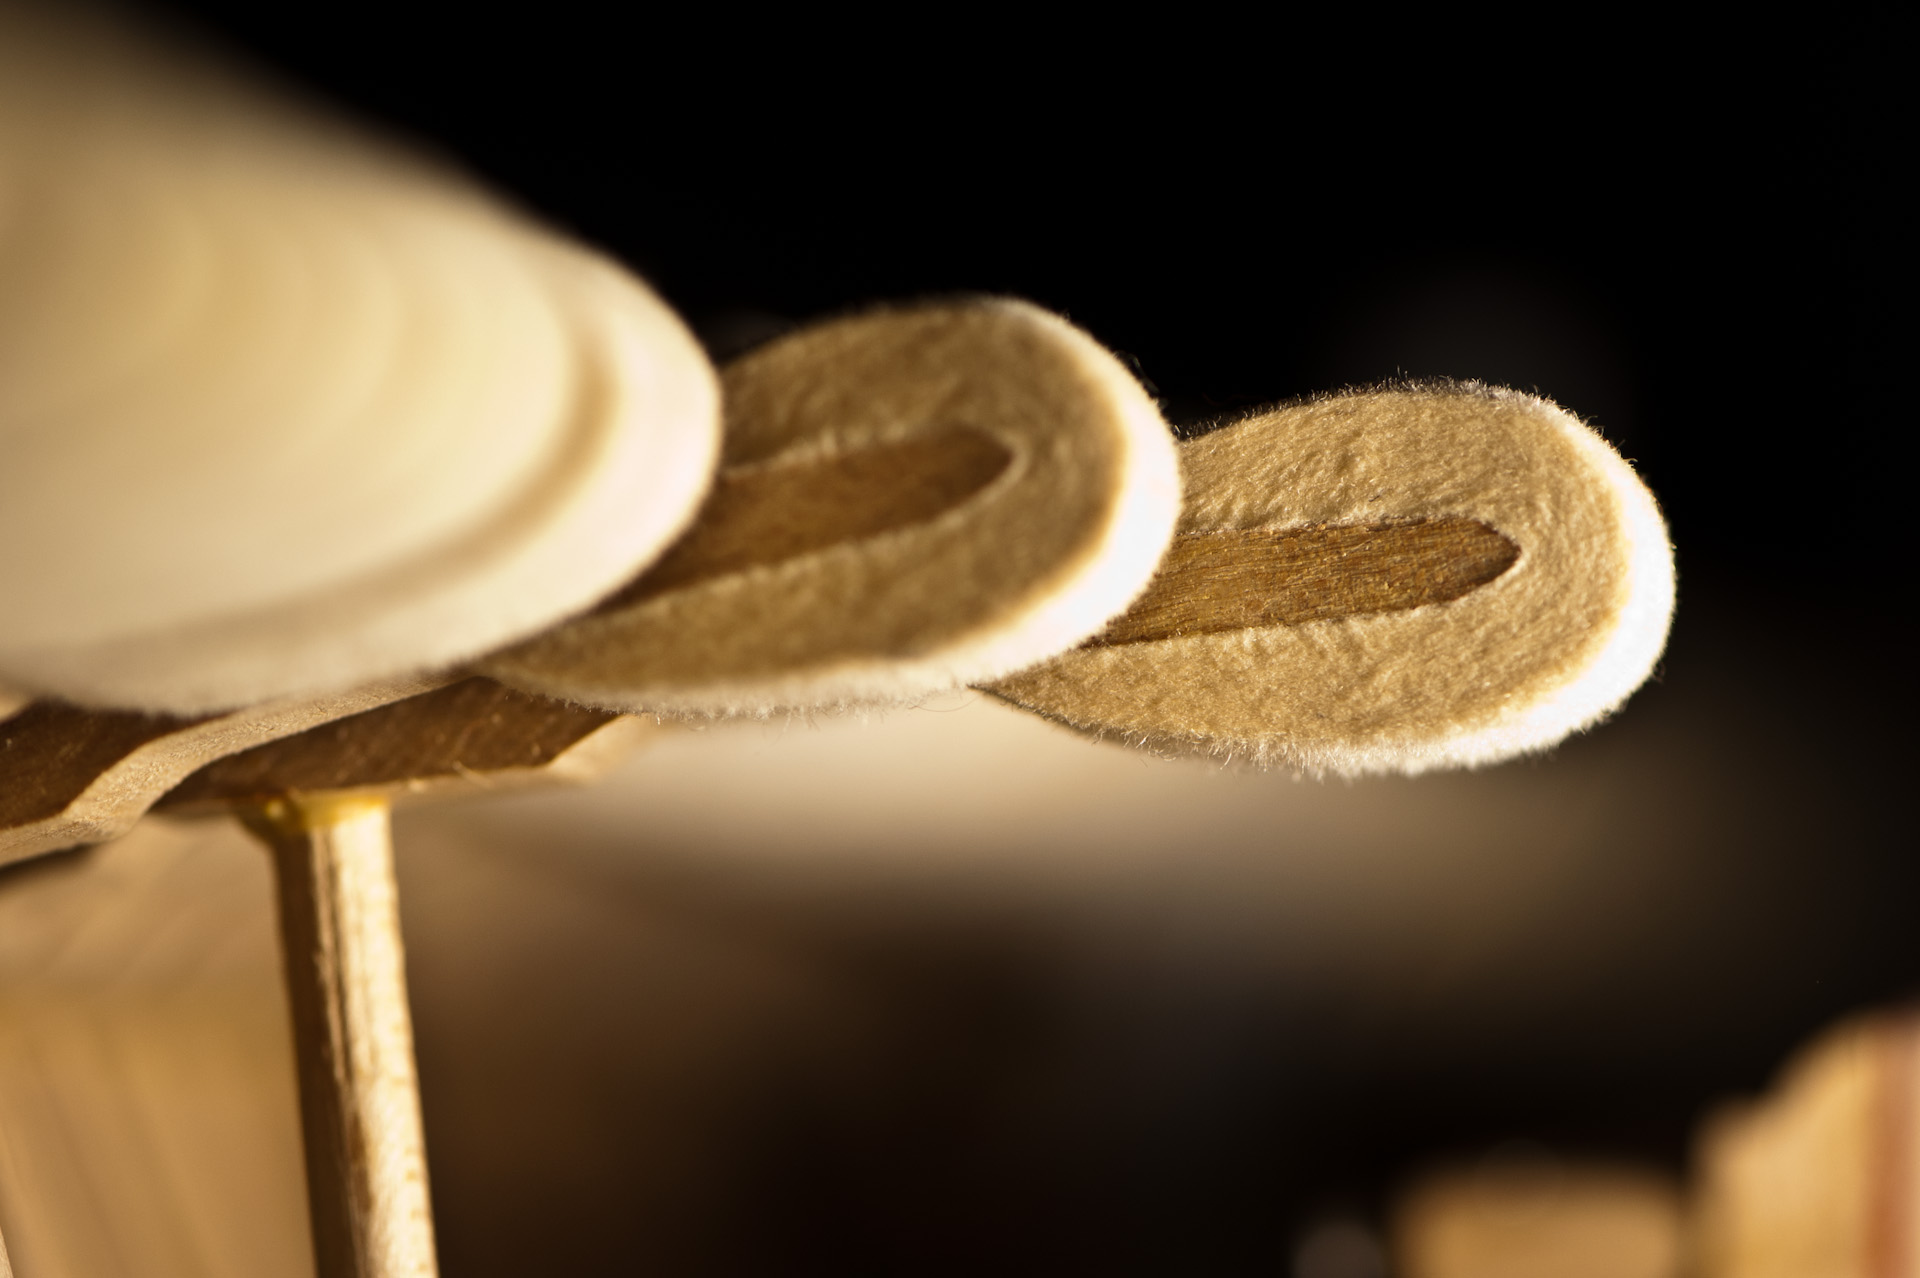
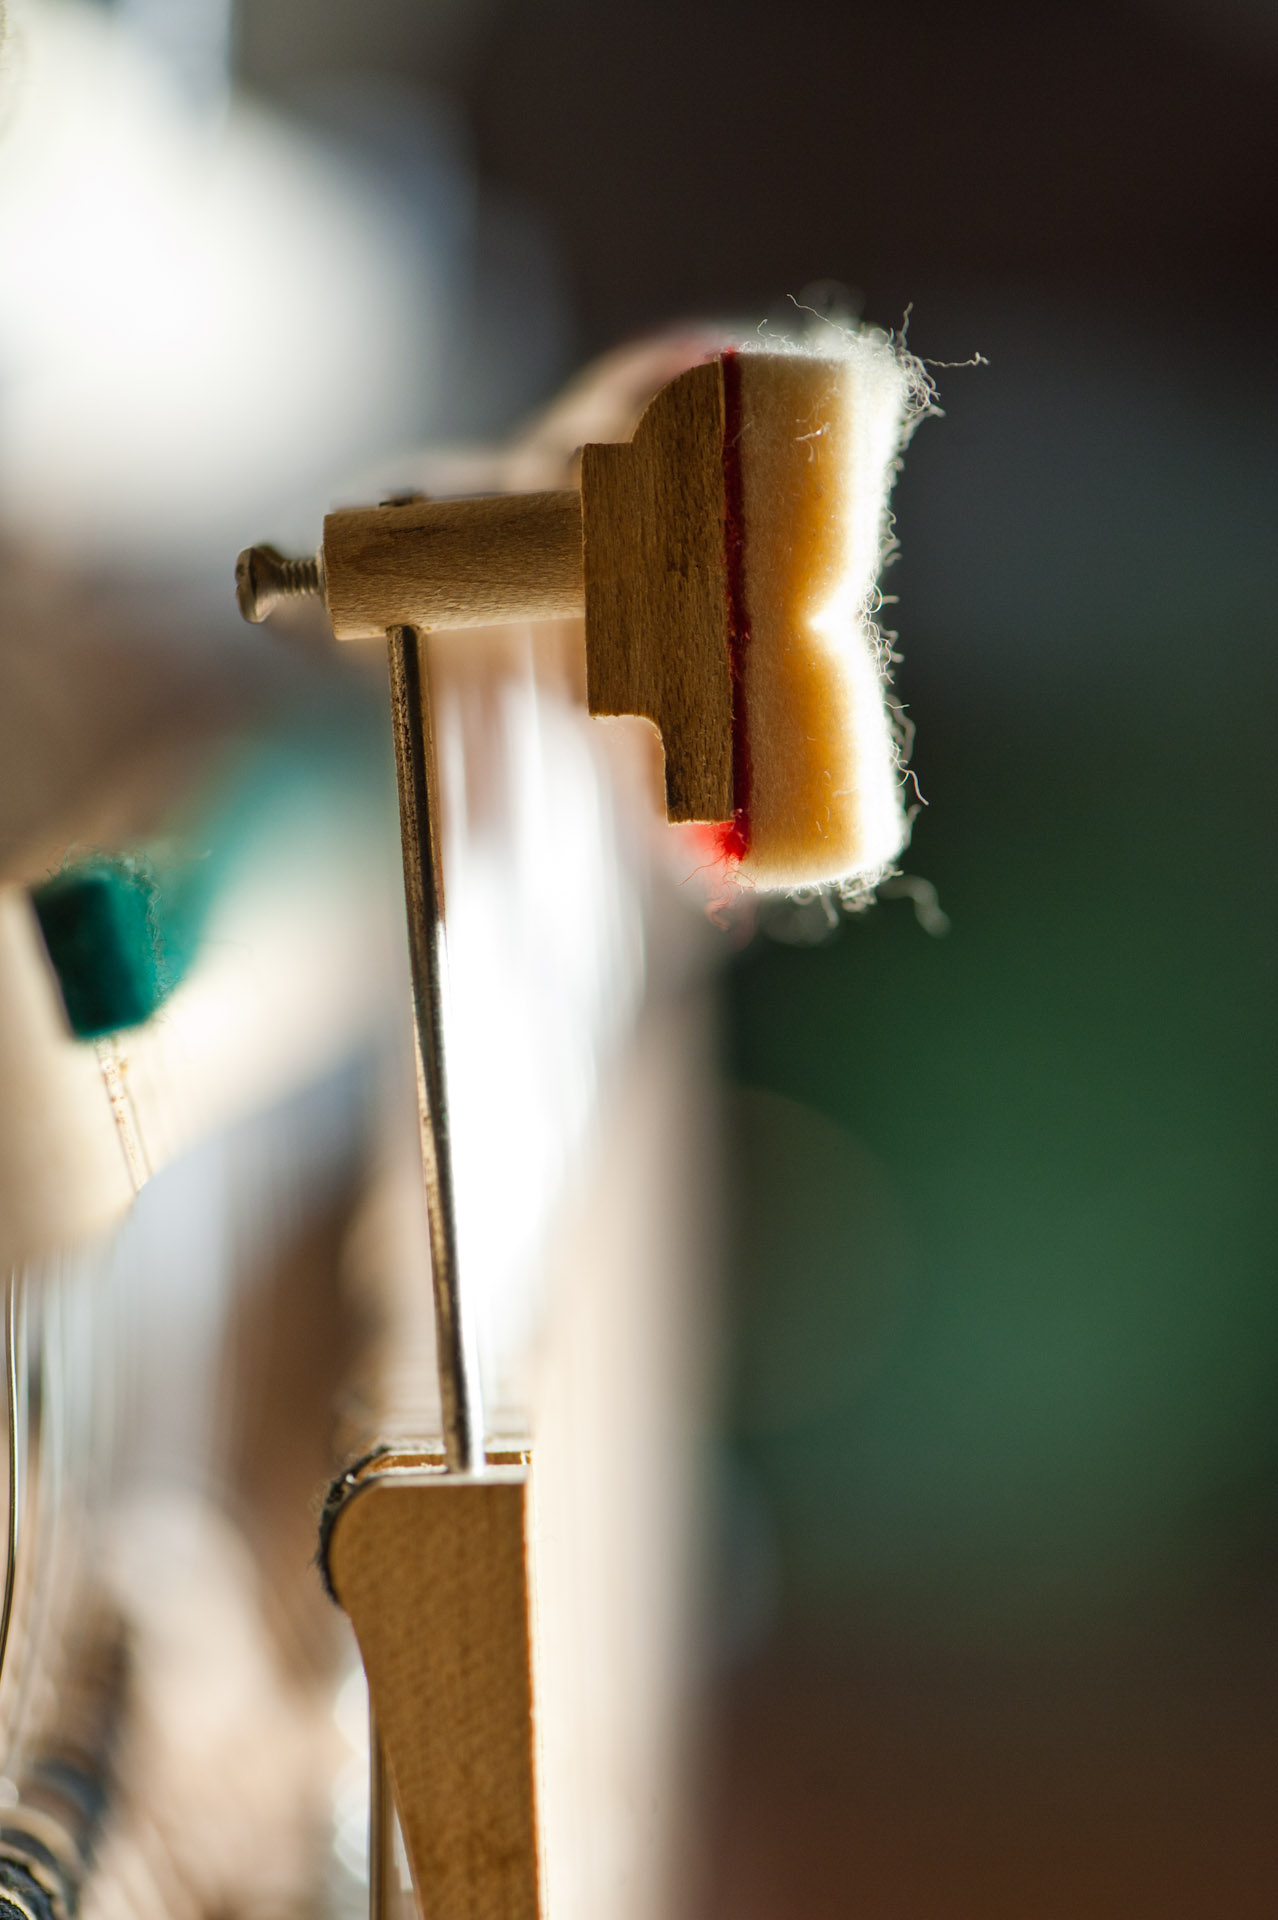
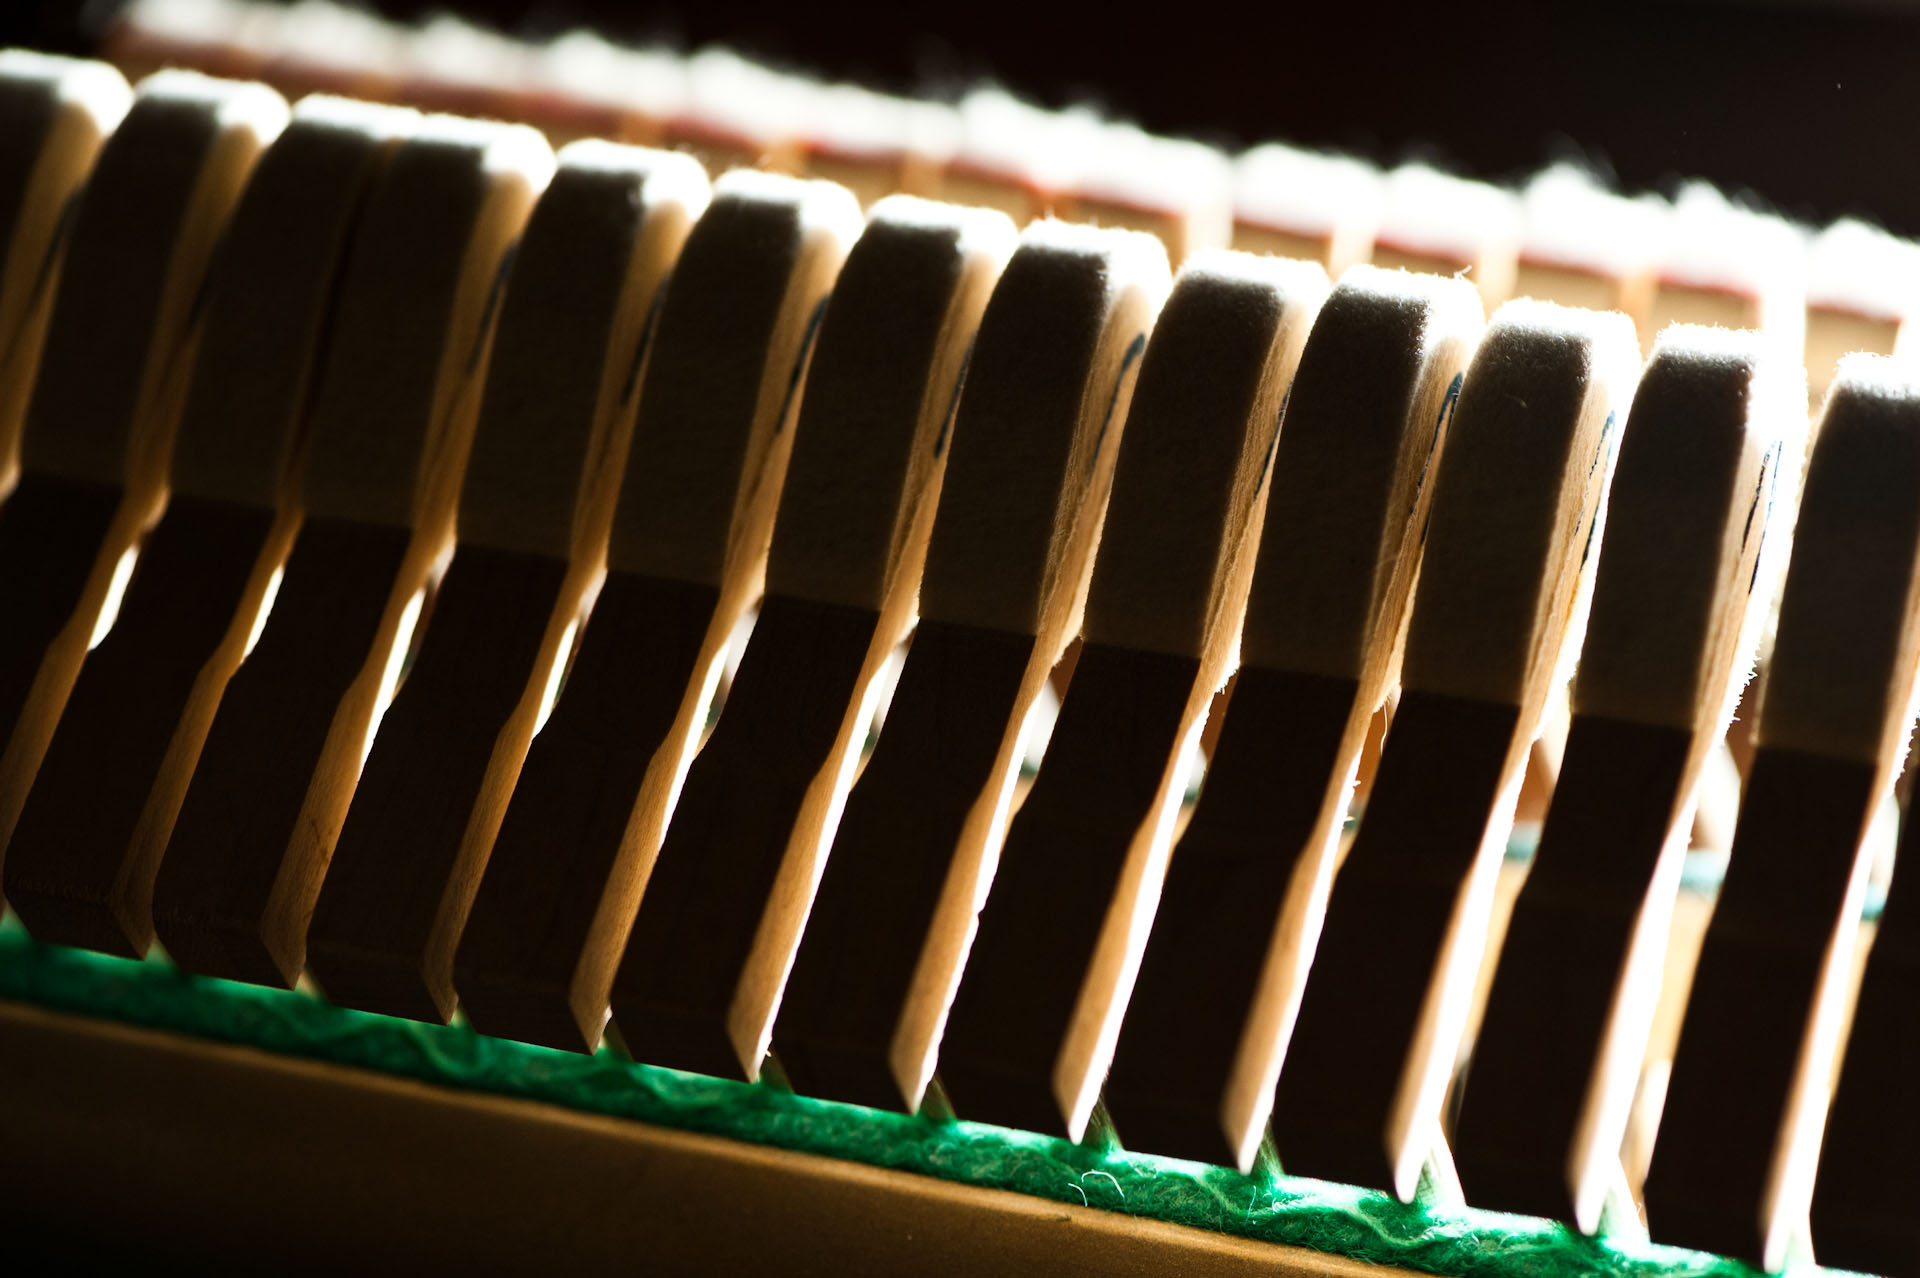
The component of the action that strikes the string is called the hammer. As a piano ages and is played, the hammers becomes stiffer and more grooved. These hammers can be filed or needled to produce a softer sound. Sometimes, one particular hammer will become more hard or soft, making one note sound different from all the others. These hammers can be softened or hardened to make them sound more consistent with the rest of the piano. Sometimes hammers also move, causing a softer part of the hammers—one that hasn’t been grooved by years of use—to strike the keys and produce a very different tone.
Cleaning
If a piano has been stored or has been exposed to very high humidity, smoke, or mice for a prolonged period, it may require cleaning for optimal performance. Dirt and mold can change the sound and feeling of a piano and cause keys to feel “sticky.” Generally, this includes vacuuming all components and using an air compressor to remove dirt from between and under the keys and inside the action. This is not for restoration, but for playability.
Benches, covers, and other parts
I can order any parts and piano accessories for you and bring them to our tuning. For a full menu of available items, see the Schaff Piano Supply catalog.
I now offer part replication!My shop now has 3D printing capability with a wide variety of sizes and materials.For individual piano owners, this means I can now replicate even the most difficult-to-find parts that piano suppliers might not carry.
To other piano technicians, I’m happy to offer my services duplicating those difficult-to-find parts. Please contact me and I’ll make that perfect party!
I will not charge travel for any piano within an hour of Portland, Maine. I am willing to travel farther, although I will sometimes charge for considerable distances and trips to islands if there aren’t enough other customers in the area. If you are dramatically outside my area, see my Resources page for other technicians.
Discounts
I offer discounts to regular customers, schools, churches, retirees, nonprofits, and home-schooling families. I also have special deals for piano teachers.
Return Policy
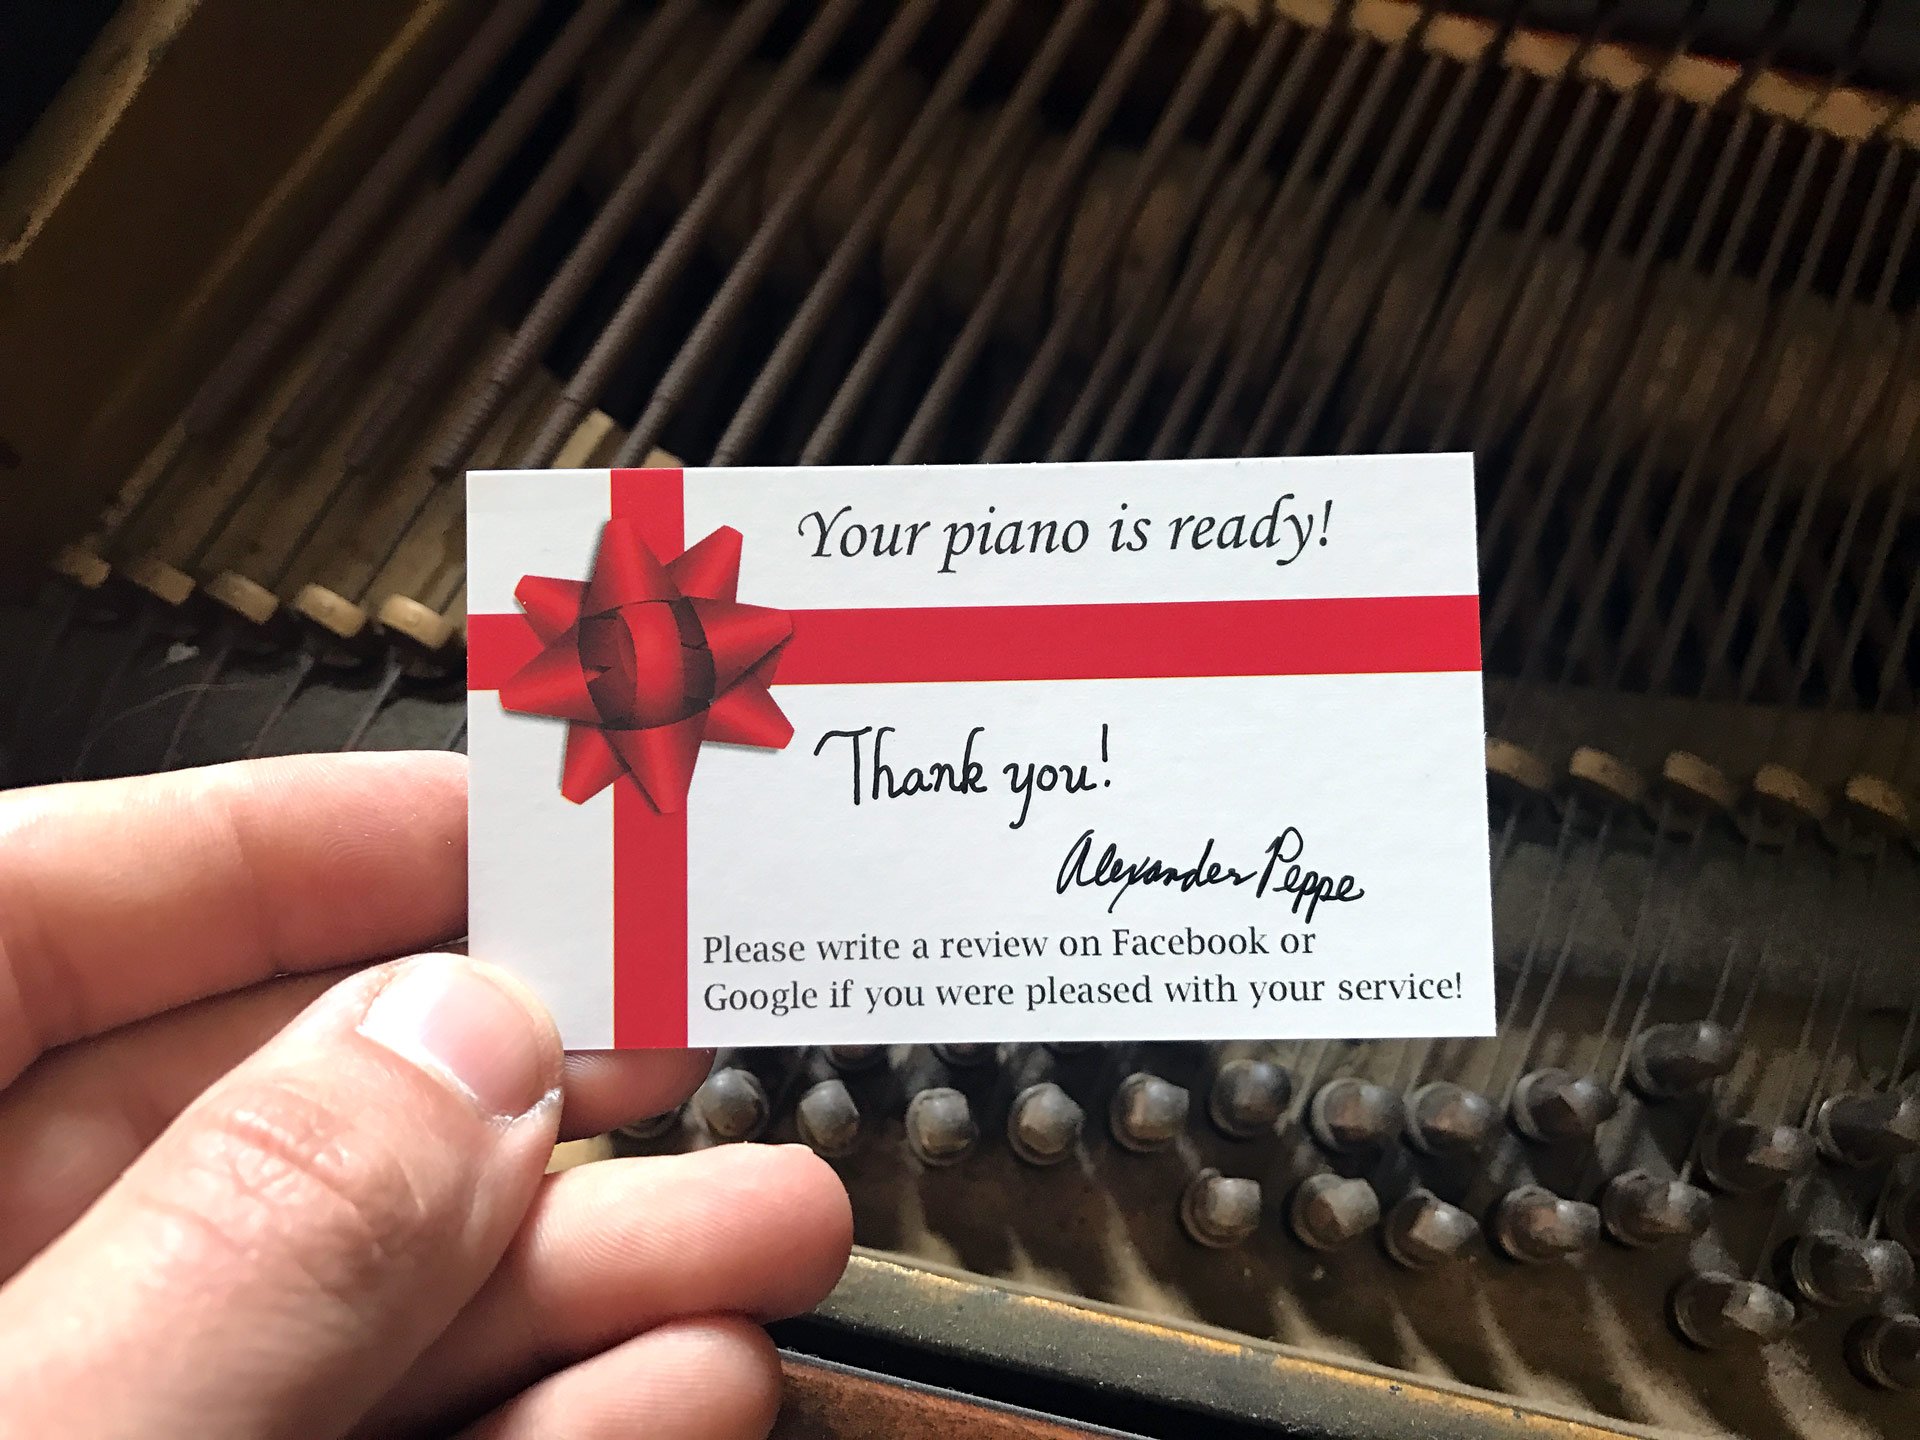
“Can I put my name on it?” When I finish working on your piano, I’ll leave a signed card on it: This represents that I believe I’ve done my best work, and that I’m pleased to put my name to it. If you have any problems with the piano at all, whether in terms of tuning or mechanical issues that you feel I’ve overlooked, let me know. I guarantee all of my work completely.
Other Policies
Please pay at time of service.
I prefer to be paid by check, but I accept debit/credit card payments through PayPal.
Service
Price
Standard service (tuning and minor work)
$180
Standard service for regularly scheduled customers
$160
Regulation
$120/hr
Full disassembly and cleaning
$200
+ cleaning under the strings of a grand piano
+ $80
Evaluations
$80
+ appraisal write-up
+ $40
Dampp-Chaser Piano Life Saver System® (most uprights)
$550
Dampp-Chaser Piano Life Saver System® (dehumidifier only)
$250
Dampp-Chaser Piano Life Saver System® (< 7′ grands)
$600
Dampp-Chaser Piano Life Saver System® (larger grands)
$875
Remote humidity monitoring
$200
Hourly charge for repair
$120
Price information is as of January 2023, and is subject to change.
I’m in the process of transferring files in a Yamaha CLP-156, a Clavinova from 1994, which uses an early version of ESEQ. I’ve been trying to figure out how to read these disks, and in my journeys, I encountered this Yamaha service note from 2004. They refer to a product called Giebler’s Yamaha DOM package, which is used for copying Clavinova and Disklavier files. I was curious to see if this different at all from the more modern tools I have available, and if it might have an edge reading older disks.
You can view the Yamaha DOM Package from Gary Giebler on the Giebler website. It’s a bit pricey — $54.95 at the time of this writing. But it’s a specialized tool, to say the least!
However, it requires an MS-DOS based version of Windows. I couldn’t get it to run in FreeDOS, as it required a Windows environment for the installation. I was able to get it running on Windows ME, running on physical hardware with an internal floppy disk drive. This is a very high bar to clear for installation — Windows ME and Windows 98SE are hard to install on modern hardware, to say the least, and Windows ME barely ran on the 2008 era computer I used for this process.
Eventually, I was able to improve on this. I’m now running it on a virtual machine using VirtualBox. To start with, I had to install Windows ME, and found a Windows ME VDI ready to use on Internet Archive. The Giebler software will install only in the Windows environment, but on the virtual machine it won’t run in it. It was necessary to install DOS Mode for Windows Millennium Edition, and then reboot into DOS. Obviously it can’t directly read the floppy disk drive from within VirtualBox, so I make images of the floppy disks, and then attach those to the session after booting into DOS.
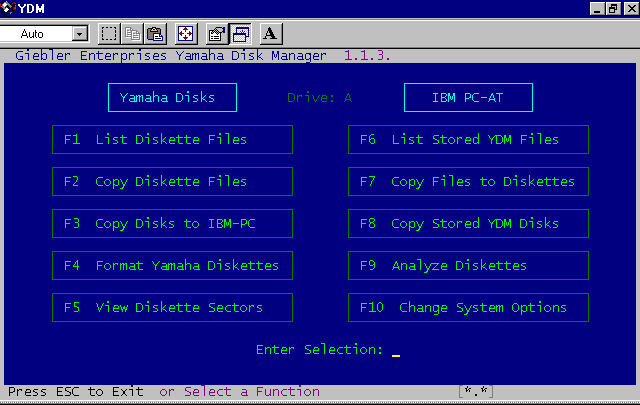
Finally, I got everything installed, and I got to the first screen. This software has the following options, and none are particularly helpful for our purposes:
The Yamaha Disk Manager control screen. (Serial number and name are scrubbed from the status bar.)
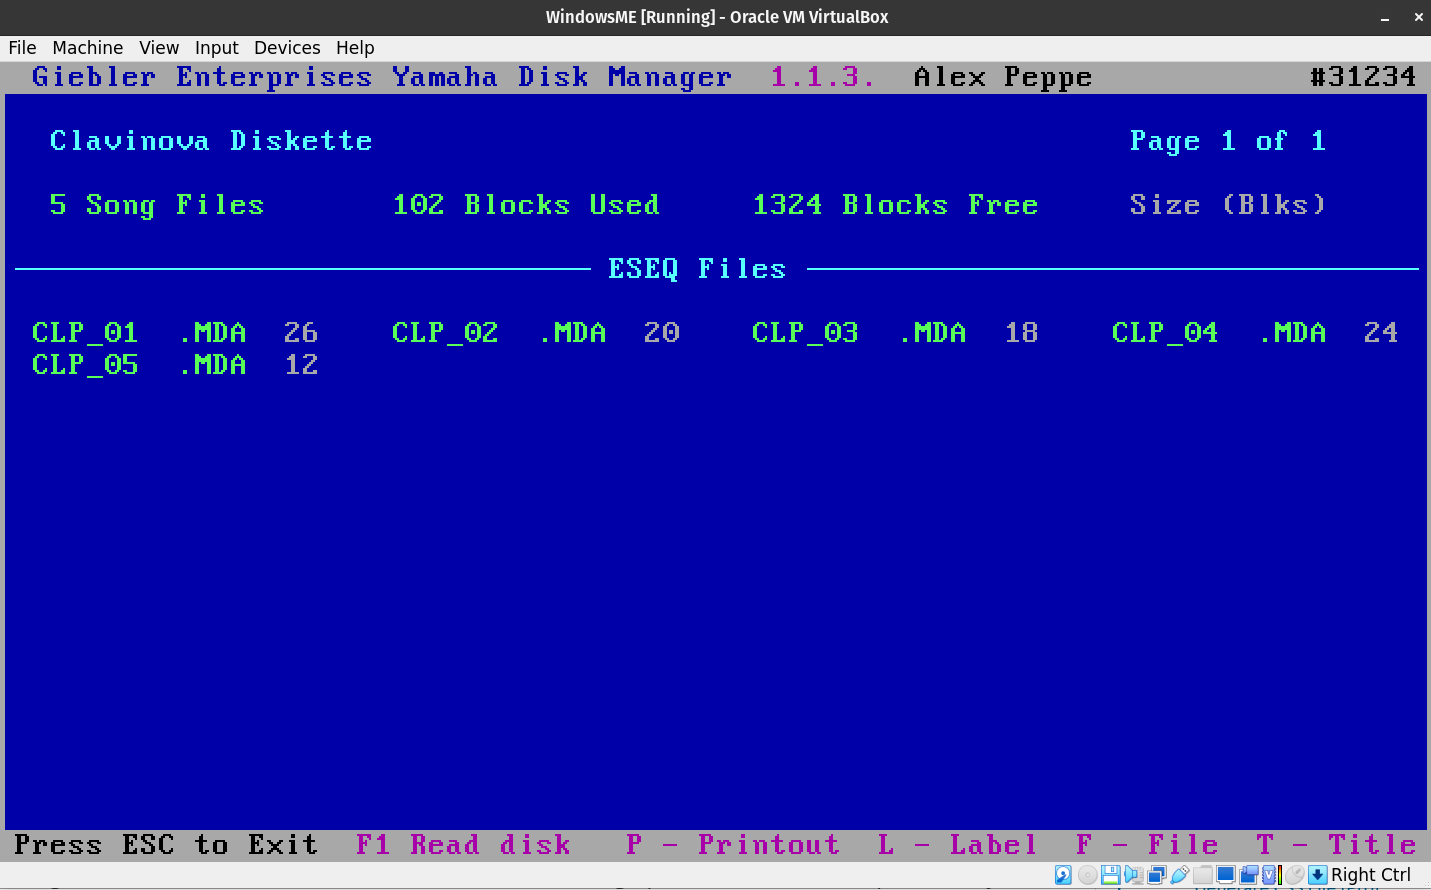
I tried a handful of disks with it. I found its performance at reading disks somewhat limited compared to modern tools like Mark Fontana’s Player Piano Floppy Backup Utility (PPFBU). But it was able to look at disks and list their contents, and it had a pleasant old-timey feel. See, for instance, a directory listing:
The directory listing for a Christmas album I used as a sample.
I attempted to make a copy of the disk, and was met with this error:
Uh-oh. It won’t copy the disk.
So now, for my Clavinova. First, using Yamaha Disk Manager (YDM), I copy the track to the local disk:
Copying an MDA / ESEQ file to the local disk.
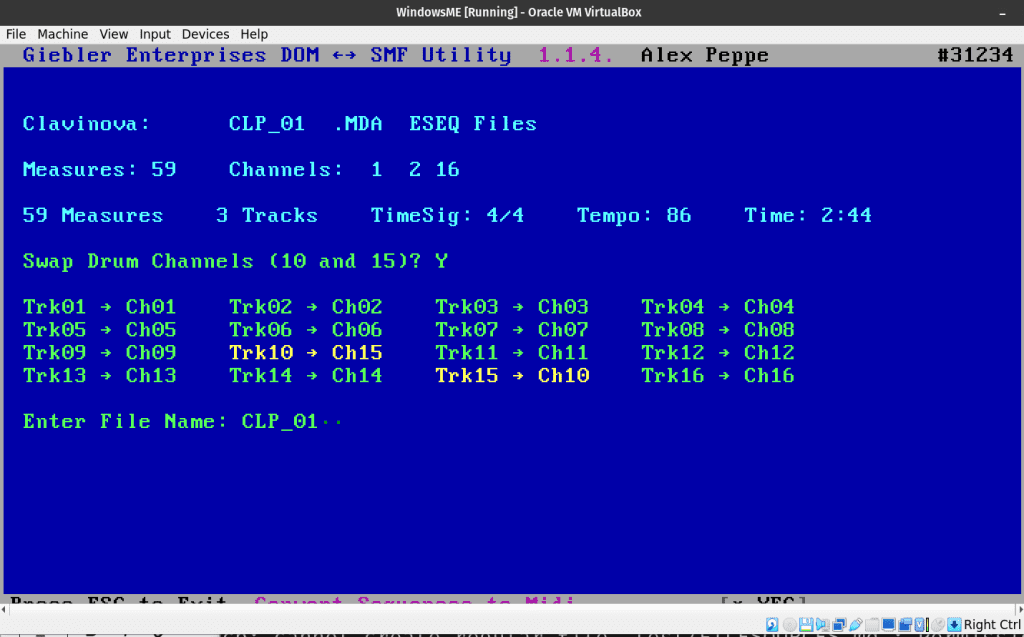
And then, I open DOMSMF, and am met with the following menu:
The initial menu in DOMSMF.
At this point, I can select “Convert Yamaha to Midi” and, remarkably, it works!
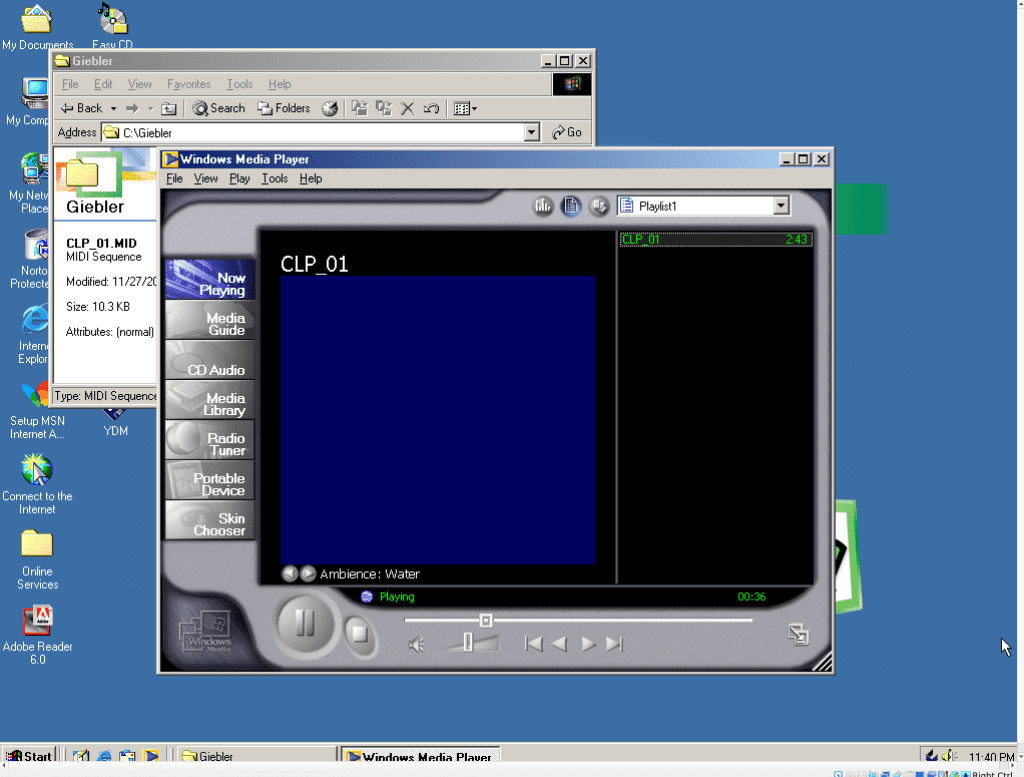
Instructing DOMSMF to convert the MDA file to MIDI.There’s the resulting MIDI file!Playing the song in Windows ME (before transferring it to an actual computer from the modern era)!
I recently had a customer reach out to me asking for my thoughts about the following email:
Greetings I am offering my late husband’s Yamaha Piano to anyone passionate about musical instruments. Please inform me if you are interested or if you know someone who might appreciate this instrument. Best regards, Tiffany
My customer then replied to the above email, asking for more details. He received the following reply:
Hello [NAME], Thanks for your message. The Yamaha Baby Grand Piano GC1 model used to be owned and played by my husband who passed away last year, the dimension is “161cm by 149cm”. It was last tuned sometime last year before he passed. She’s about 3 years old and in an impeccable condition. I’m relocating to France next two weeks, and I don’t think my husband will be happy if I sell this piano, so I’m hoping to give it out to someone who is a passionate lover of the instrument, I wasn’t going to leave it alone in an empty house. The Piano is currently in storage in Little Rock Arkansas with the movers I employed to move my properties from my house. I can forward you the movers’ contact details to enable you to contact them. The movers can deliver anywhere. However, I will not be responsible for the cost of delivering the piano to you. However, the movers’ rates are reasonably affordable. I look forward to your reply. Tiffany
This is a scam. Any email offering a free piano, particularly one of value, is statistically almost certain to be a scam. Most of these emails follow similar patterns, and the piano’s “owner” typically will tell you the piano is currently being handled by a mover or storage company, and that you just need to send them money. There is no piano. You will not see your money again, and they’ll gather your personal information for future attacks.
Nearly all scam emails that people have shared with me have involved deceased family members. Below are a variety of messages I’ve received over the last two years. Hopefully, if you’re received a similar email, one of these will come up in your web search:
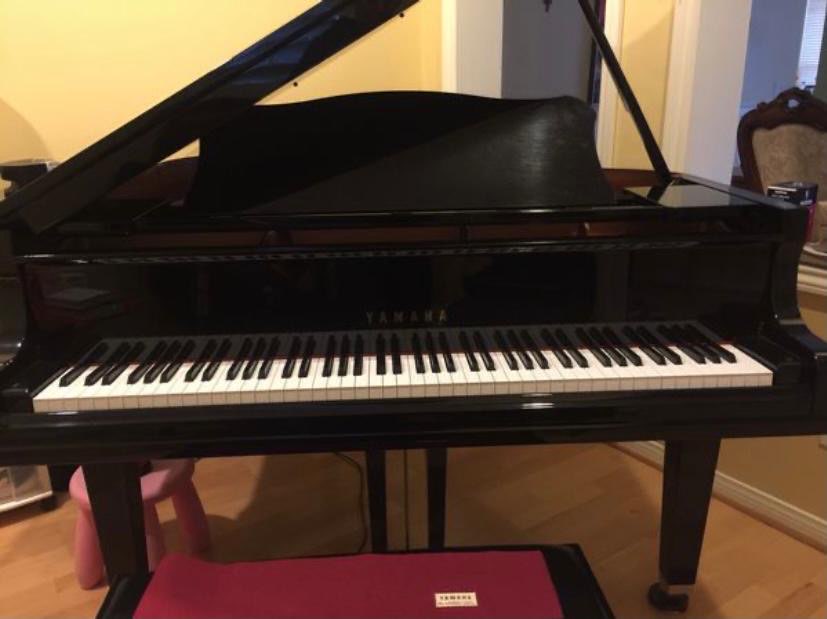
Note that these emails often include pictures of the instrument, and these pictures are stripped from Craigslist, Facebook, and other platforms with pianos for sale, such as the one in this post. The pianos are nearly always higher value instruments, worth thousands, in order to activate your sense of lost opportunity.
Hello, How are you doing today? I am looking to give away my late husband’s Yamaha baby grand piano to a passionate instrument lover, Please let me know if you will take it or have someone who will care for it. Contact me via: [EMAIL ADDRESS] Regards, Lacikay
Hello, How are you doing today? I am looking to give away my late husband’s Yamaha baby grand piano to a passionate instrument lover, please let me know if you will take it or have someone who will care for it. Regards, Elysha
Received as a text I am giving away my late husband’s Yamaha Grand GC1 as a donation. If your facility is interested or you know of any teacher, school, child, church, or any home it will be appreciated, Please share this email with them. God bless you. Regards, Theresa Williams
How are you doing today? I am looking to give away my late husband’s Yamaha Baby Grand Piano to a passionate instrument lover, Please let me know if you will take it or have someone who will care for it. Alice
Hello, How are you doing today? I am looking to give away my late husband’s Yamaha baby grand piano to a passionate instrument lover, Please let me know if you will take it or have someone who will care for it. Regards, Mrs Mata
Hello, I hope this mail gets to you soon. I’m looking to give away my late husband’s baby grand piano to a loving home, music school or church. Please let me know if you will adopt it or if you have someone in mind who wants it, just in case you don’t need it. Best Wishes, Laura
The Yamaha Disklavier is a sophisticated piece of technology, but typically, you’re limited to Yamaha’s song library. Many Yamaha songs include both a piano part for the Disklavier and an accompanying music track, though the Disklavier piano part might differ dramatically from the original piano part in the song. In many cases, the piano tracks are recorded as accompaniments by artists, and are either added to songs that didn’t have piano originally, or that are designed to augment rather than to replace the piano in the original recording.
I recently had a customer ask if I could figure out a way for the Disklavier to play the piano portion of a particular song that was important to him.
As an alternative to Ivory, Onset and Frames can be locally installed. This software is dated (2018), and there are many frustrations with attempting to run such an old Python program, so I opted not to use this solution. However, if you have a high-end system with a powerful GPU and the free time to get it running, it’s a free option. You’ll also need to train your own model, with was estimated to take several days on my GeForce RTX 4080.
Separating the Tracks
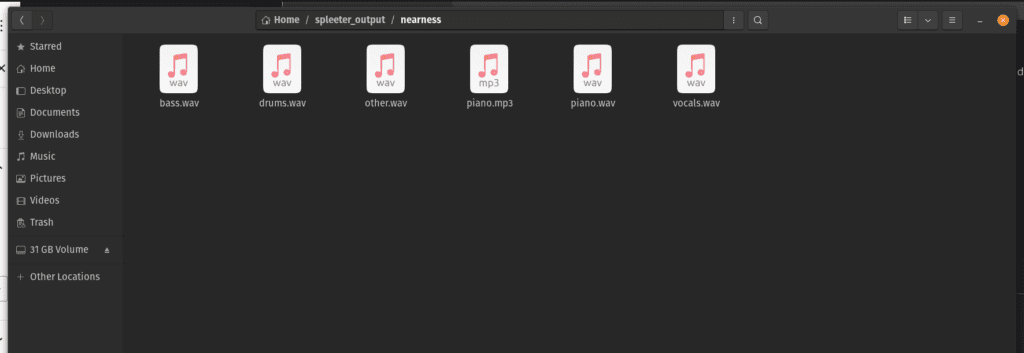
I used the 5stems model in Spleeter, which allows you to individually separate the piano. See the instruction below.
spleeter separate -o ./tmp -p spleeter:5stems "sample.wav"
The output of Spleeter.Here’s a six-second excerpt from Norah Jones’s “The Nearness of You” with the piano.Here’s the same six-second clip without the piano.
Recombining the Tracks
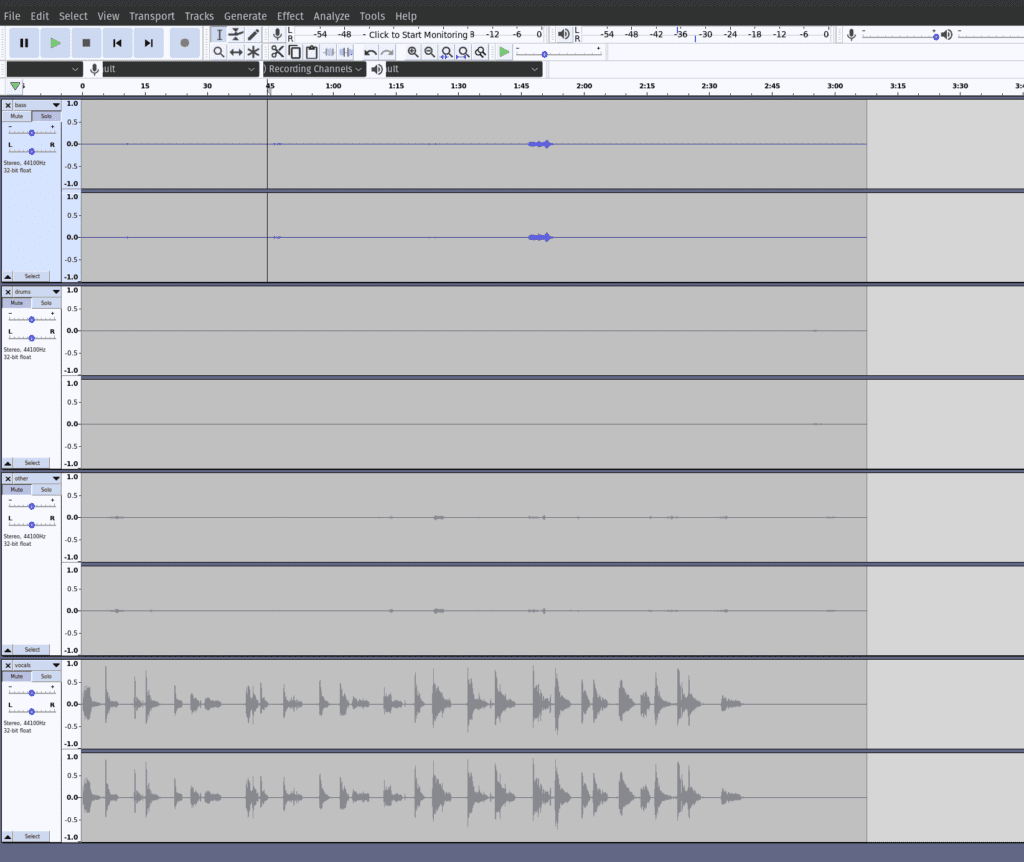
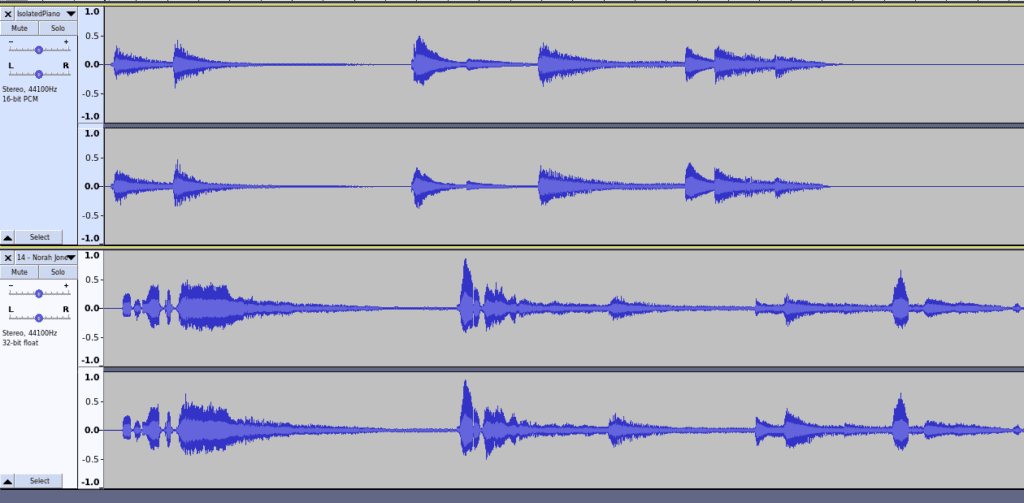
After reviewing each track, I found only the bottom vocals track had usable audio; the others were filled with artifacts, so I simply removed them. However, in songs with more instrumentation, this would be an important step. Review the tracks, listen to them individually, and remove any artifacts you can, applying filters as necessary.
This is what the isolated tracks look like without the piano.
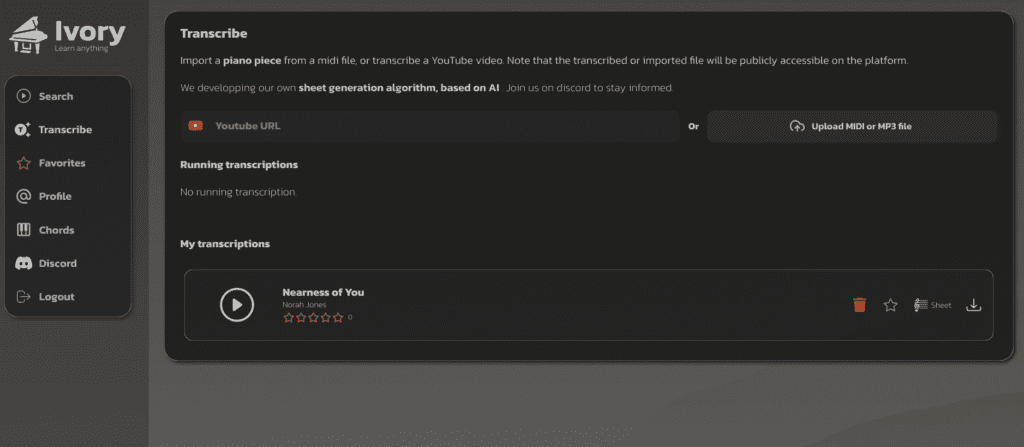
Next, I used the Ivory App to transcribe the piano audio track. Ivory is an AI-driven piano transcription tool that converts piano audio into sheet music or into MIDI files. Utilizing advanced deep neural networks, it offers high transcription accuracy. I converted my piano.wav file (produced by Spleeter) into an mp3, and then uploaded it to Ivory.
Transcribing songs on Ivory.The resulting MIDI file, as displayed in Ardour.
Syncing the Audio
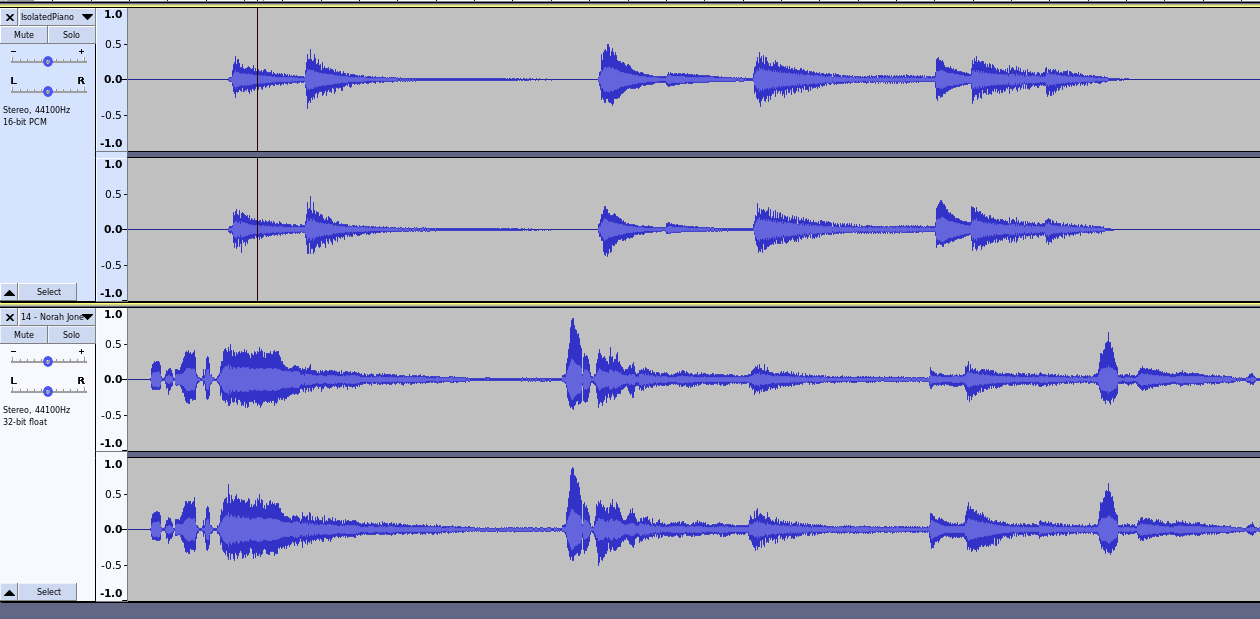
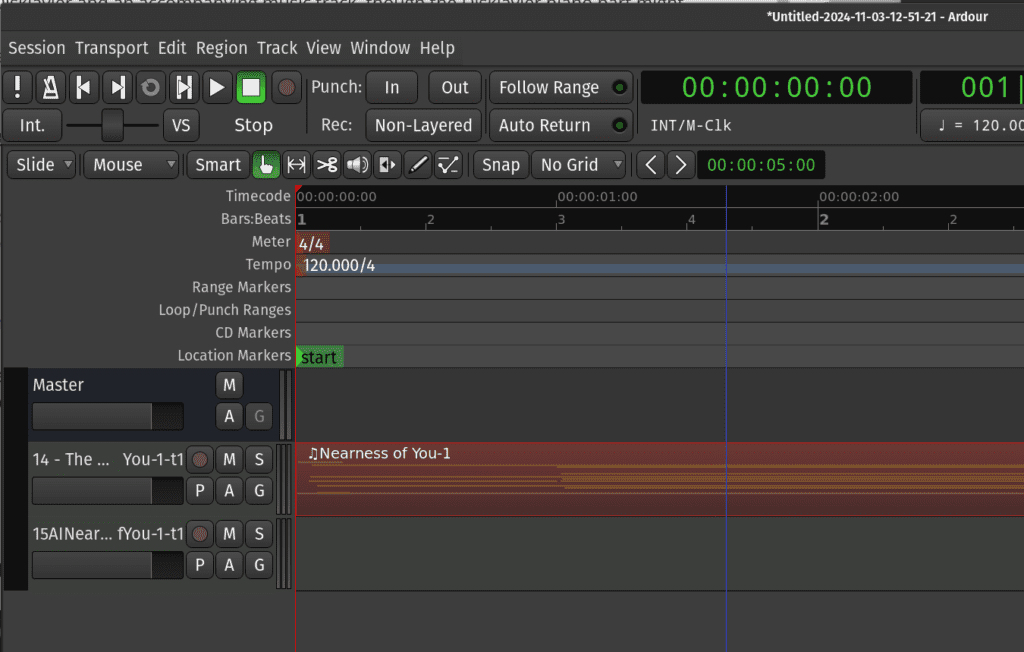
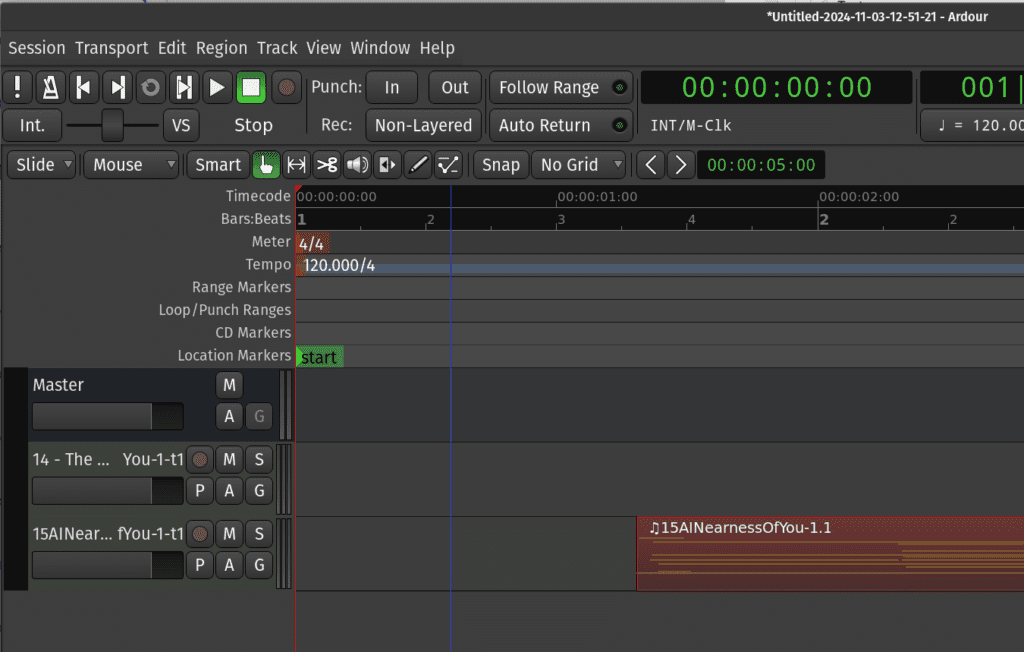
After downloading the MIDI file, I found that the MIDI file did not properly sync with the audio. In order to solve this, I synthesized the audio (using FluidSynth with Yamaha C7 samples). I then imported this into Audacity, and played the isolated piano alongside the original audio. After a few attempts, I then moved the audio back and forth until I determined exactly how much time had to be added to properly sync the two pieces.
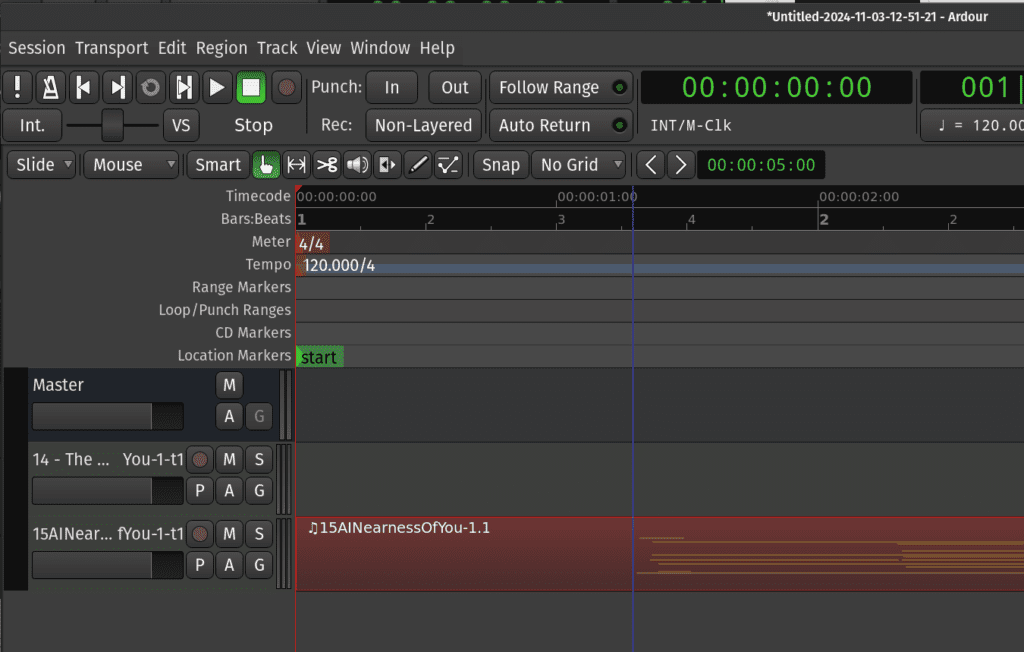
The isolated piano comes in much too early!The isolated piano is perfectly in sync with the original.
After carefully adjusting the audio which I’d synthesized from the MIDI file in Audacity, I determined that the MIDI file needed a total of 1.150 seconds added to it. This is a decimal fraction, rather than seconds in 60ths of a second, which is how Ardour determines time.
Seconds in 60ths = Integer Part + (Decimal Fraction × 60)
Just take the decimal component of the number (.150, in this case), and multiply it by 60. In this case, we end up with 1:09 seconds. Now we have a number we can use in Ardour.
I’ve now carefully moved the track to 1:09 seconds (or 1.150 seconds, according to my measurement in Audacity).I’ve now extended the MIDI track, and can export it!
Once the MIDI file is downloaded, name the MIDI file from Ivory and the piano-free audio from Audacity identically, and transfer them onto a USB stick. The properly named files will look something like this:
01MySong.mid 01MySong.mp3
Provided the filenames are identical (excepting the extension), the two files will be recognized as the same song by the Disklavier.
Your Disklavier is now ready to play both files in sync! The keys will move to the isolated piano track, and the audio will play alongside it without any competing piano sounds.
Synthesized audio from the MIDI file (using FluidSynth with C7 sampling) along with the vocals.
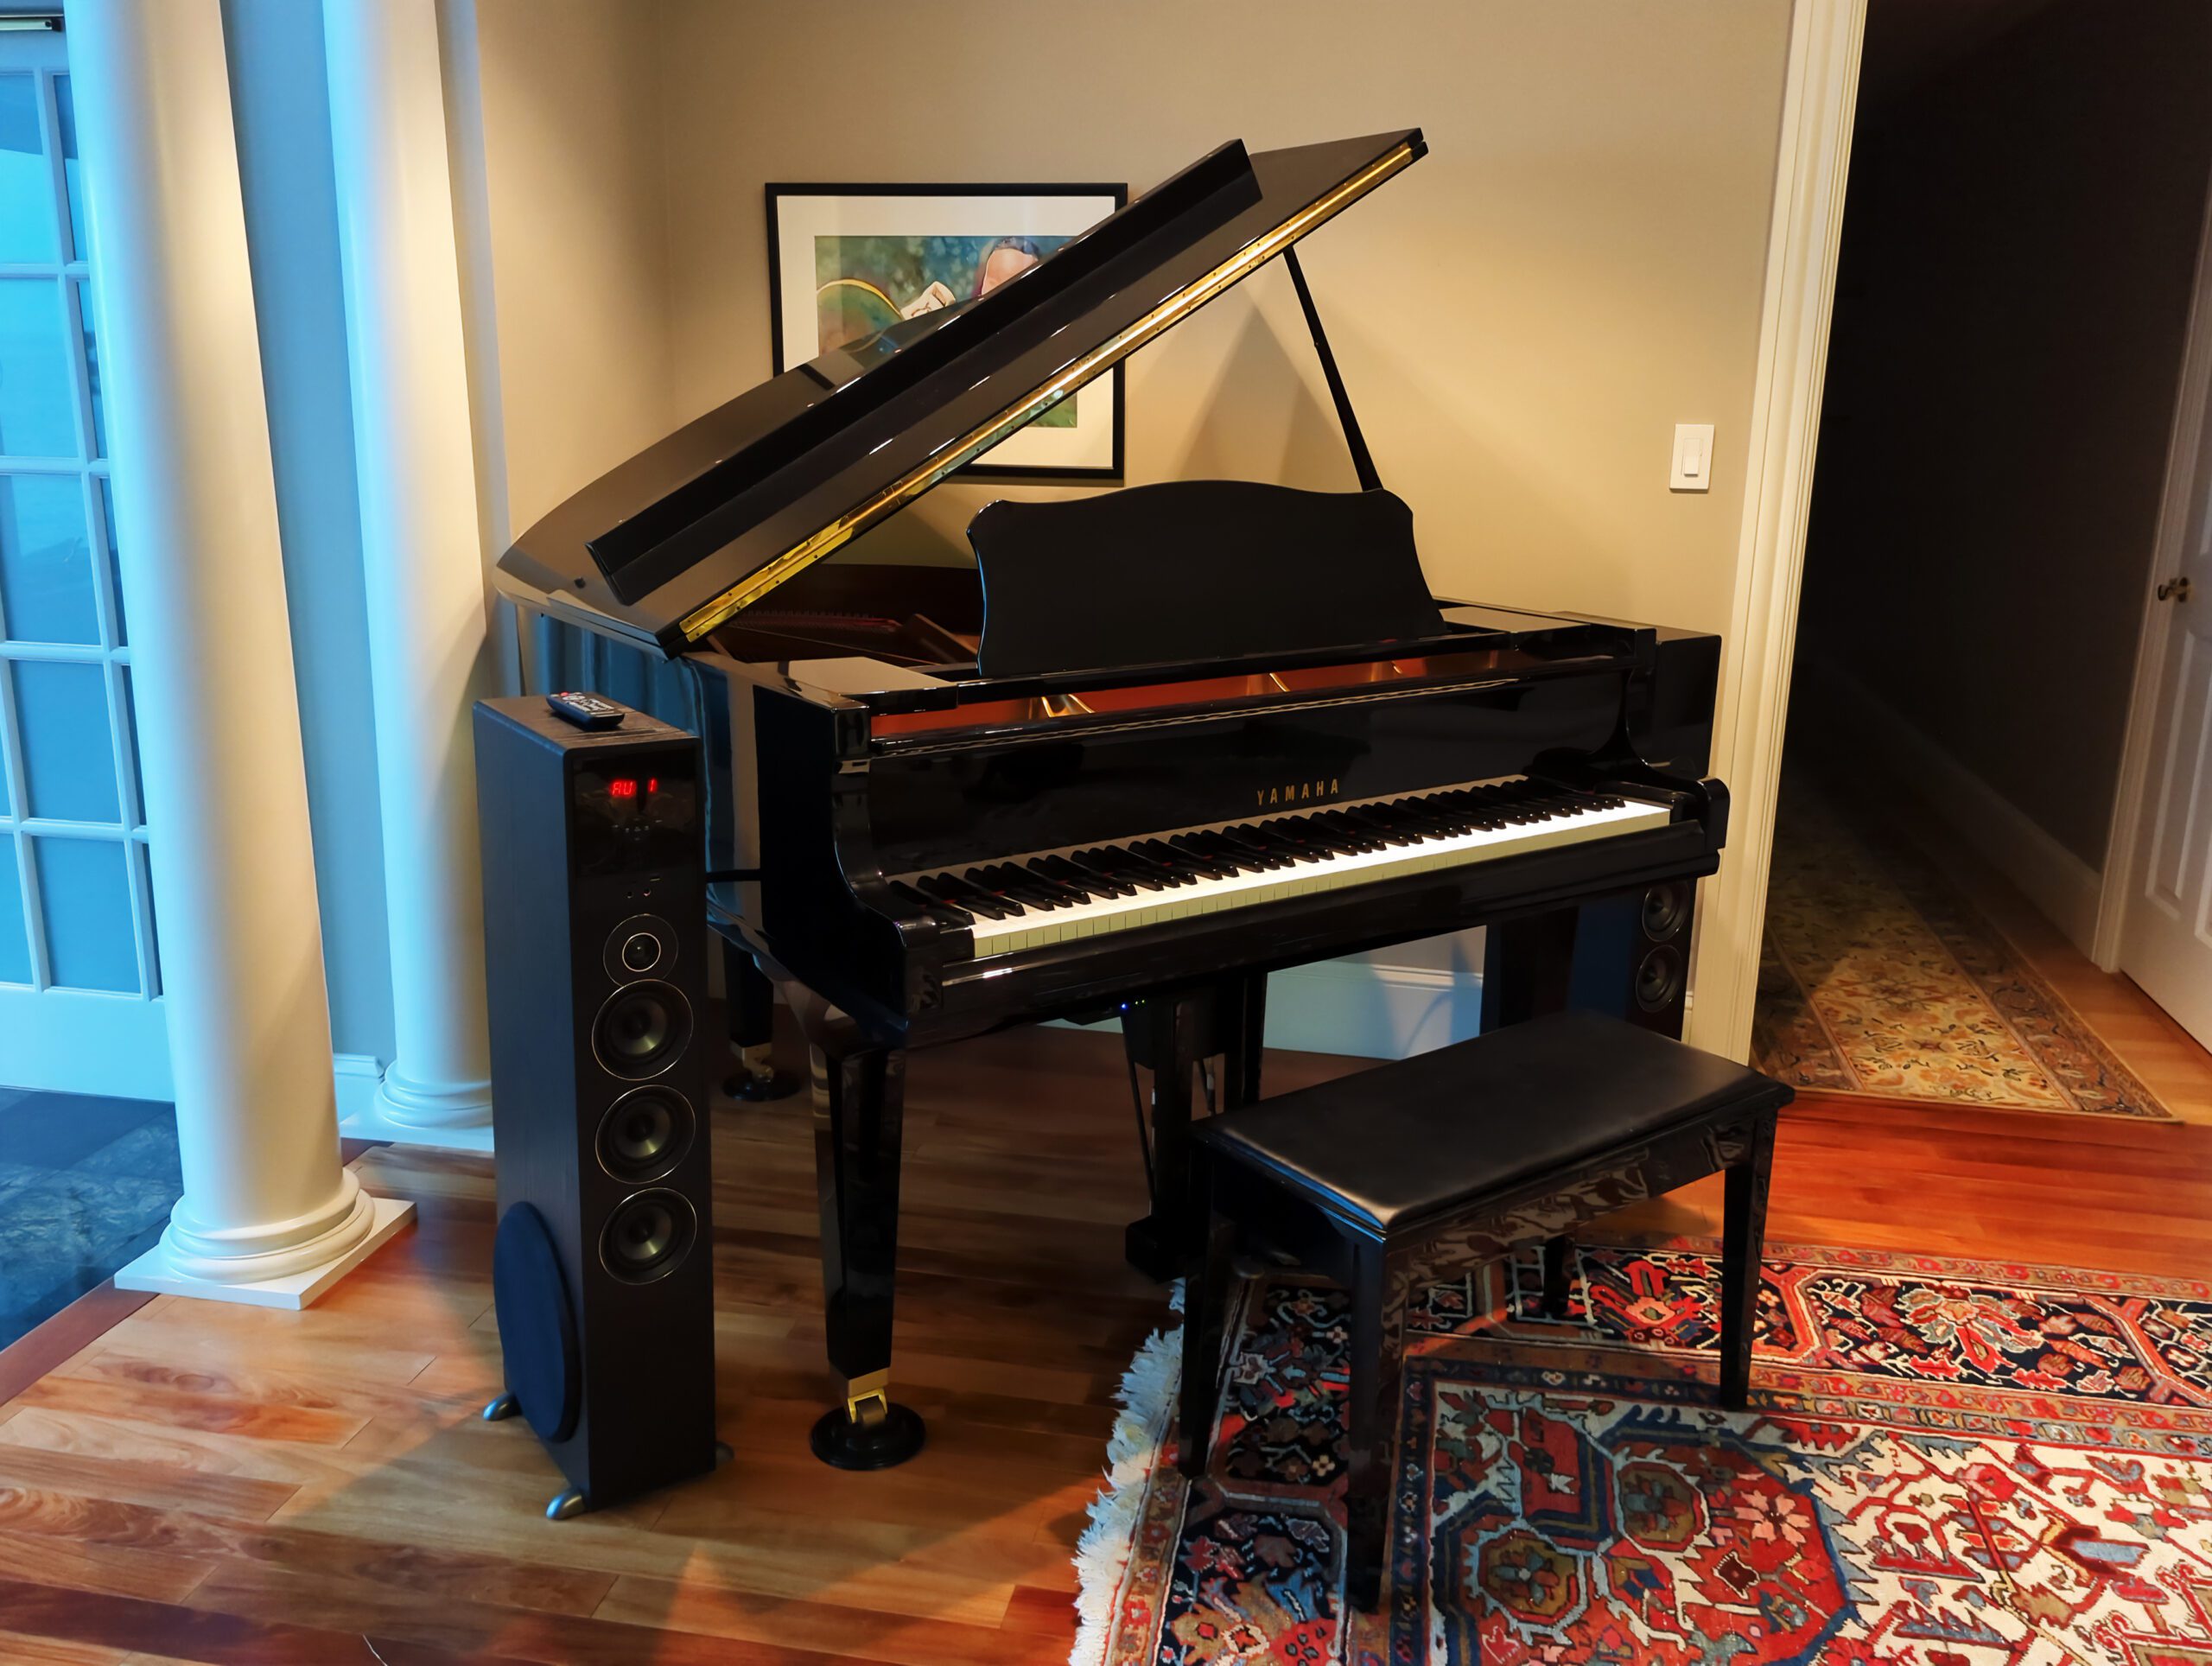
I have a customer who recently upgraded his Mark IV to a DKC-900, and wanted to add larger Bluetooth enabled speakers. We used Rockville TM150B 10″ Speakers. Although the speakers are powered, and amplify signal quite well, we nonetheless found the audio output from the Disklavier was a bit low. I added an RCA preamp to amplify the signal going into the speakers. The RCA preamp is zip tied in place using 24″ zip ties. These work wonderfully for strapping components to the beams.
The speakers underneath the piano are present, but are no longer powered or connected.
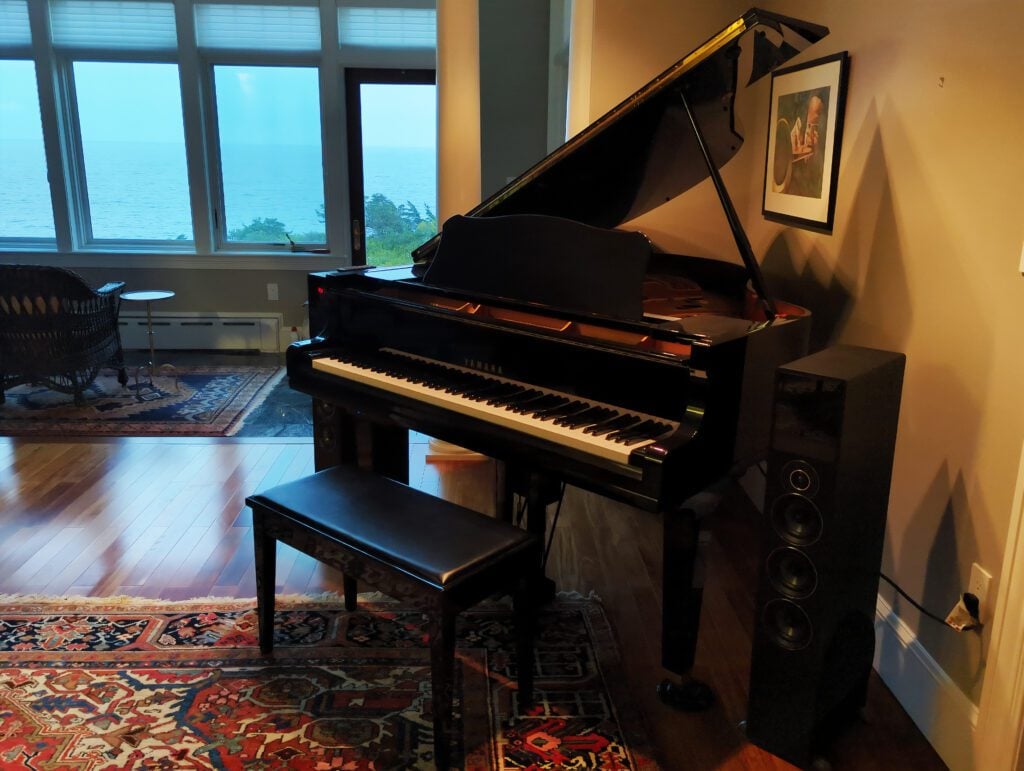
An RCA preamp installed between the control center RCA output and the speaker. The piano alongside its powered Rockville speakers, overlooking the ocean.This piano connects to his network using a Powerline adapter, as discussed in my Connecting Yamaha Disklaviers to a Network article.
Yamaha GH actions require the insertion of a “rod” (as it’s referred to in the service manuals). Yamaha sells a specific tools—specifically part TX000671 (VCN03010) during disassembly. The rod blocks the hammers, relieving the pressure on the contacts and contact circuit boards, allowing you to easily remove and reinstall them.
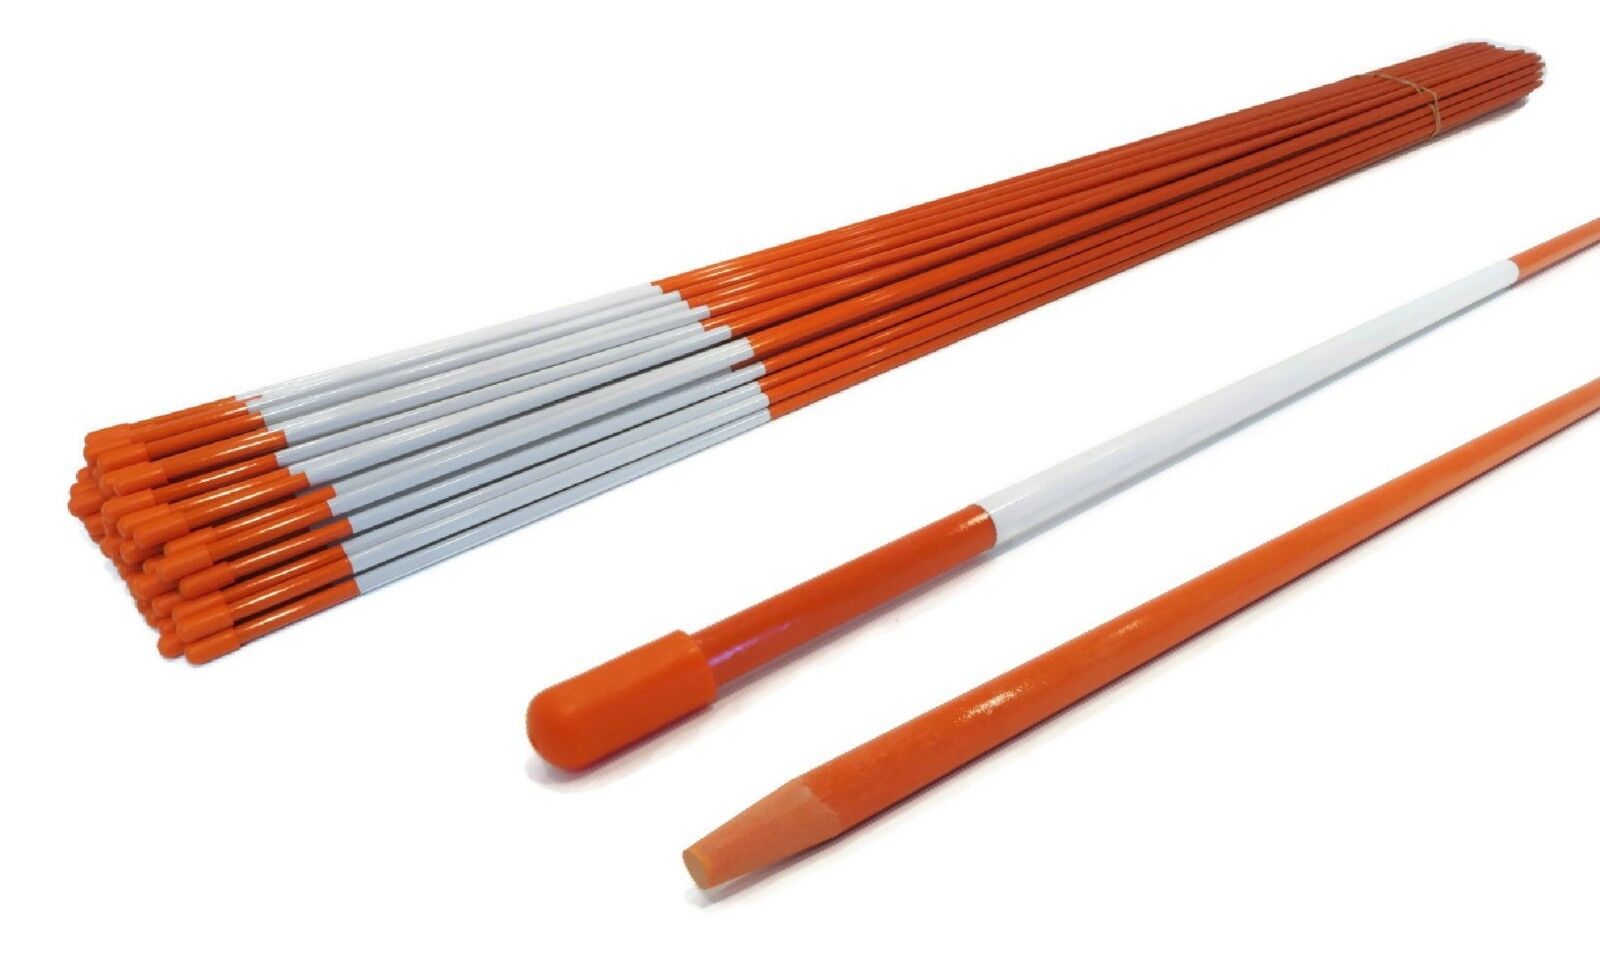
The tool Yamaha sells (TX000671 / VCN03010) is a steel dowel, of a suitable length and diameter to conveniently fit between the hammers and the frame.
Not only is this the correct size to fit nicely in both the Yamaha GH actions, but I actually find it easier to use. The tapered, pointed end means it slips more easily between the hammers and the frame. It’s made of fiberglass, so it’s less likely to cause unintentionally scratches. And in fact, the far end even comes with a ready rubber bumper, just in case you lose track of it and whack a wall with it!
The TX000671 (VCN03010) currently costs $187.0 to the public on Yamaha 24×7, whereas the trusty 48-inch driveway marker costs $3.27 at Home Depot (prices as of 9/9/24). It’s an option worth considering!
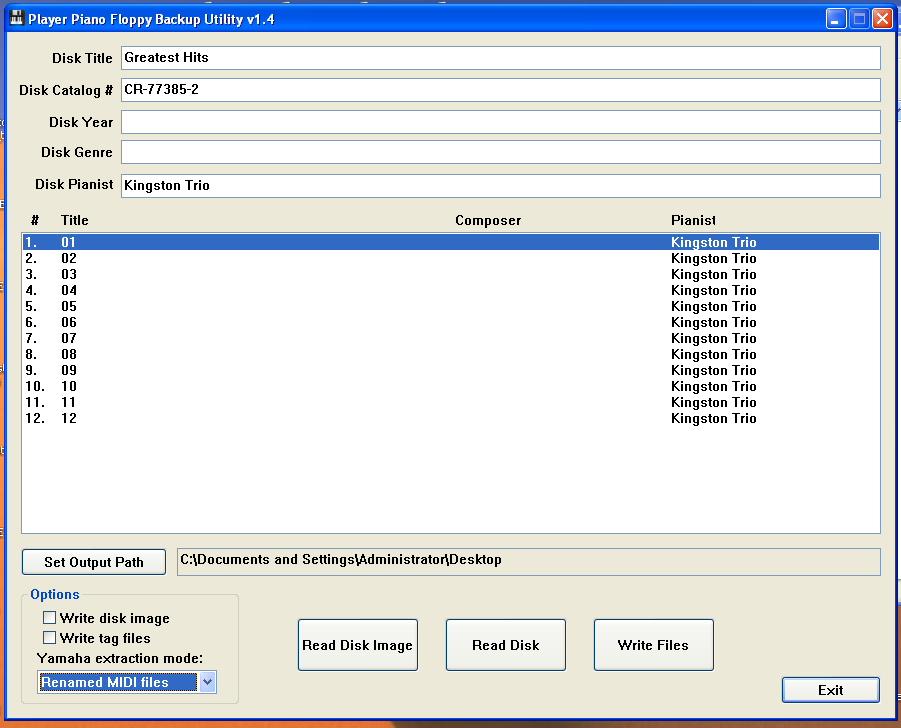
The most important part of this step is that you write the files as “Renamed MIDI files.” I typically name each one with the name of the track, and make sure each name starts with the track number (00, 01, 02…). This makes it much easier to keep track of which MIDI file goes with which MP3 later on.
Using PPFBU to extract the files, and then export them as Renamed MIDI files. I’m using a dedicated Windows XP box that I keep just for this purpose. You can rename the files in PPFBU before you export them, or you can rename the MIDI files after (like I did in this case).
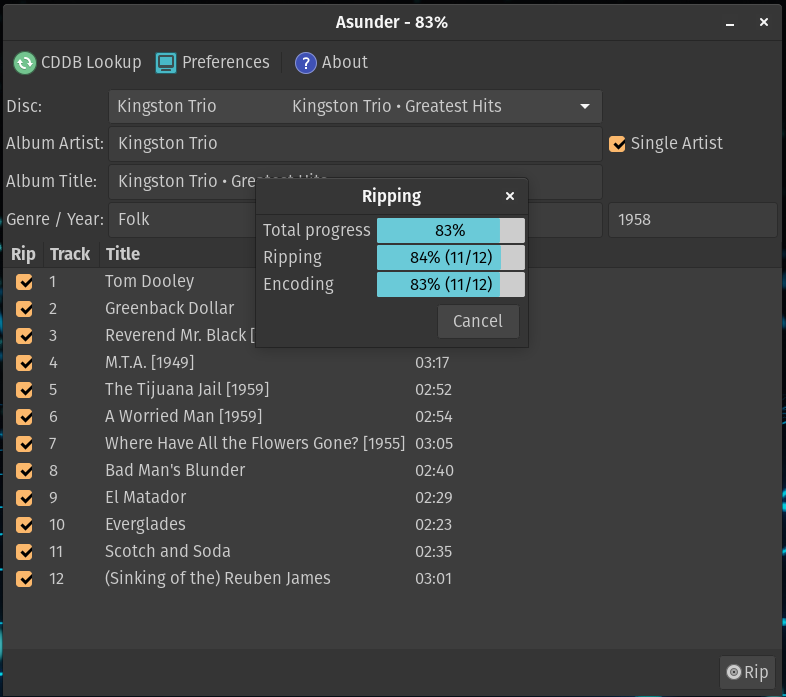
Ripping an Audio CD using Asunder on a Linux system.
Name and Organize the Files
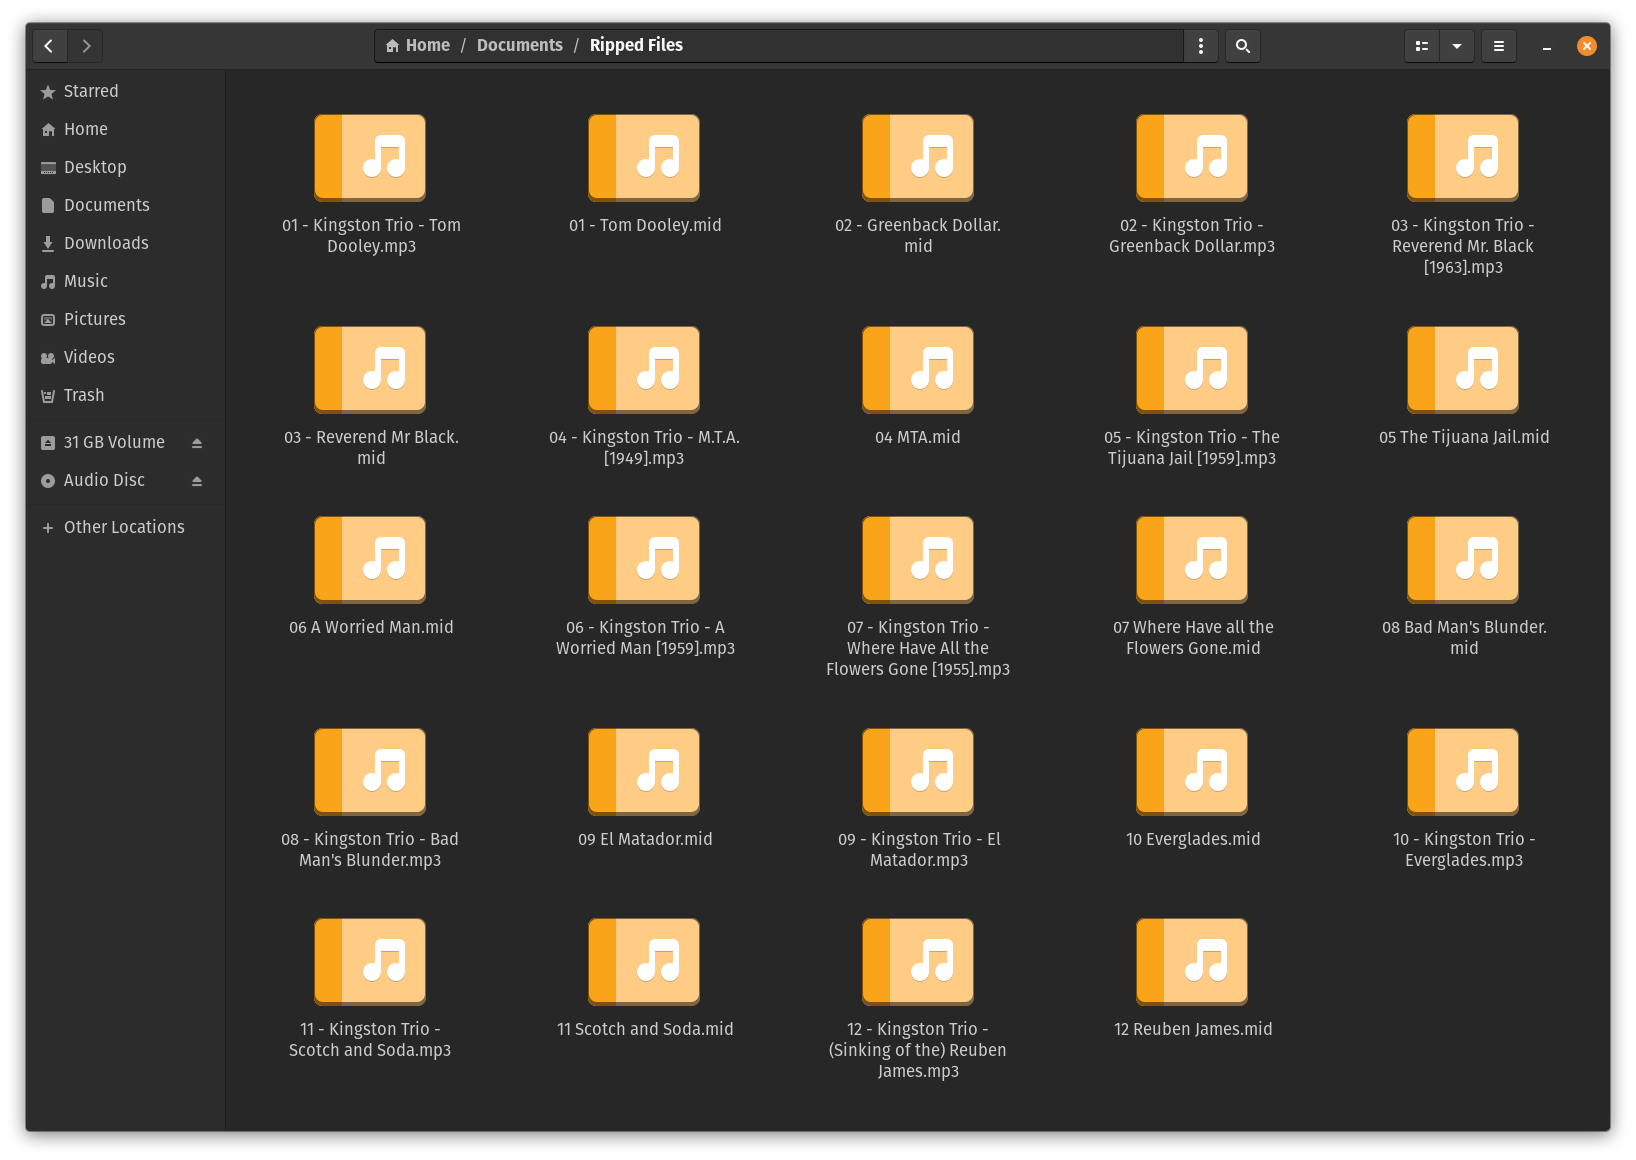
Below, you can see the files listed after ripping the audio CD, and after backing up the floppy disk drive using Player Piano Floppy Backup Utility. The floppy disk tracks are MIDI files and have a .mid extension. These contain the instructions to operate the piano. The CD tracks have been ripped as MP3 files and therefore have a .mp3 extension—these contain the audio.
All the files are present, but they will not yet play correctly in the Disklavier, as the filenames do not match.
I wrote a short Python script to automatically rewrite all the filenames to match. Using the numbers at the beginning of each filename, it pairs together matching MIDI and MP3 files and names them whatever the name of the MIDI file is, but without spaces or symbols. This appears to be the same formatting of downloadable Disklavier albums.
Whether you use the script or not, the before and after directory listings indicate how you must rename the files.The script is called using the following syntax:
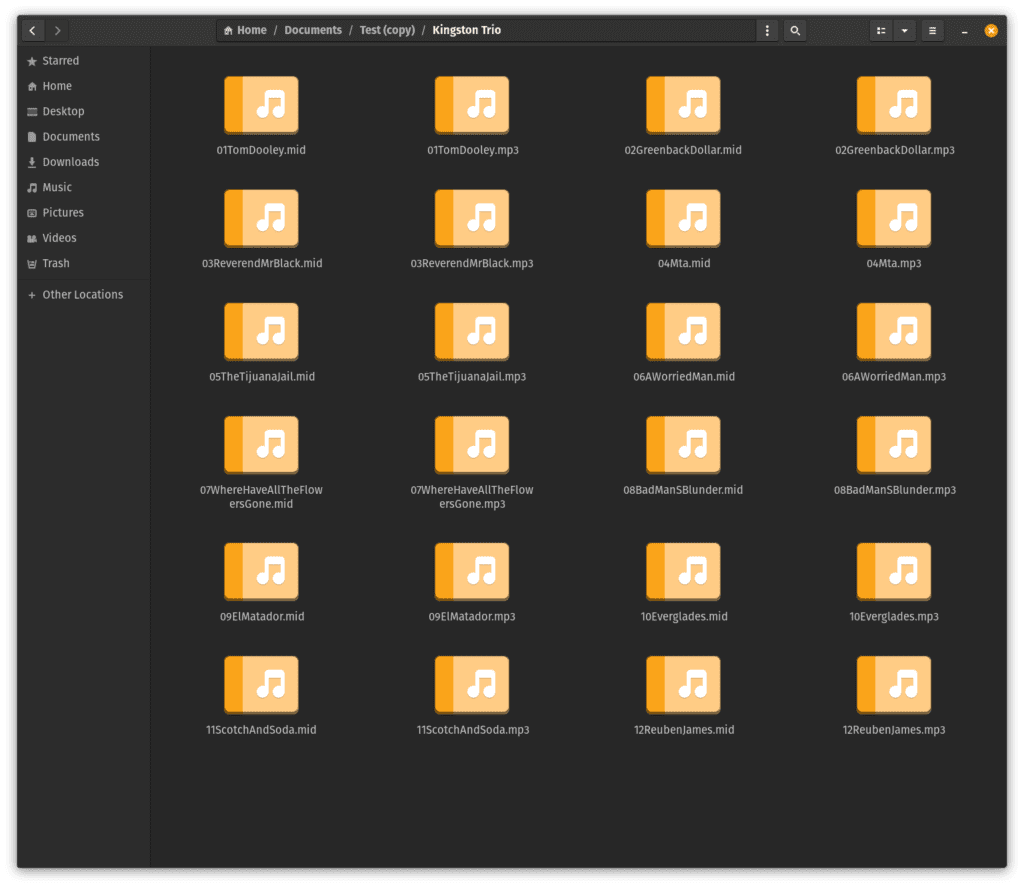
Note that now the MP3 and MIDI files have identical names for each song, identical capitalization, and that all spaces and symbols have been removed. In the ENSPIRE, unlike earlier iterations of the Disklavier, filename length does not seem to matter. Here’s a graphical representation of the last folder, ready to move:
The filenames match! It’s ready to be put on a USB stick and played in your ENSPIRE.
It’s Time to Play!
At this point, you can move the complete folder (in this case, Kingston Trio) onto a USB stick, and insert it into the front of your ENSPIRE controller.
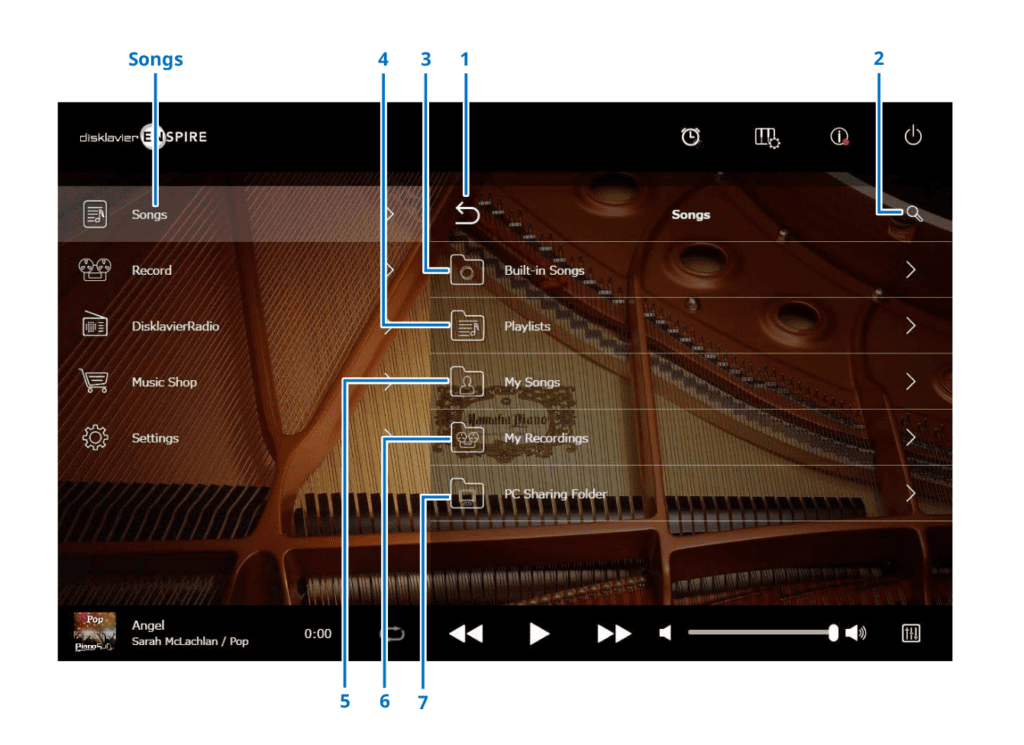
Once your USB is inserted, you’ll see the My Songs (5) option appear in the ENSPIRE controller app. (This image is copied from the ENSPIRE Controller Operation Manual created by Yamaha, which is available from them.) Just open up the “Album” (which is the folder you created for all of your files on your USB stick), and select a song! It’ll play the piano parts, and the audio will accompany it.
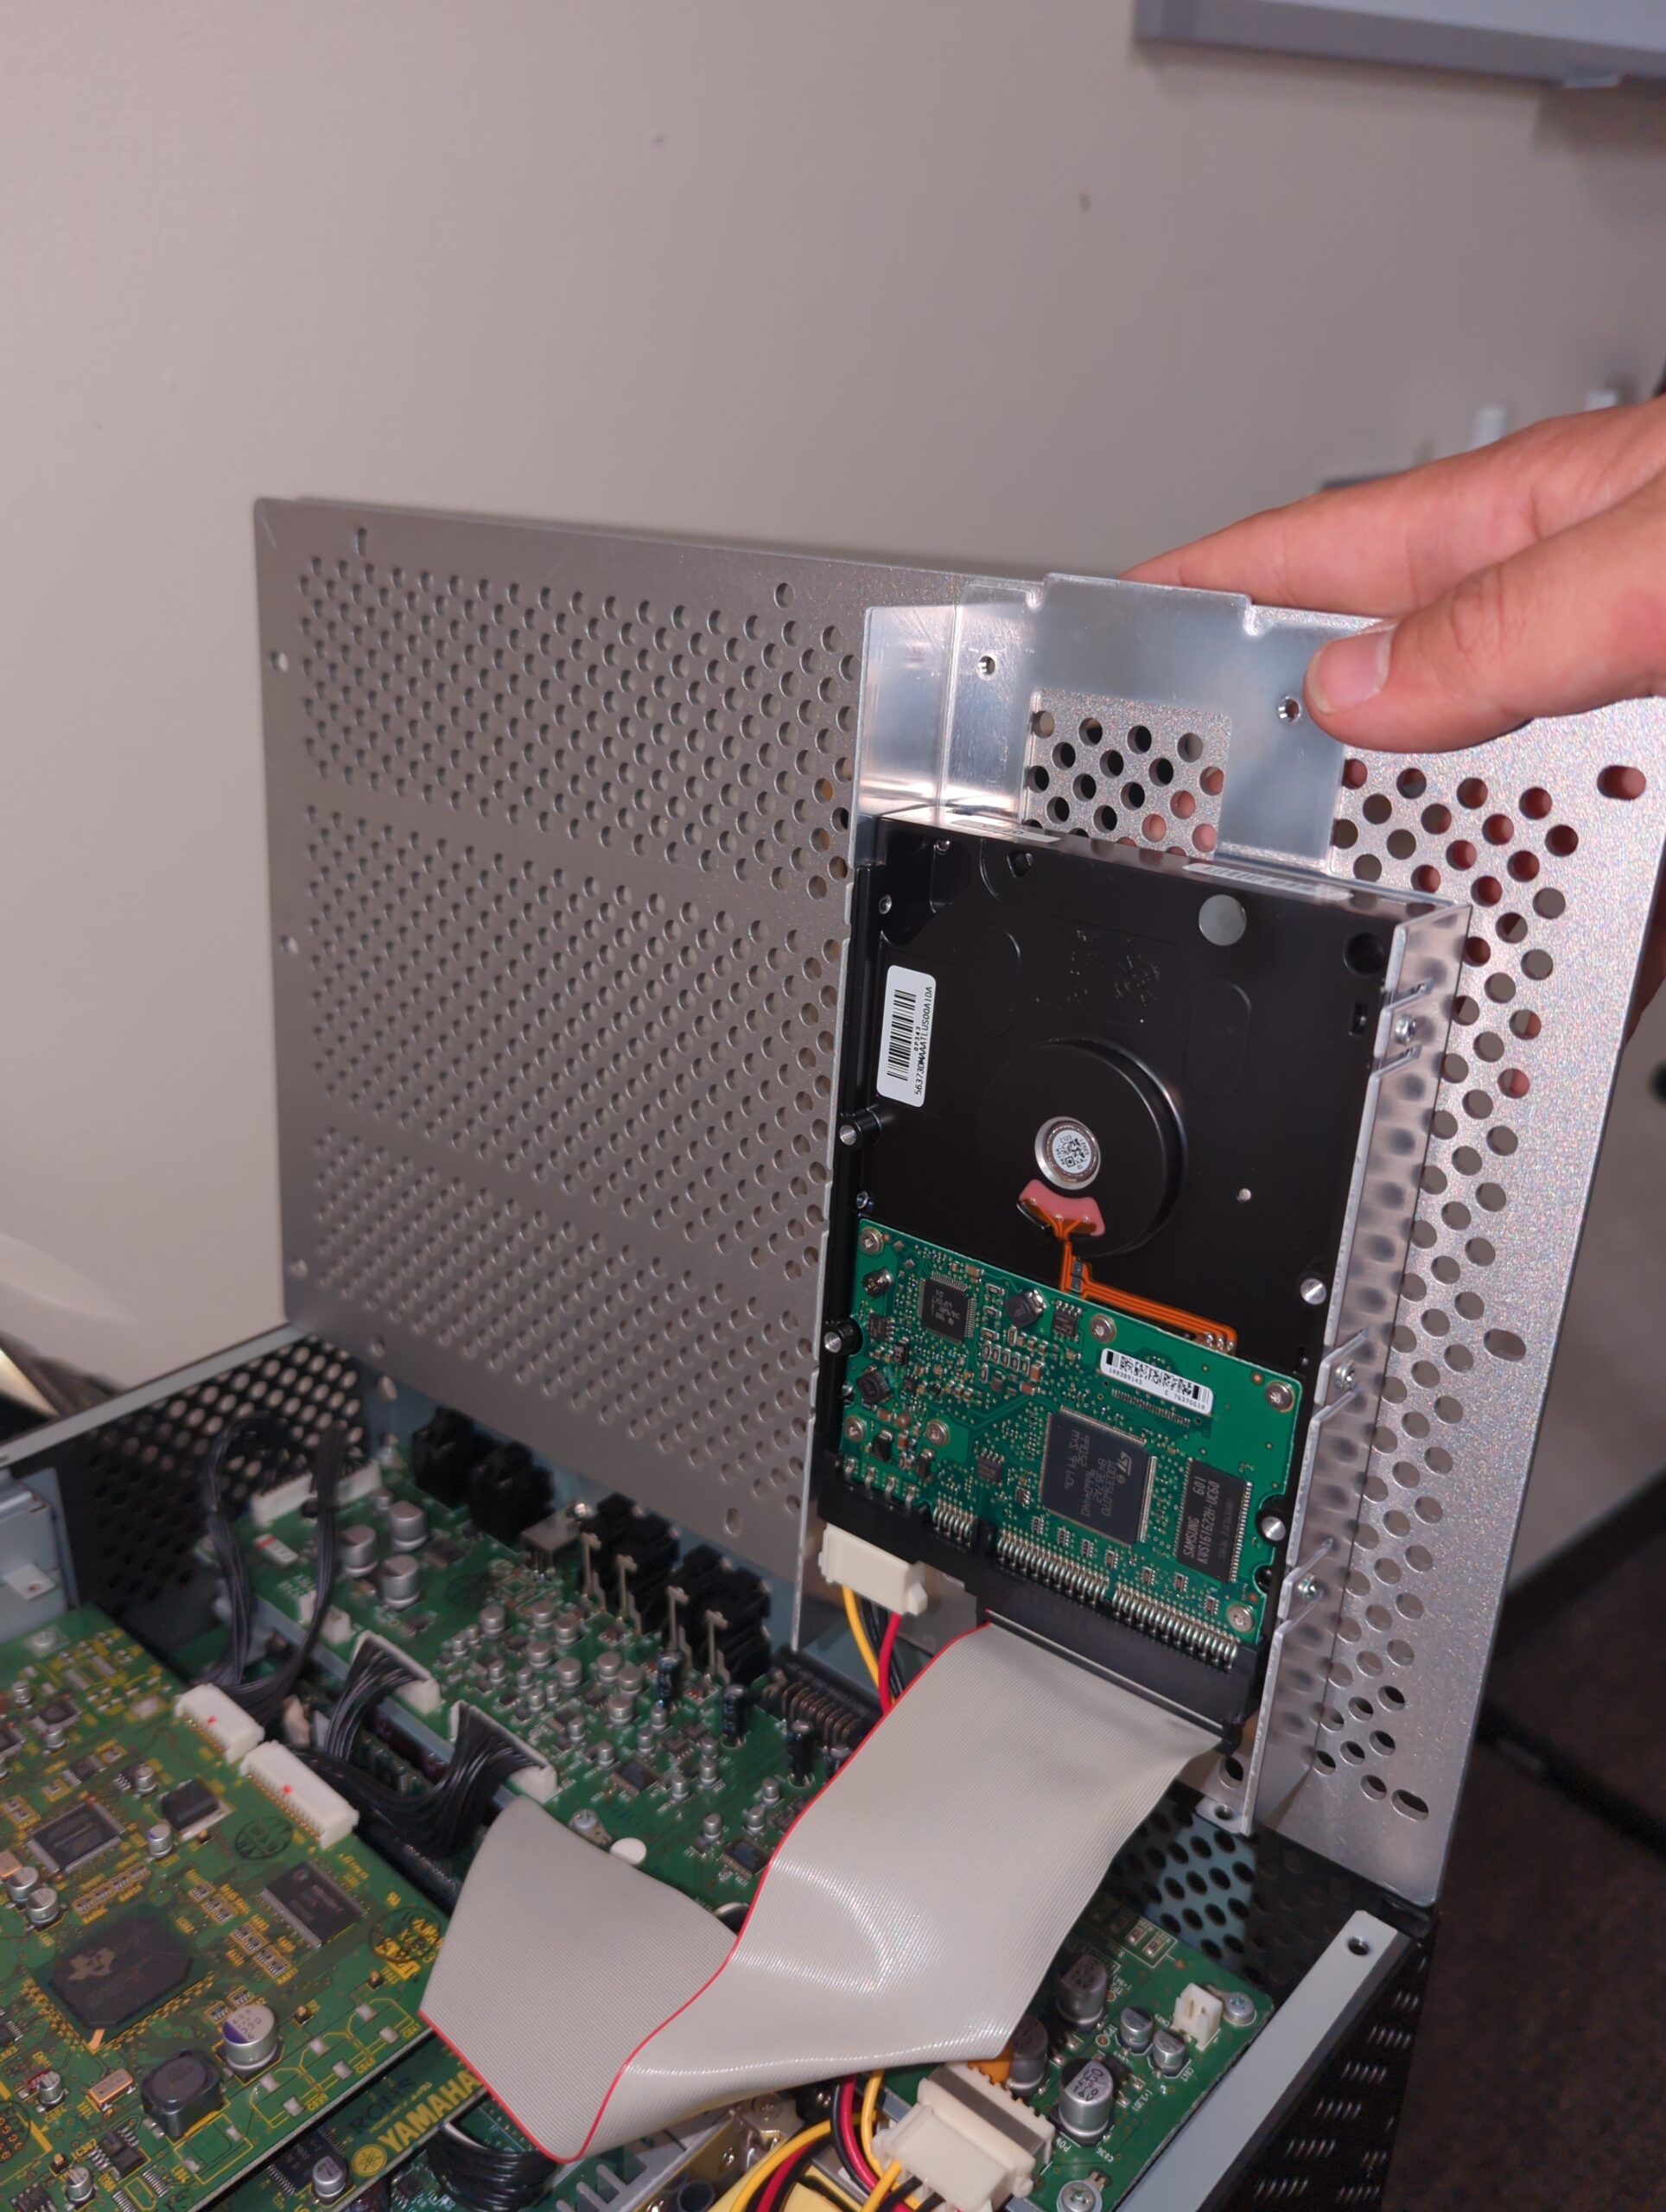
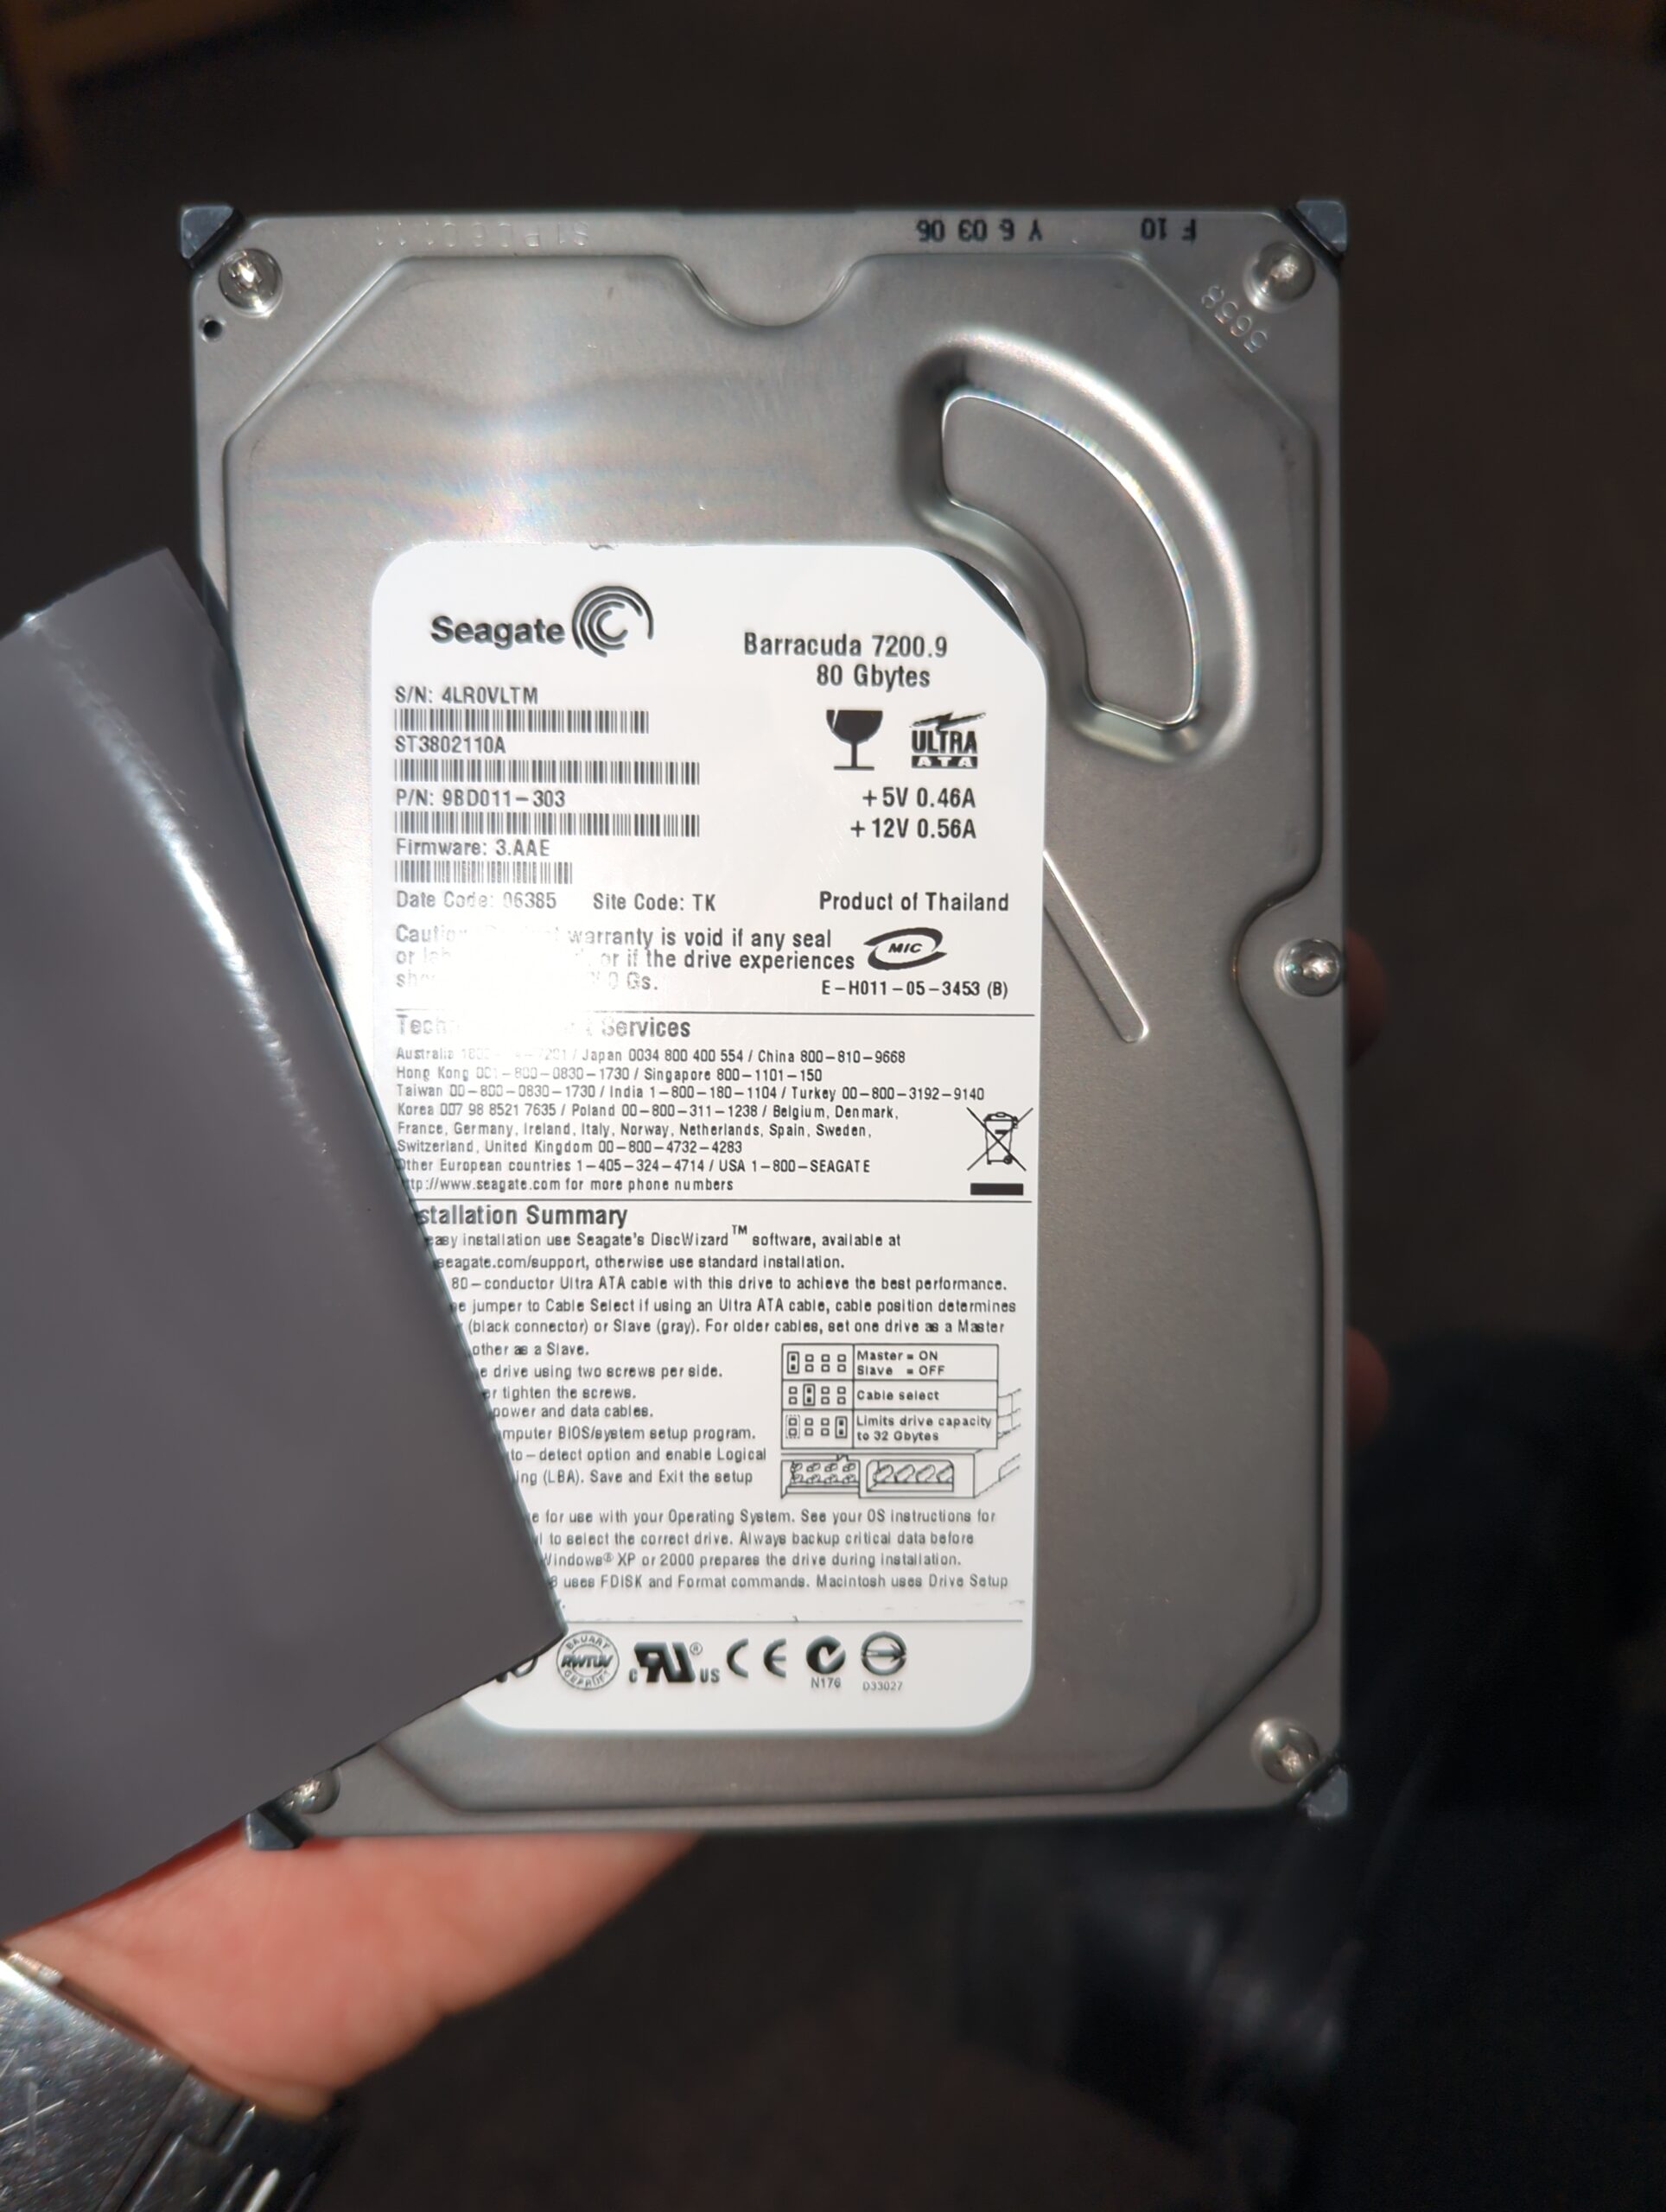
The Mark IV utilized a spinning hard disk, which was more than sufficient for the technology of its time. Even advanced systems like the Yamaha Disklavier don’t demand exceptionally fast read speeds, as piano notes aren’t played within microseconds of each other. However, spinning hard disks do come with inherent drawbacks. Being mechanical, they are prone to eventual failure, and are noisy. Additionally, during system updates, the limitations of their read and write speeds become evident, resulting in updates that can take nearly an hour to complete.
Whether you’ve chosen to upgrade because of the improved read/write speed, or you’ve simply arrived here because the hard drive has failed, or an update has been interrupted, read on!
First, you’ll need a new solid state drive with a minimum of 80 GB of storage capacity, as well as an IDE to SATA adapter. The 120 GB OWC Mercury Pro Legacy comes with all necessary components. (Note that, although Richard used this, and it fit neatly into the system, I installed mine using a 120 GB Patriot Burst drive and Kingwin SATA to IDE adapter, so my pictures differ. His OWC product is a neat, all-in-one solution.)
Installation
Remove the control unit from the piano by first unscrewing the parallel port connector using the two flat blade nuts on the sides of the port.
Unplug all the cables and then carefully unscrew the control unit from the piano. It is very heavy, so carefully lift it down and turn it over.
Unscrew all the black screws on the top face of the control unit that would normally be against your piano. This surface is the unpainted, silver surface.
Carefully remove the two plugs from the hard drive. Unscrew the drive underneath using a Phillips screwdriver with lots of pressure taking care not to strip the screws.
To create your own backup on Linux or Mac, you can use the dd instruction in a terminal. Note that you’ll need to adjust /dev/sdX to be whatever the location of your hard disk is! On Mac, this will be similar to /dev/rdiskX.
The drive should mount to your Macintosh or Linux computer.
Using the terminal, type in “diskutil list” command shown as below, then press “Enter” to list all the disks in your Mac computer. Take down the number of your USB drive. Here assume that the USB drive number is “2”.
Type in the following command, replacing “#” with your USB drive number.
diskutil unmountDisk /dev/disk#
Then press “Enter” to unmount it.
Type in the following command. On Mac, replace “/path/to/your.img” by dragging the image file from the Finder into terminal. On Linux, type the path. Then press “Enter” to burn the IMG image file to the USB drive.
Note that, on Windows, you can write IMG files to a disk using Balena Etcher.
Unmount your USB drive, put the red adapter back on, and screw it into your Disklavier top assembly. You will need to use the middle screws to give it enough room to be able to have the cable attached and close it.
Voilà! You have now updated your system and changed your drive to solid state!
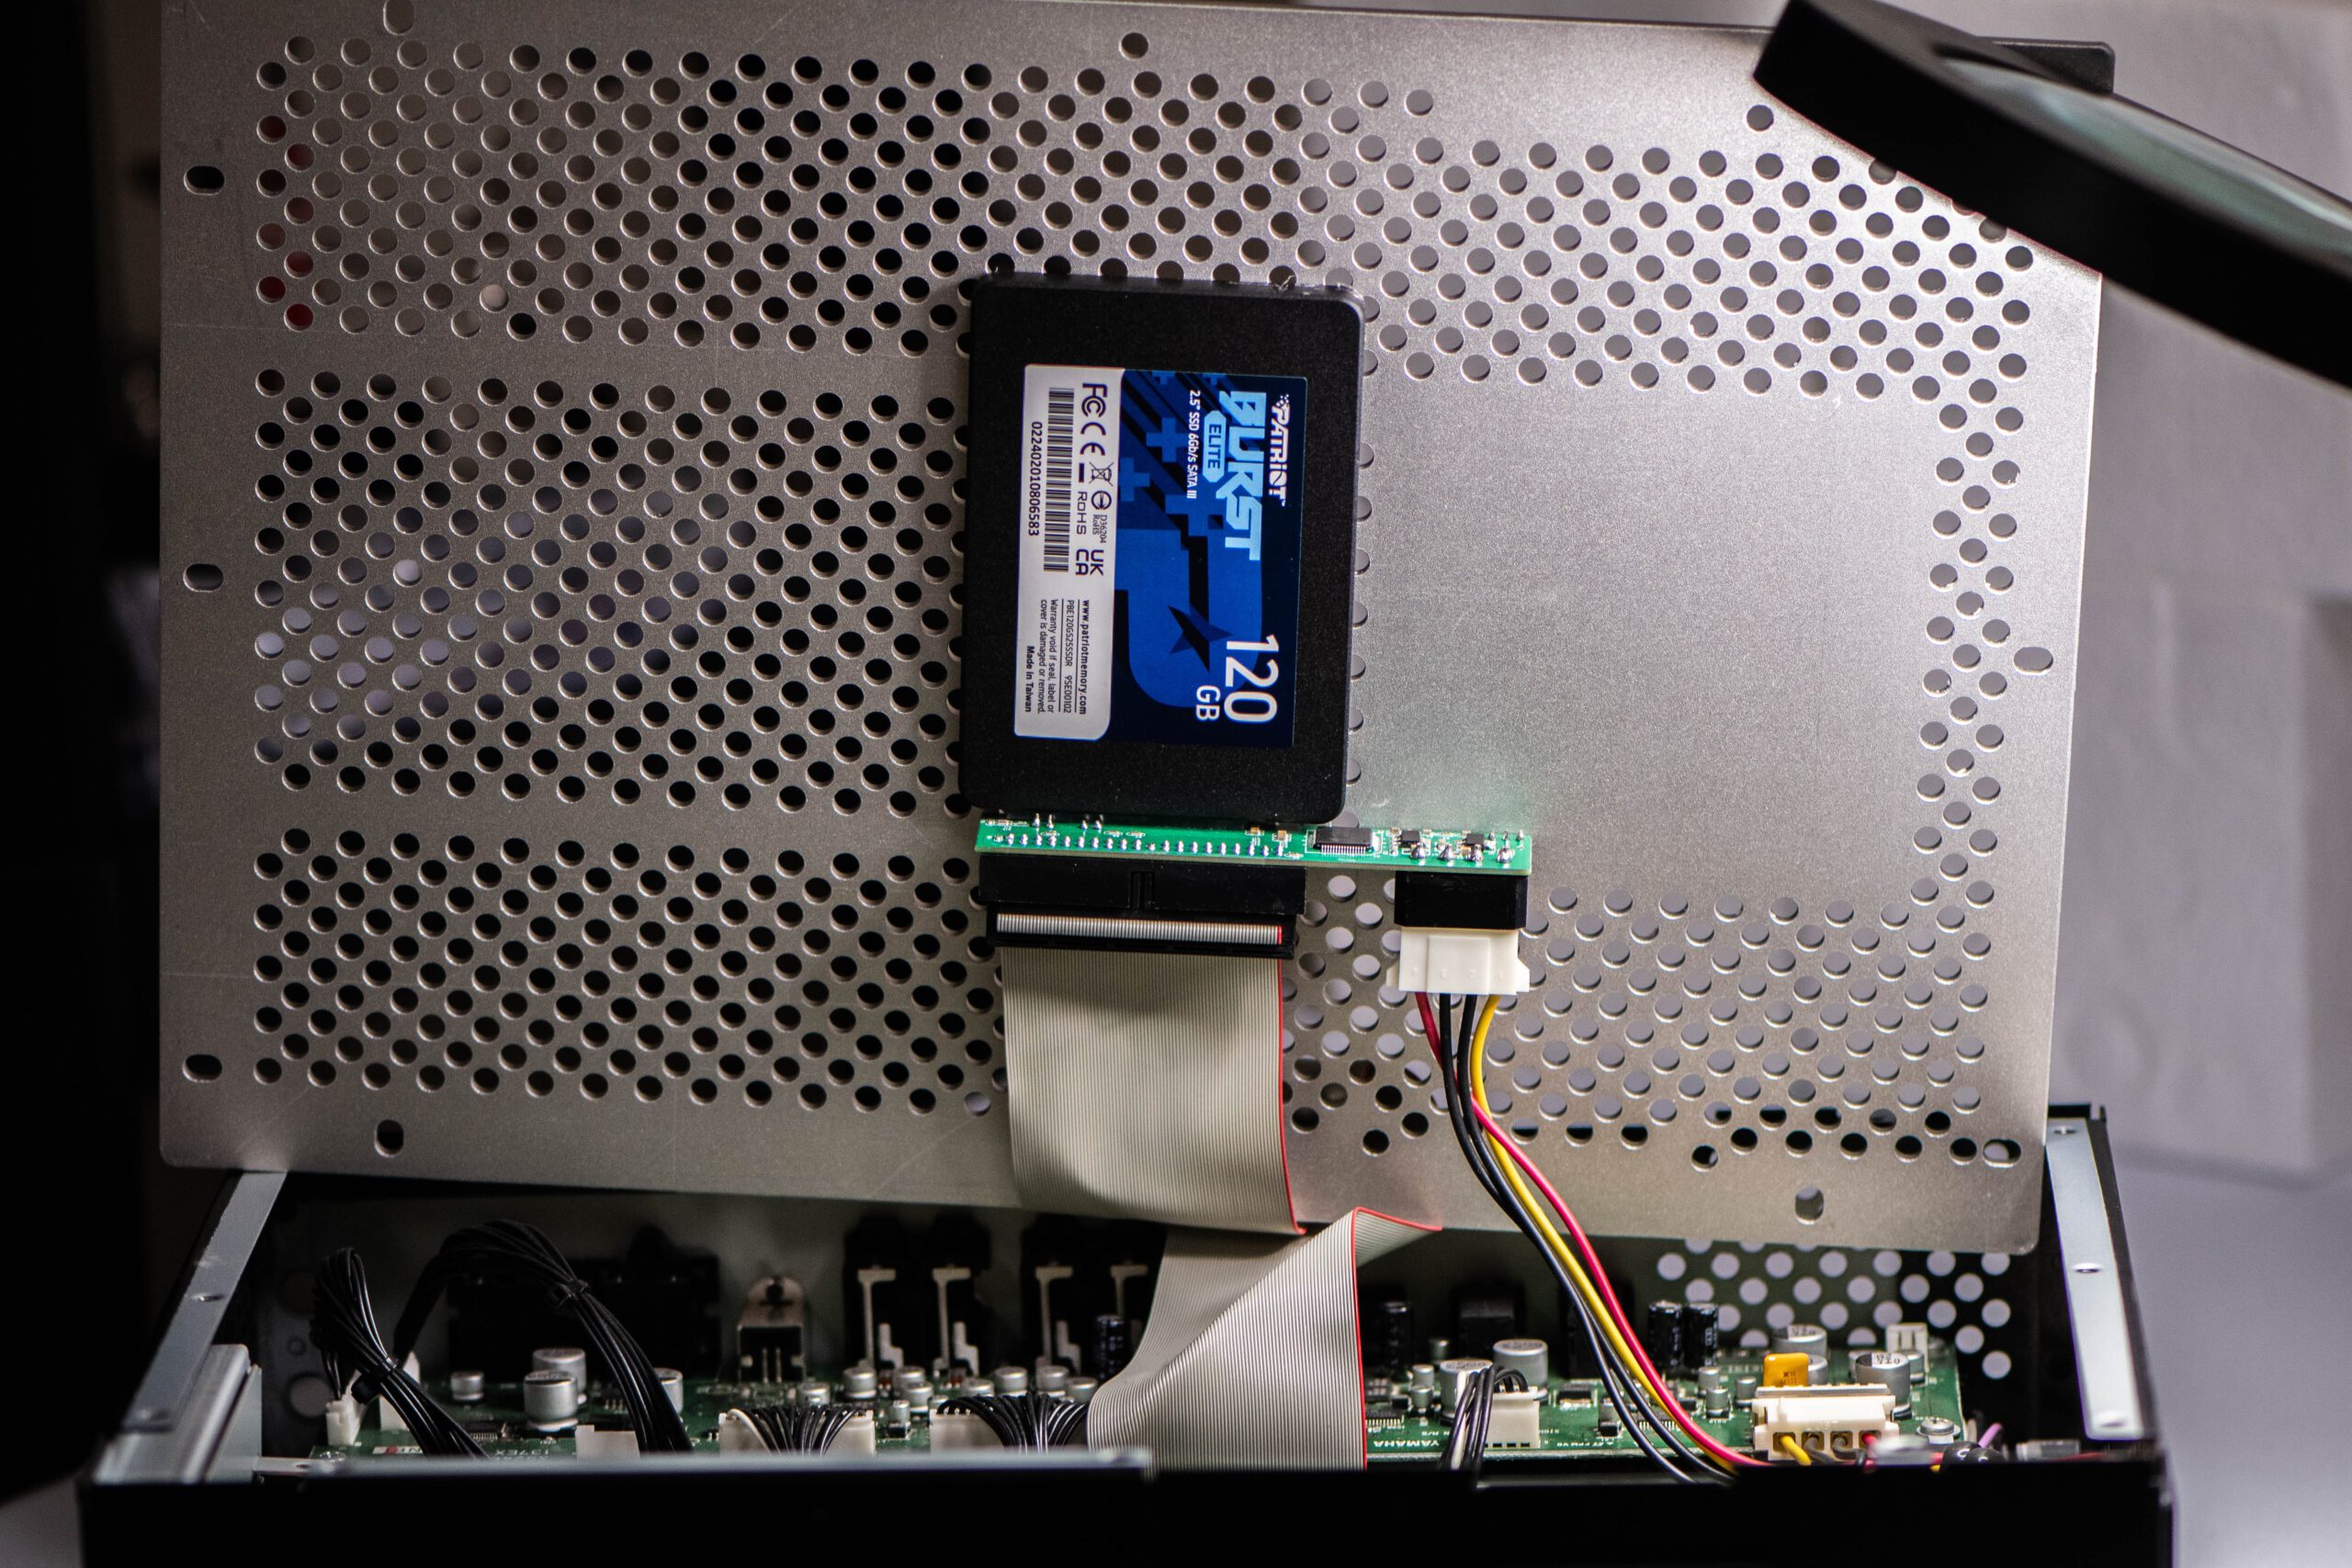
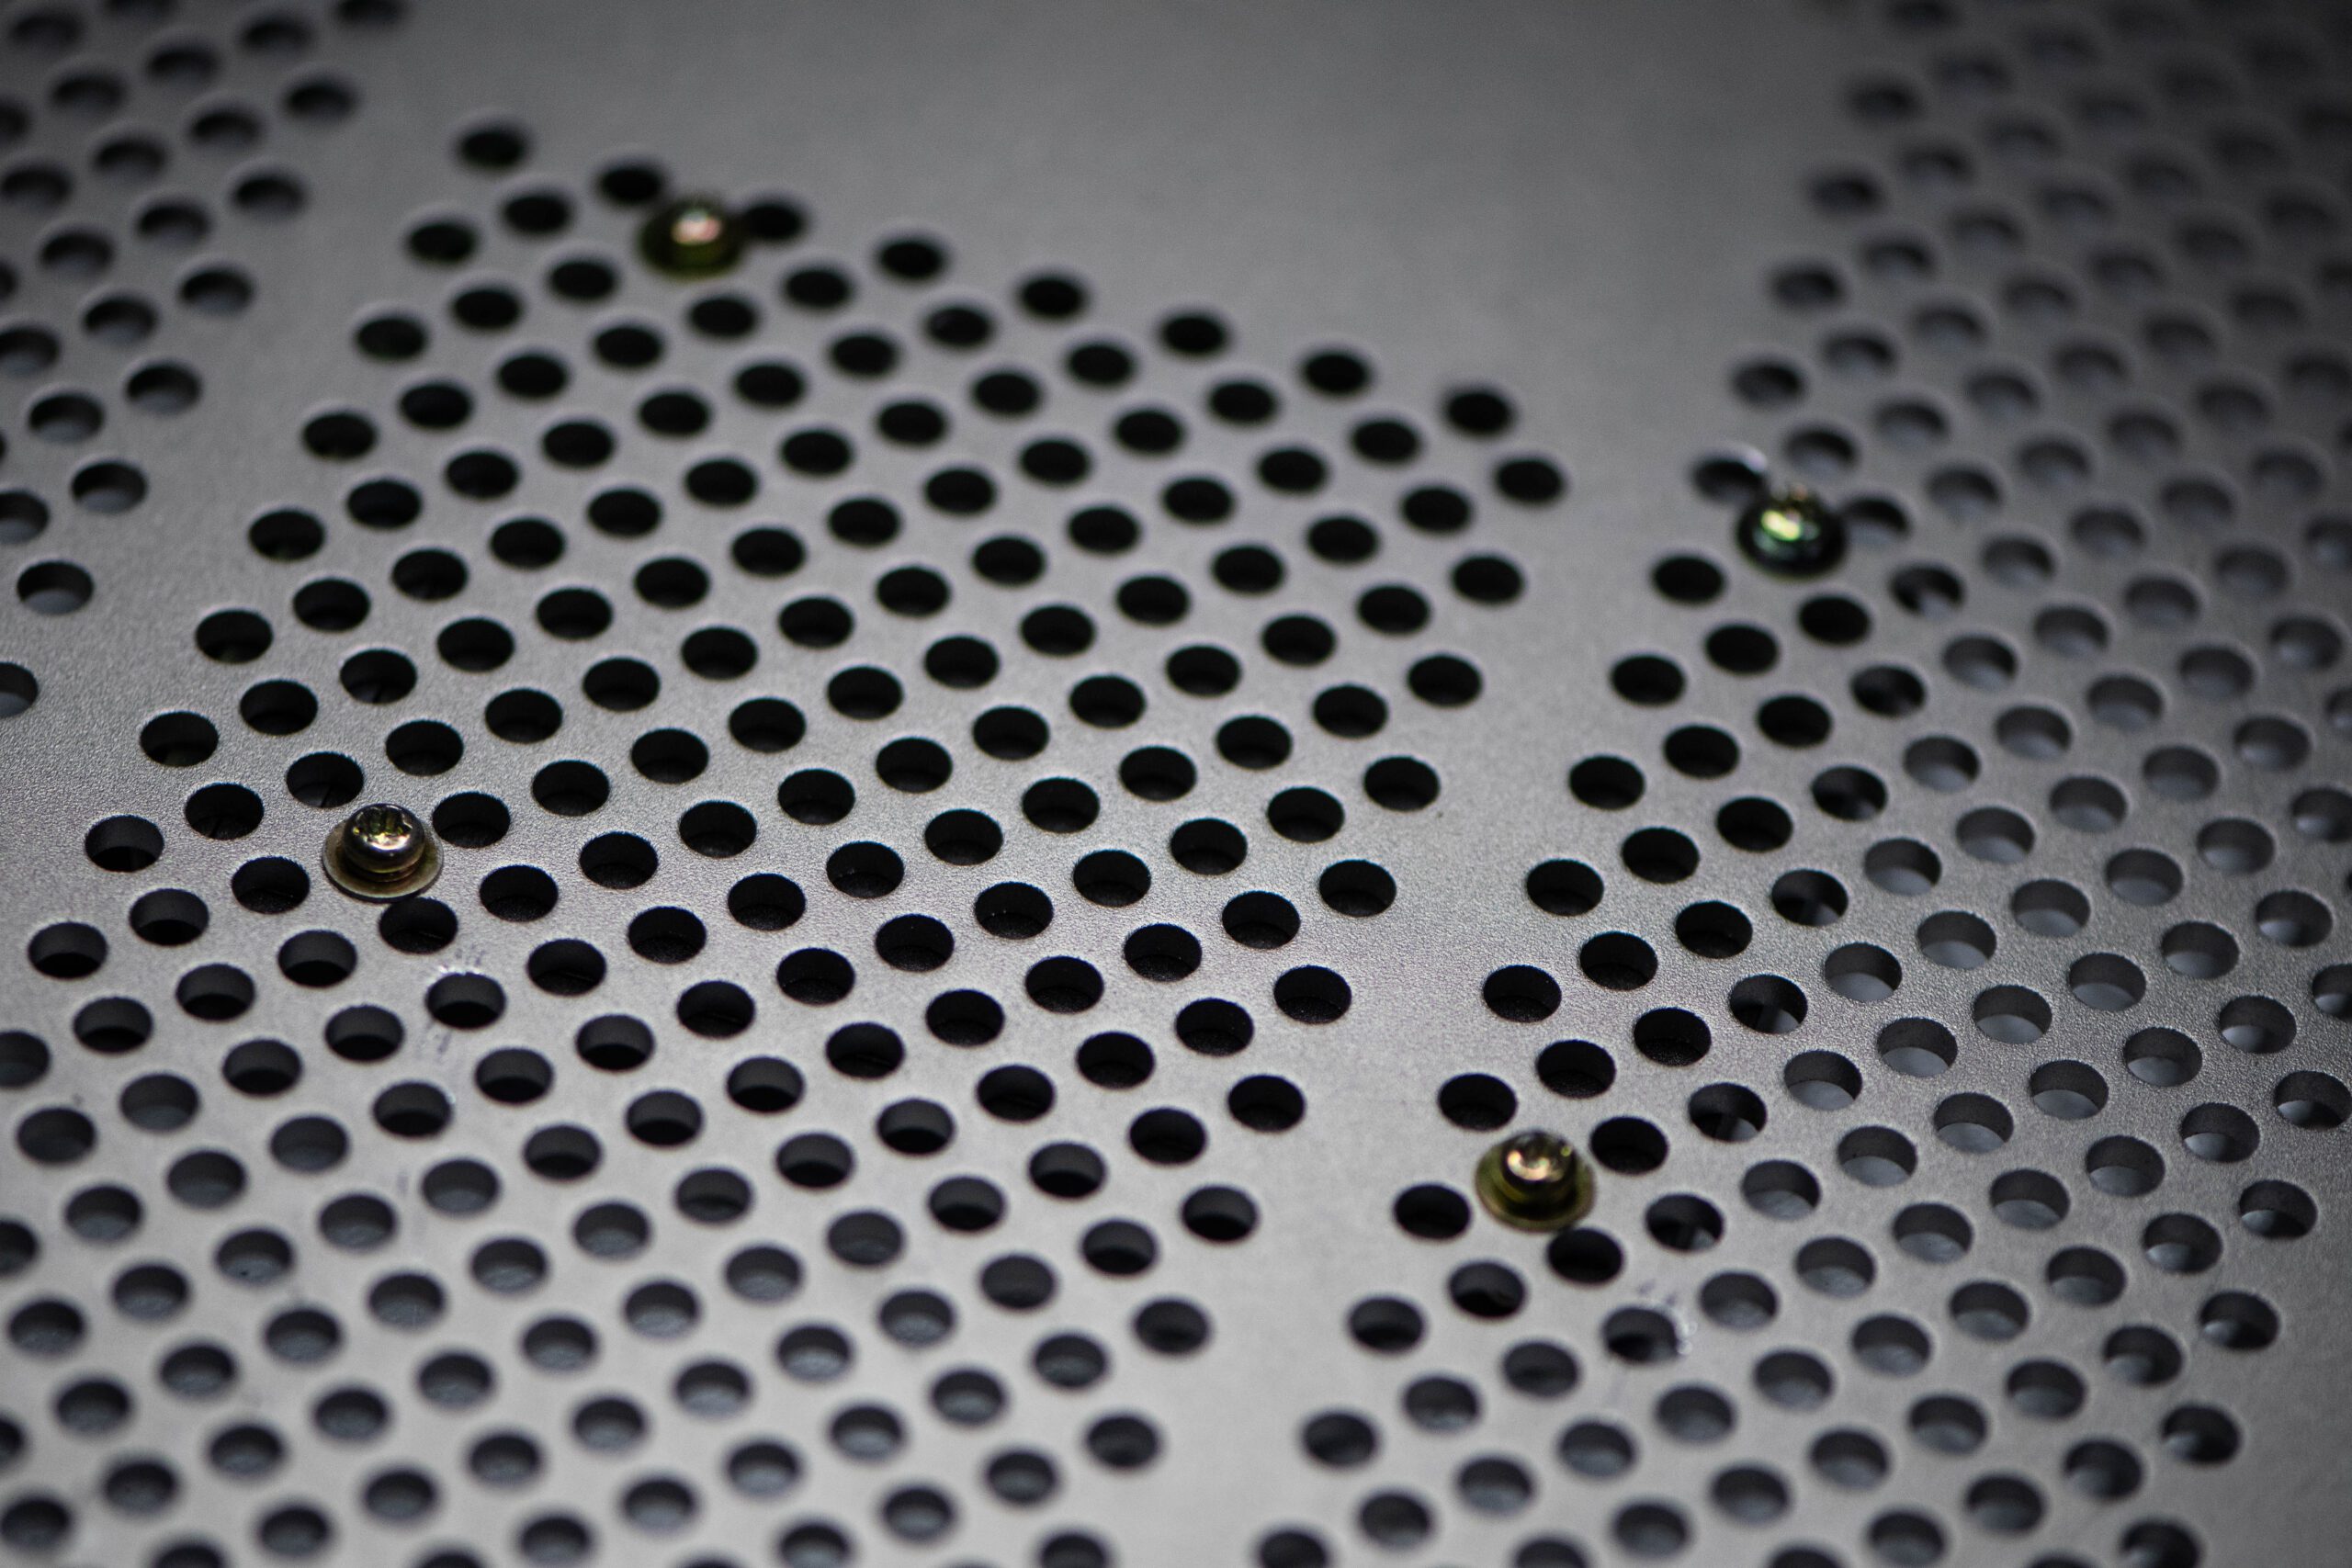
My Patriot Burst SSD, mounted directly to the top plate.
I was able to line up the Patriot Burst drive with the cooling holes on the upper plate such that I could screw it directly in place